Introduction
Thank you for choosing WebPractice, a full featured Internet based advanced practice management software. WebPractice has been built ground-up for the Internet to ensure the highest quality of service and user-friendliness. The system has been developed using the state-of-the-art in Microsoft technologies. It includes everything needed to successfully run a physician's office - from on-line appointment scheduling to financial analysis to claims collections.
WebPractice is a product which will assist and ease the professional life of the physicians. It is a web-hosted software for a physician’s Medical Practice Management.
After a patient is cared for, a bill needs to be prepared, payments entered and an appointment needs to be rescheduled if necessary. This is the most important economic activity performed in a physician’s office. Thus, WebPractice is the centerpiece and serves as glue that holds all the other pieces of the physician application software together. Our solution will allow the physician's staff to concentrate on patient care.
Apart from all the features that a Medical Practice Management software can possibly have, WebPractice is unique in that, it has a patient portion that ties your patients to your practice. Each of your patients will have the ability to create his/her own Personalized Home Pagethrough which they can interact with you. This will contribute to a much higher patient satisfaction and improved staff productivity in your office and distinguish your practice from others.
WebReferral is a product that provides the community with a Physician Referral Service. It is integrated with the WebPractice software and offers the physician the following benefits:
Each patient receives a personalized home page or access page to interact with their physicians. From this page they can,
- Locate and add their physician who use WebPractice.
- Schedule, cancel and reschedule appointments online with any of their participating physicians.
- Page their physicians online in complete privacy.
- Send Email to their physicians anytime.
- Browse their medical records.
- Run different reports like Expense Report and Prescription report.
All of these transactions are secure and use state of the art SSL technology for encryption and authentication.
HealthNautica.com has contracted with a premier hosting company called DataReturn to manage all the servers and the hosting of all the data on them. DataReturn monitors these servers on a 24X7 basis.
All data centers require both badge access and a palm scan for entry. All the servers are installed in secure metal cabinets that have locking doors on both the front and back which are unlocked only when DataReturn employees require access to the servers in the cabinet. Only the authorized DataReturn employees have access to the cabinets that contain our servers.
The DataReturn team backs up the files and the data on all the servers in order to provide
- A fast recovery of servers in the event of a hardware / software failure or physical disaster.
- A measure of protection against human error or the inadvertent deletion of important files.
To make these services available, the files on each system are regularly copied to a recovery storage medium and retained for periods of time at both the DataReturn server facility and an off-site storage facility.
DataReturn contracts an insured third party company to store two weekly sets of tapes in off-site vaults protected against fire, flood, and other natural disasters. All of these facilities are completely secure and the tape archives are accessible only to the specific DataReturn employees.
Sometimes failures occur due to bad tapes, failure of tape drives, etc.. When such failures occur, DataReturn uses the following "best practice" backup processes:
- Daily incremental backup ()
- Weekly full backup
- Weekly data restoration for up to four weeks (four tape sets used each week)
- Verification of all backups. To ensure that the backups are corrected, a member of the server team works exception reports the following business day after the missed scheduled backups.
This scheme allows systems to be restored in the event of a disaster. Individual files can be restored if they were present on the system during a backup operation.
The data is protected in three different ways: -
- At the physical level, i.e., the data is stored on servers and tape storages. Only authorized DataReturn employees have access to the cabinets that contain our customer servers.
- The login access to server is password protected. The passwords are deliberately kept very long in order to foil any automated attempts at guessing. Only those who know the password can access the data on servers.
- Sensitive data in transit is protected against snooping by employing Secure Socket Layer(SSL) protocol. This protocol is being used today for conducting all the financial transactions over the internet and hence is assured to be safe.
For any problems, please contact us at the following address :-
HealthNautica.com Inc.
3817 Green Trails Drive
Woodridge, IL 60517
Tel: 630-886-7478
Fax: 630-969-1172
Getting Started
Whenever a new user starts using any new application, he must know the pre-requisites before actually using the application. This chapter tells the user what he should have on his PC before getting started with the application.
Important Terms
Super User
WebPractice will have a super user whose login ID and password is determined
at the time of sign-up by HealthNautica.com. Subsequently, the password can be
changed by the super user. A super user is the person
who is the administrator of the system.
The super user maintains the user logins for the system and their passwords. He can even
change the passwords of the existing users. He also makes the PCs trustworthy so
that regular users can login and start working from only those PCs which have
been made trustworthy.
Office Level Login
Appointments can be scheduled at the different offices of a medical practice. Through
Office level login, only those appointments which are being scheduled for that
office can be seen and manipulated. Also, all the service details entered by this login
is automatically assigned to this office. WebPractice users are encouraged to use Office
Level Login.
Practice Level Login
In Practice Level login, the user is able see all the offices belonging to a medical practice.
If this login is used, then the user has to choose an appropriate office (from the WebPractice
home page) before entering service details.
Making PC Trustworthy
The individual PCs in the office need to be made trustworthy. It is the function of the super
user to make a PC trustworthy. Once it is made trustworthy, WebPractice can
be accessed by a non-super user only from that PC. A user (other than a super user) is thus
prevented from accessing WebPractice from non-trusted PCs.
The following fields are validated, i.e., the formats of the following fields is pre-defined.
In WebPractice, several windows may be opened simultaneously so that the physician can view various details about his patients at a time and thus carry out different functions with ease. The various windows that can be opened simultaneously are :-
- Patient / Guarantor Profile - This window displays the details of a patient or a guarantor.
- Service Details - This window displays the details of a patient's service details.
Thus, a physician can have upto eight open windows at a time. In addition, there will be other help windows which will be transient in nature.
Please make a note of the following:
Before begining to use WebPractice
Ensure that you are using Microsoft Internet Explorer version 5.0 or later as your browser.
To print any page through WebPractice, the margins have to be fixed. To fix the margins:
Blank out all the text from the Header and Footer text input area.
- Left - 0"
- Right - 0.25"
- Top - 0.35"
- Bottom - 0.75"
Please check the following:-
- PCT 1.0
- SSL 2.0
- SSL 3.0
- TLS 1.0
Please check the following:-
- MM/dd/yyyy
Please check that the date and time are set properly on your PC. In order to do that:
How to setup multiple PCs in an office
WebPractice is an internet based multi-user software.
It can be accessed by any number of physicians and from different locations. There is no
need to set up a Local Area Network in your office for multiple access like in traditional
software. To access
the WebPractice, all that the user needs is a PC with access to Internet.
Once the PCs are set up, the super user will provision the Login ID and password for the
new user in the office and make the PCs
trustworthy. The user is now ready to login and start working.
This procedure can be repeated for any number of offices belonging to a practice.
Now you are ready to use WebPractice. The first step is to provision all the master tables that will allow for the smooth working. The next chapter explains the provisioning in detail.
Provisioning WebPractice
One has to maintain master information for any
software solution. This chapter explains the provisioning of data into these master
tables necessary for the smooth working of WebPractice. By clicking on the
Provisioning Tables link under the Utilities on the WebPractice main menu, the following screen
for Provisioning Tables is displayed. Through this
screen, all the master tables will be provisioned.
The following sections will explain the logical order in which the information in these
tables needs to be provisioned.
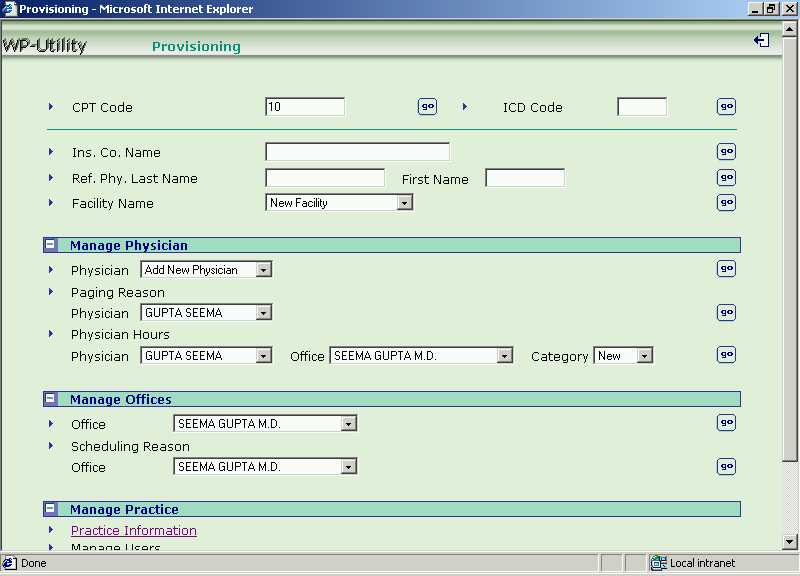
Screen 1 - Provisioning Tables Main Menu
This menu
option maintains all the information pertaining to a
practice.
To provision the practice related information,
click on Manage Practice -> Practice Information.
The following screen is displayed.
Screen 2 - Practice Information
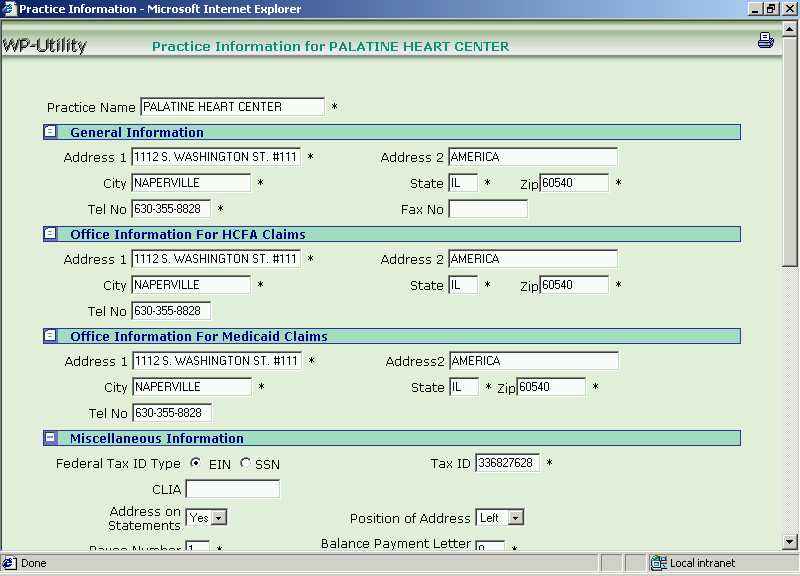
The practice related information includes:
On entering / modifying the above practice information, click on [Update] to update the information. [Cancel] will one take back to the Provisioning Page without saving the changes if any.
Manage Users
Only the super user can add login information for a new user or modify or delete the
login information of an existing user.
Add New User Login
To add login information for a new user, click on Utilities -> Provisioning Tables -> Manage Practice. The Manage Users option is displayed. Against the "User Id", select the [Add New Login] from the drop-down list box, and click the [Go] button. The following screen will be displayed.
Screen 3 - New User Login Information
Fill in the information and click on the [Add] button to add the new user login information. [Cancel] button will take one back to Provisioning Page.
Update Password / Delete User Login
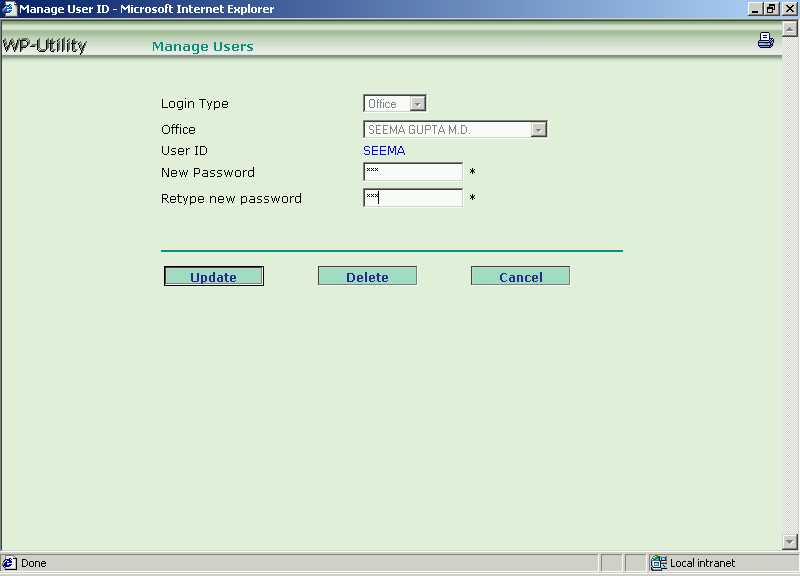
To update password or delete the user login information, click on Utilities -> Provisioning Tables -> Manage Practice. The Manage Users option is displayed. Against the "User Id", select the [Existing User Login Name] from the drop-down list box, and click the [Go] button. The following screen will be displayed.
Screen 4 - Update / Delete User Login Information
Modify the password and click on [Update ] button to update the user's password, or click the [Delete] button to delete the user information. A user who is deleted, will not be able to login and access WebPractice. [Cancel] button will take one back to Provisioning Page.
This option allows one to maintain the information for all
the physicians in a practice - their claims related details, paging reasons and their
office hours.
To provision the physician details,
click on Utilities -> Provisioning Tables -> Manage Physicians.
Physician Information
One can add / update / delete the information of a physician. The
information includes :-
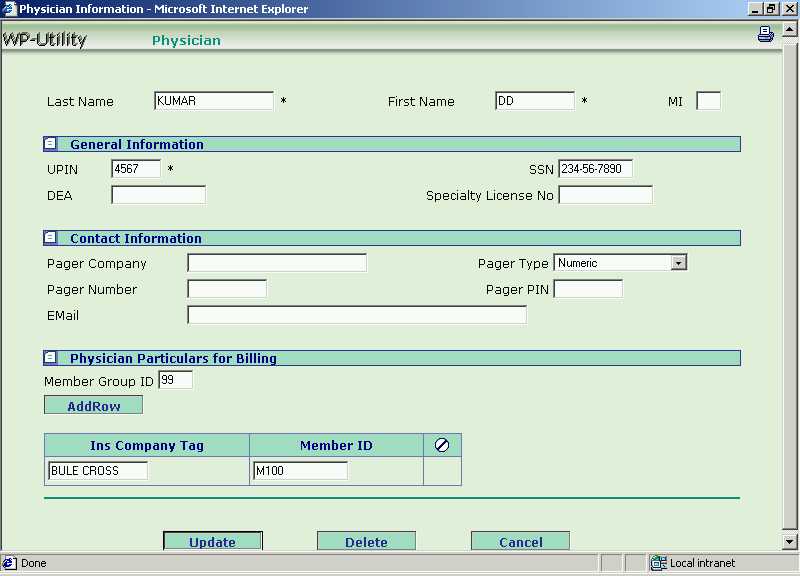
Add New Physician
To add a new physician, click on Utilities -> Provisioning Tables -> Manage Physicians. The Physician option is displayed. Against the "Physician", select the [Add New Physician] from the drop-down list box, and click the [Go] button. The following screen will be displayed.
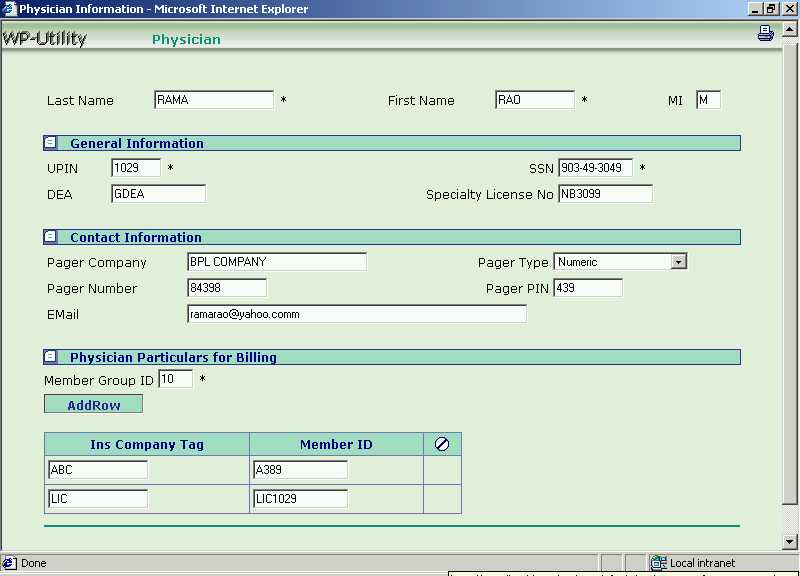
Screen 5 - Add New Physician
Enter the physician information mentioned above and click the [Add] button to add a new physician. [Cancel] button will take one back to the Provisioning Page.
On clicking the [Add] button, you can go to WebReferral Physician Information screen. This is the physician information screen which you get through the [Physician Locator] option. The physician can add office for his practice from this screen.* Note :- Please refer to the User Manual of WebReferral for the details of adding new office details of the physician practice.
Update / Delete the Physician
To update / delete any physician from the domain, click on Utilities -> Provisioning Tables -> Manage Physicians. The Physician option is displayed. Against the "Physician", select the [Existing Physician Name] from the drop-down list box, and click the [Go] button. The following screen will be displayed.
Screen 6 - Update / Delete Physician
Update the physician information and click the [Update] button, or click the [Delete] button to delete the physician from the domain.
From the billing particulars, the Insurance Company Tag can also be deleted. Tick the check box adjacent to the insurance company and click [Update] button.
[Cancel] button will take one back to the Provisioning Page.
Paging Reasons
One can add / update / delete the reasons for paging a physician. This will allow patients
to page their physicians from their access page.
Add New Paging Reason
To add a new paging reason, click on Utilities -> Provisioning Tables -> Manage Physicians. The Paging Reason option is displayed. Against the "Physician", select the [Existing Physician Name] from the drop-down list box, and click the [Go] button. The following screen will be displayed.
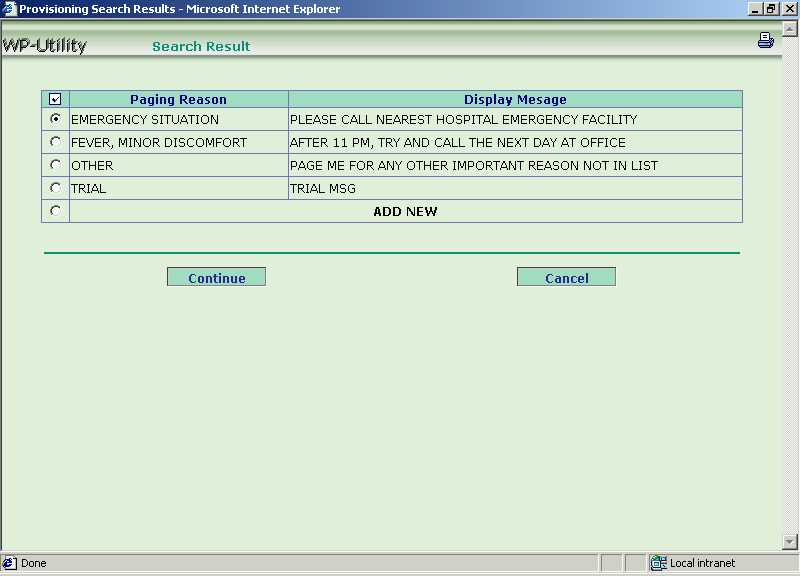
Screen 7 - Paging Reason Search Result
Various Paging Reason Codes and their corresponding Messages to be displayed on a pager are displayed. Click on the radio button adjacent to [Add New] row to add new paging reason. Then click [Continue] button. See the following screen.
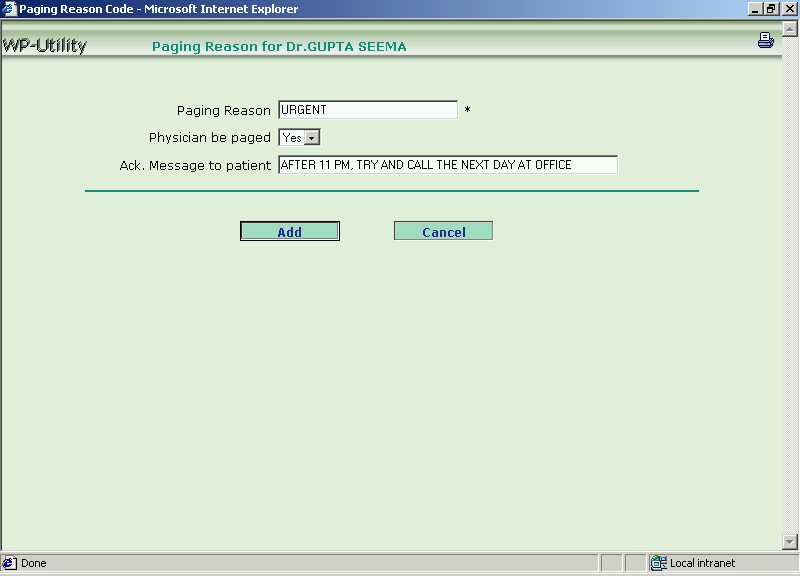
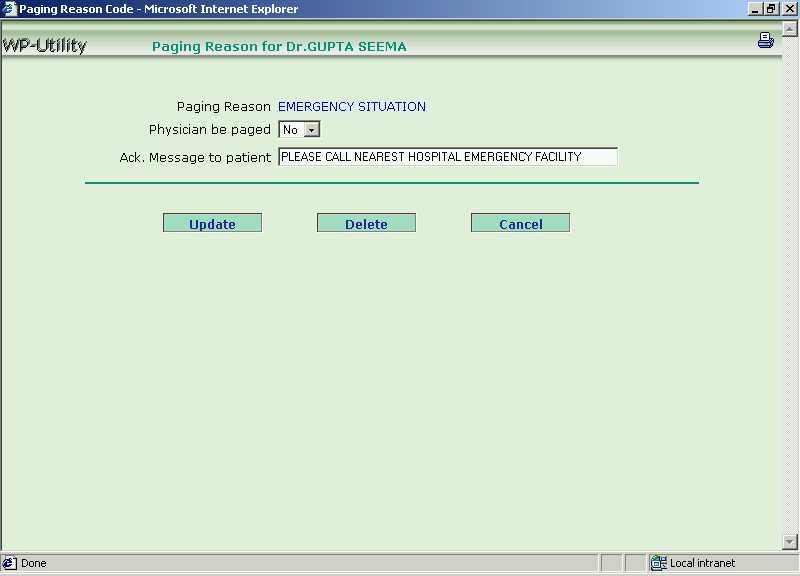
Screen 8 - Add New Paging Reason
Enter the paging reason code, physician to be paged yes/no and the message to be displayed on the pager and then click the [Add] button. [Cancel] button will take one back to the Provisioning Page.Update / Delete a Paging Reason
To update / delete an existing paging reason, click on Utilities -> Provisioning Tables -> Manage Physicians. The Paging Reason option is displayed. Against the "Physician", select the [Existing Physician Name] from the drop-down list box, and click the [Go] button.
In the search result (Refer Screen 7), various Paging Reason Codes and the Messages to be displayed on a pager are shown. Click on the radio button adjacent to [Existing Paging Reason Code] row to update / delete any paging reason. Then click [Continue] button. See the following screen.
Screen 9 - Update / Delete Paging Reason
Modify the physician to be paged tag - yes/no and the message to be displayed on the pager and then click the [Update] button. Click the [Delete] button to delete the paging reason. [Cancel] button will take one back to the Provisioning Page.
Physician Hours
One sets the physician hours for a particular office.
Furthermore, the office hours can be defined for two categories of patients -
new and existing. One can either
set new schedule of office hours or update / delete the existing schedule.
The concept of reference week comes into play if a
physician's schedule is bi-weekly. The reference week serves as an anchor from
which the bi-weekly schedule is set.
To view a list of office hours schedule, click on Utilities -> Provisioning Tables -> Manage Physicians. The Physician Hours option is displayed. From the drop-down list box, select the following :-
- The [Existing Physician Name],
- The [Office of the Physician],
- The [Category of Patients - New / Existing]
Then click the [Go]
button. The following screen will be displayed.
Screen 10 - Add / Update / Delete Office Hours Schedule
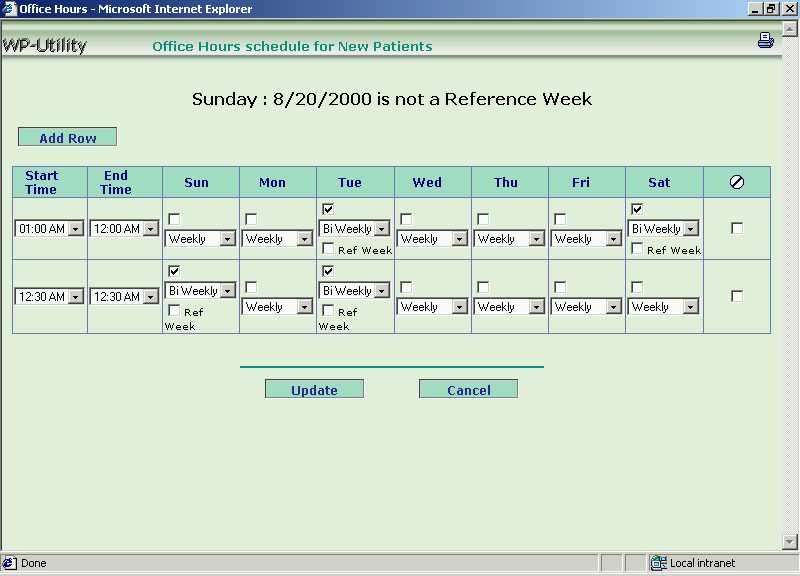
Add New Office Hours Schedule (Physician Hours) / Update / Delete the Schedule
From the office hours schedule displayed, select the "Start Time" and "End Time" and select the working week days. Click the [Update] button to update the data.
- To add new schedule, click the [Add Row] button and add another working schedule.
- To update the schedule, modify the office hours "Start Time", "End Time" and the working week days and click the [Update] button.
- To delete the schedule, tick the check box in the last column indicating [Delete].
[Cancel] button will take one back to the Provisioning Page.
This option allows one to maintain the details of all the
offices for a practice. The details maintained are the General
Information about the offices and also the scheduling information for that
office.
To provision the office details,
click on Utilities -> Provisioning Tables -> Manage Office. The Office option is displayed. Against the "Office",
select the [Existing Office Name] from the drop-down list box, and click the [Go]
button. The following screen showing the office information is displayed.
Screen 11 - Office Information
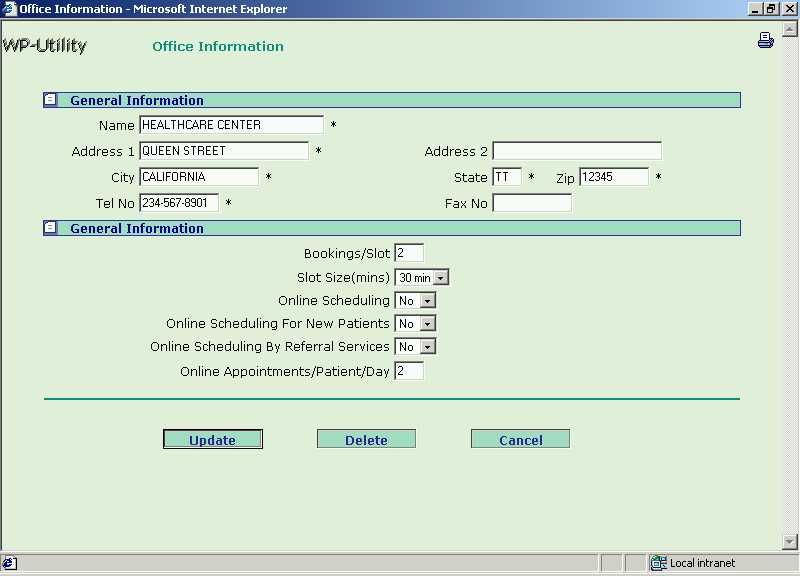
In the above screen, office information to be entered is :-
Add New Office
A new office is added through the provisioning of physician information.
Update / Delete Office
To update office details or delete an existing office, click on Utilities -> Provisioning Tables -> Manage Offices. The Office option is displayed. Against the "Office", select the [Existing Office Name] from the drop-down list box, and click the [Go] button. Refer to the screen showing the Office Information.
In the Office Information screen, update the office details and click on [Update] button to update the modified office details, or click the [Delete] button to delete the office details. [Cancel] button will one take back to Provisioning Page.
Scheduling Reason
One can add / update / delete the reasons for
scheduling appointments at a particular office. These codes are used when
an appointment is scheduled.
Add New Scheduling Reason
To add a new scheduling reason, click on Utilities -> Provisioning Tables -> Manage Offices. The Scheduling Reason option is displayed. Against the "Office", select the [Existing Office Name] from the drop-down list box, and click the [Go] button. The following screen will be displayed.
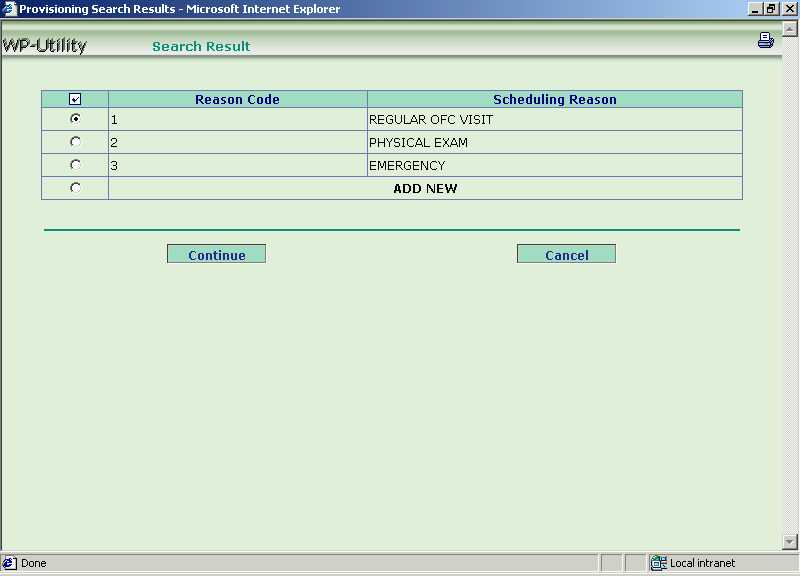
Screen 12 - Scheduling Reason Search Result
Various Reason Codes and their corresponding Reasons are displayed. Click on the radio button adjacent to [Add New] row to add new scheduling reason. Then click [Continue] button. See the following screen.
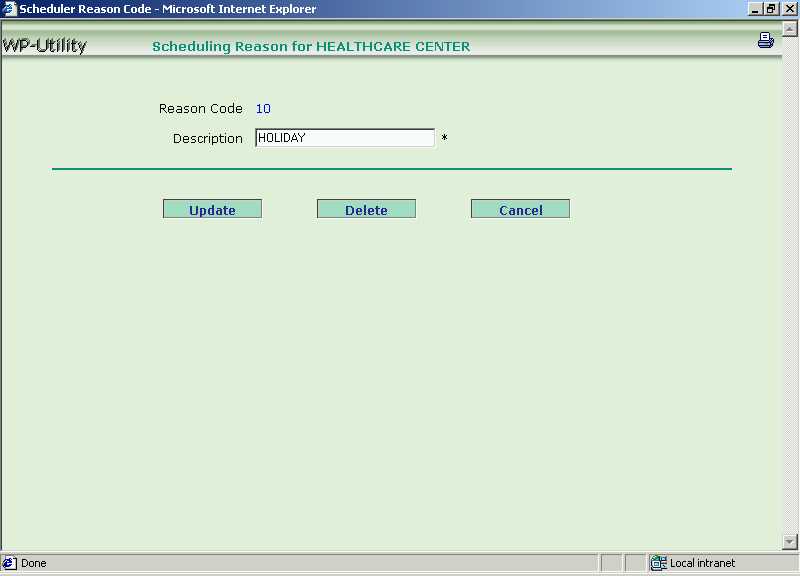
Screen 13 - Add New Scheduling Reason
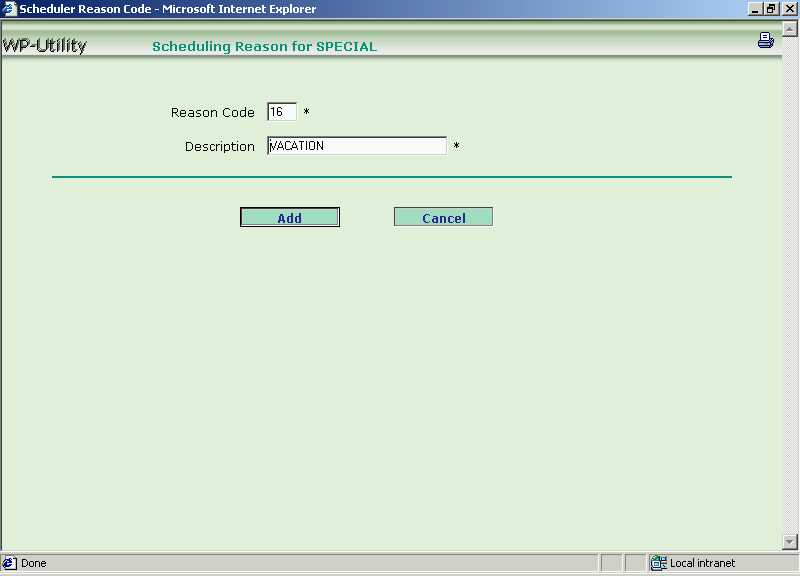
Enter the reason code and the description and click the [Add] button. [Cancel] button will take one back to the Provisioning Page without registering any changes if any.Update / Delete a Scheduling Reason
To modify an already defined scheduling reason, click on Utilities -> Provisioning Tables -> Manage Offices. The Scheduling Reason option is displayed. Against the "Office", select the [Existing Office Name] from the drop-down list box, and click the [Go] button.
In the search result (Refer Screen 12), various Reason Codes and their corresponding Reasons are displayed. Click on the radio button adjacent to [Existing Scheduling Reason] row to modify it. Then click [Continue] button. See the following screen.
Screen 14 - Update / Delete Scheduling Reason
Modify the description and click the [Update] button. Click the [Delete] button to delete the scheduling reason. [Cancel] button will take one back to the Provisioning Page.
CPT codes
are the procedure codes. This option allows one to provision the various
procedure codes for a practice.
To provision the CPT codes,
click on Utilities -> Provisioning Tables. [CPT Codes] option is shown.
To add / update
/ delete the CPT codes, enter the search criteria (i.e. the CPT code) and click the
[Go]
button. Various CPT Codes and their corresponding Descriptions are displayed. See the
following screen.
Screen 15 - Procedure Codes Search List
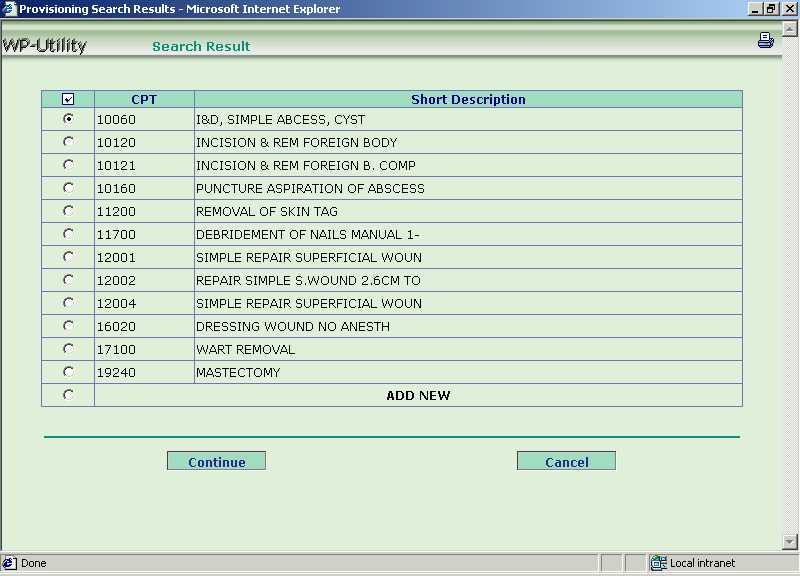
Add New CPT Code
In the above screen, click on the radio button adjacent to [Add New] row to add new CPT code. Then click [Continue] button. See the following screen.
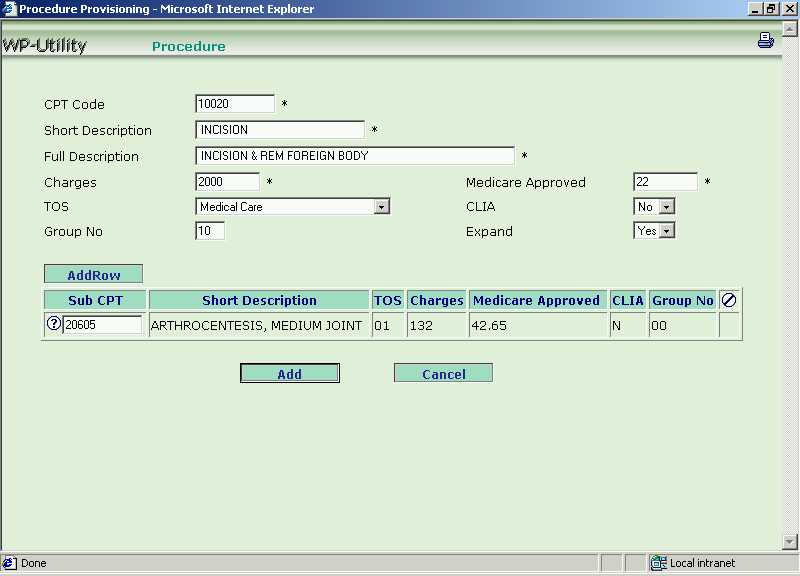
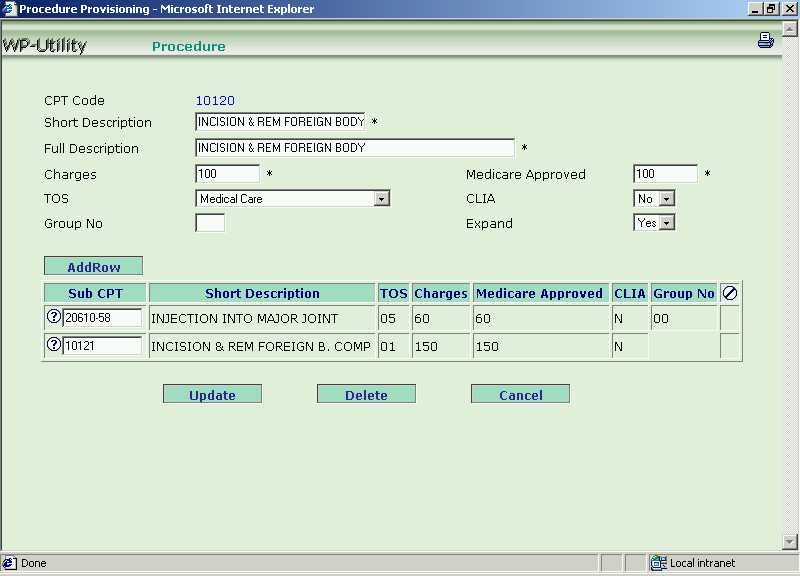
Screen 16 - Add New Procedure Code
Enter the details of the procedure.The Group No allows the grouping of CPT codes for the purpose of reporting. This is explained in the chapter on Reports .
The Expand field allows one to associate a group of real CPT codes for a given fictional CPT code entered on the screen. In order to do so, select Yes against the Expand field and then click the [Add Row] button repeatedly to associate as many real CPTs with the fictional CPT code.
The CLIA (Clinical Laboratory Improvement Amendments) field signifies if the concerned procedure is a CLIA procedure. It affects the submission and resolution of Medicare claims.
By filling in the Medicare Approved amount, adjustments are made automatically when a service detail is entered provided the insurance company is Medicare.
Finally, click the [Add] button to add the concerned CPT to the master table. [Cancel] button will take one back to the Provisioning Page.
Update / Delete CPT Code
In the "Search Result" screen - Screen 15, click on the radio button adjacent to [Existing CPT Code] row to update / delete an existing CPT code. Then click [Continue] button. See the following screen.
Screen 17 - Update / Delete Procedure Code
Modify the details of the procedure and then click the [Update] button to update the modified information or click the [Delete] button to delete the CPT code. [Cancel] button will take one back to the Provisioning Page.
ICD codes are the diagnosis codes. This option allows one to provision the various codes for the diagnosis done in a particular practice.
To provision the ICD codes,
click on Utilities -> Provisioning Tables. [ICD Codes] option is shown.
To add / update
/ delete the ICD codes, enter the search criteria (i.e. the ICD code) and click the
[Go] button. Various ICD Codes and its Description are displayed. See the
following screen.
Screen 18 - Diagnosis Code Search List
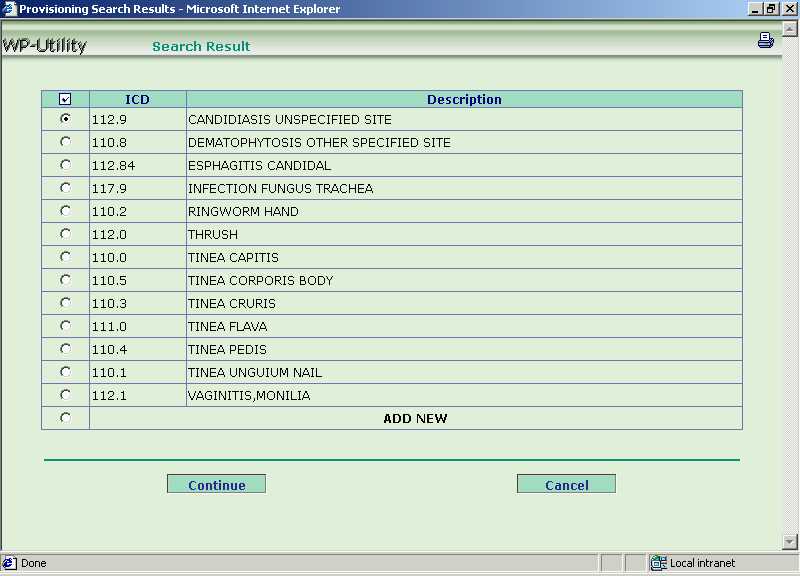
Add New ICD Code
In the above screen, click on the radio button adjacent to [Add New] row to add new ICD code. Then click [Continue] button. See the following screen.
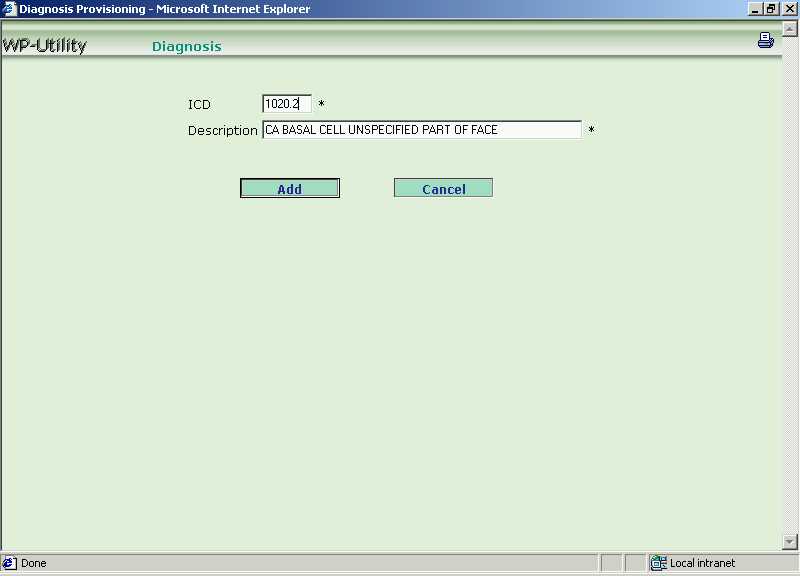
Screen 19 - Add New Diagnosis Code
Enter the new ICD code and its description. Then click the [Add] button. [Cancel] button will take one back to the Provisioning Page.Update / Delete the ICD Code
In the "Search Result" screen - Screen 18, click on the radio button adjacent to [Existing ICD Code] row to update / delete an already existing ICD code. Then click [Continue] button. See the following screen.
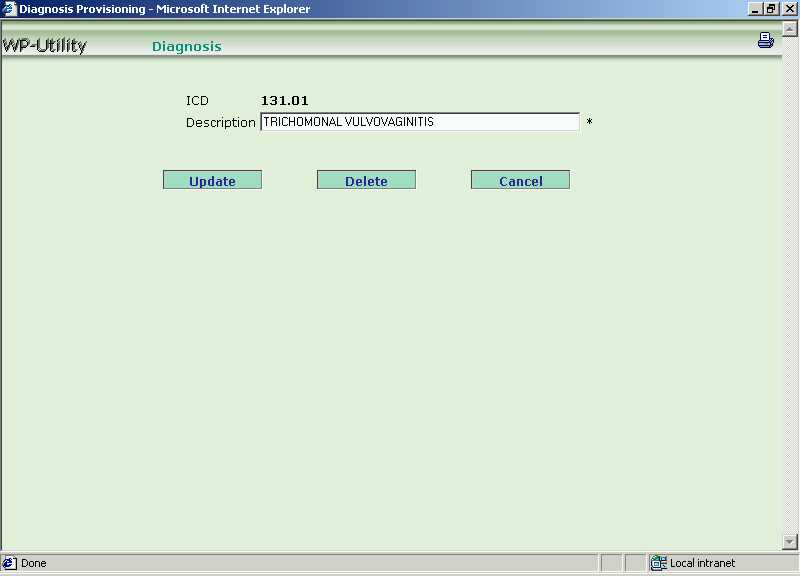
Screen 20 - Update / Delete Diagnosis Code
Update the description of an existing ICD Code. Then click the [Update] button, or click the [Delete] button to delete the ICD code. [Cancel] button will take one back to the Provisioning Page.
Physicians get their payment from the various insurance companies. This option allows one to provision the information of different insurance companies to whom claims will be submitted for the services rendered to the patient.
Note that a fictitious Insurance company called SELFPAY should always be created. All the patients who do not have insurance and are responsible for making their own payments will make use of this insurance company.
To provision the insurance company information,
click on Utilities -> Provisioning Tables. [Insurance Company Name]
option is shown.
To add / update / delete the insurance companies, enter the search criteria (i.e. the insurance company
name) and
click the [Go] button. Various Insurance Company Codes, its Name and
Address details are displayed. See the following screen.
Screen 21 - Insurance Company Search List
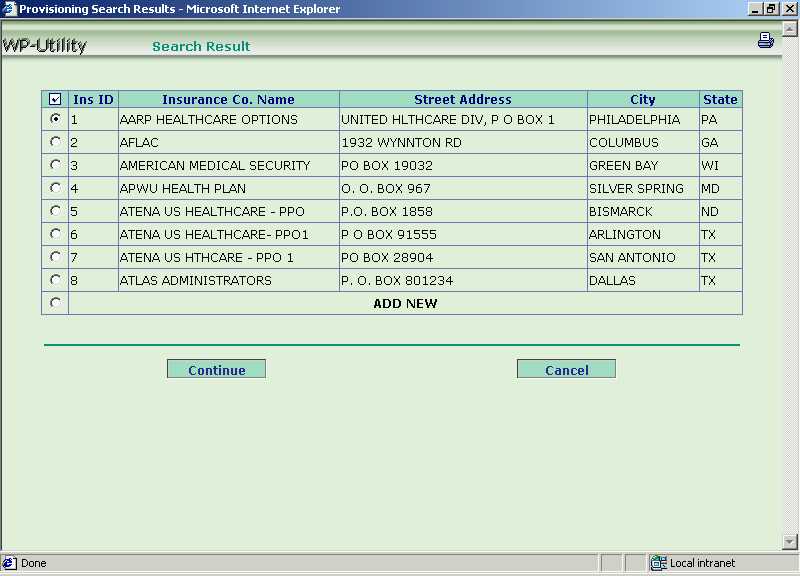
Add New Insurance Company
In the above screen, click on the radio button adjacent to [Add New] row to add new Insurance Company. Then click [Continue] button. See the following screen.
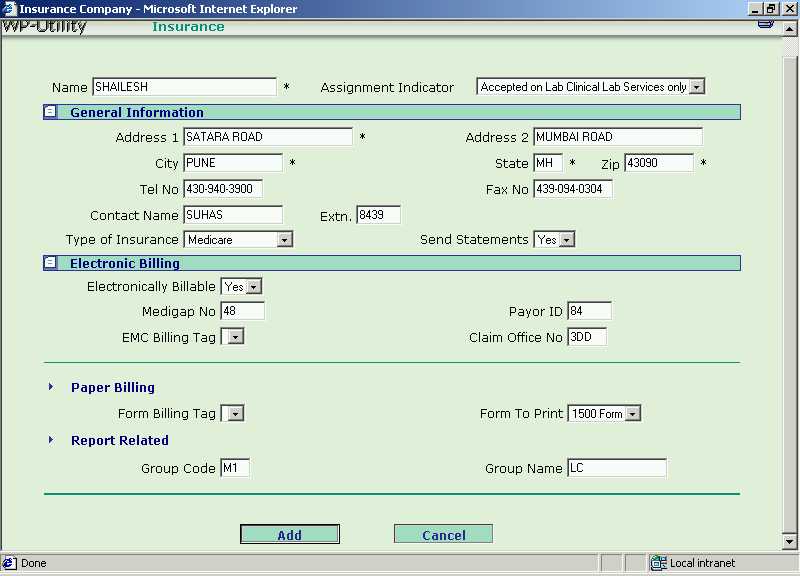
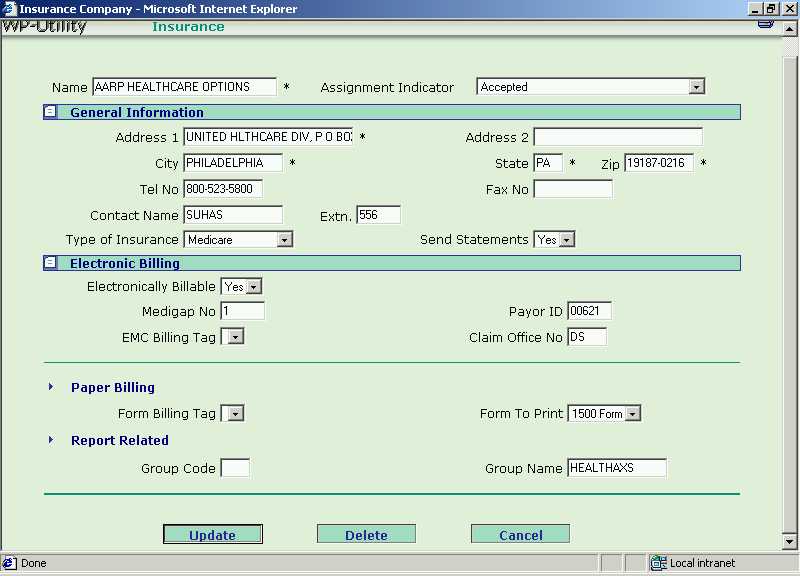
Screen 22 - Add New Insurance Company
Enter the new Insurance Company Name and its Address. With respect to billing or submission of claims the following should be noted:
- Type of Insurance - This specifies whether the concerned insurance company is Medicare or Blue Cross or Publicaid, etc. As a result appropriate claim submission rules are invoked.
- Send Statements - This governs whether statements will be sent to the guarantor for balance owed. For example, for a Publicaid patient, it is illegal to send balance statements and hence this field must be set to No.
- Electronic Billing - If claims can be sent to the concerned insurance company electronically, then the details have to be filled. The EMC Billing Tag field indicates which provider number will be submitted to this insurance company.
- Form Billing - The Form Billing Tag indicates which provider number will be printed on the form. The type of form printed is governed by the Form To Print field.
The Group Code and the Group Name fields pertain to reports. It allows one to group all the insurance companies in a few groups. For example, one can group all commercial insurance companies into one group, all HMO companies into another group, all federal programs like Medicare, Medicaid etc. into yet another group and so on. One can then run a report that shows revenue distribution by these groupings. This is explained in the chapter on Reports.
When all the information has been entered, click the [Add] button. [Cancel] button will take one back to the Provisioning Page.Update / Delete the Insurance Company
In the "Search Result" screen - Screen 21, click on the radio button adjacent to [Existing Insurance Company] row to modify the Insurance Company information or delete it. Then click [Continue] button. See the following screen.
Screen 23 - Update / Delete Insurance Company
Modify the Insurance Company details and click the [Update] button. Click the [Delete] button to delete the insurance company. [Cancel] button will take one back to the Provisioning Page.
This option allows one to provision the
information of the Referred Physicians by the practice.
To provision the referring physician information,
click on Utilities -> Provisioning Tables. [Referring Physician] option
is shown.
To add / update / delete the referring physician's details, search the
physicians on their "Last Name and optionally First Name" too and click the [Go]
button. Various referring physicians are displayed. See the following screen.
Screen 24 - Referring Physician Search Result
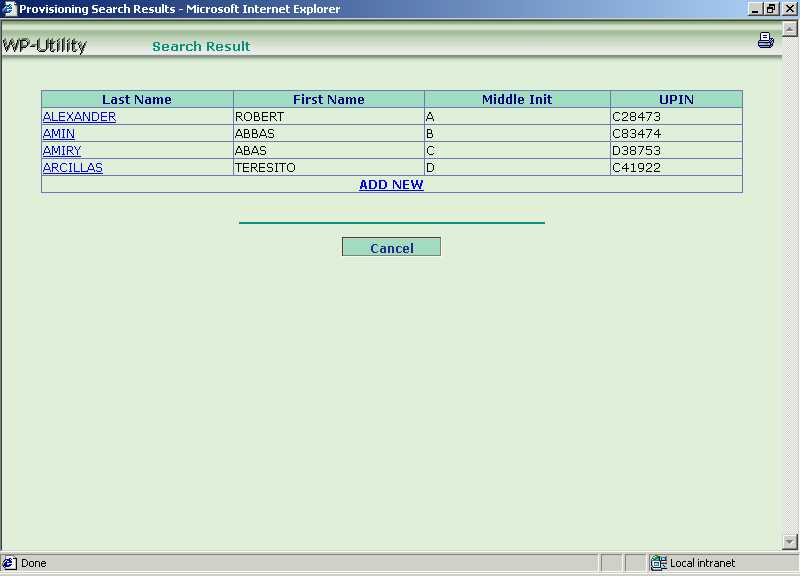
Add New Referring Physician
In the above screen, click on [Add New]. Then click [Continue] button. See the following screen.
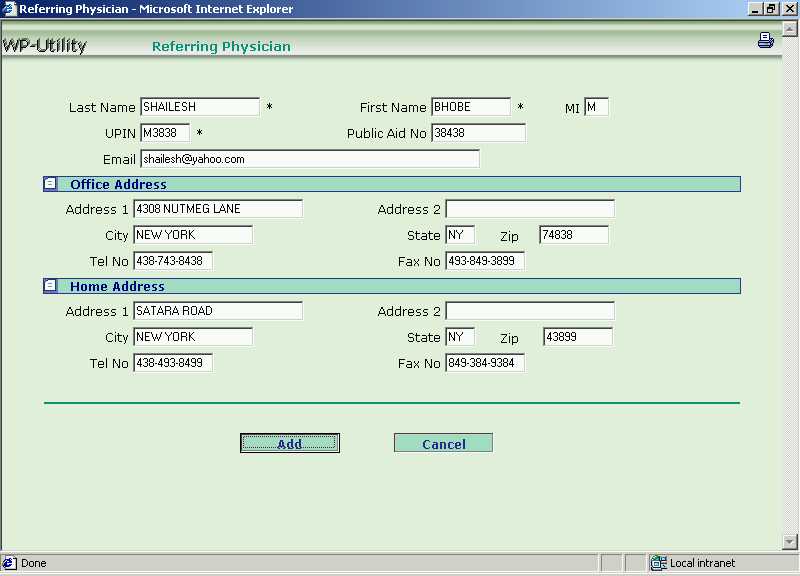
Screen 25 - Add New Referring Physician
Enter the Referring Physician's Name, UPIN and optionally the Office Address and Home Address. Then click the [Add] button. [Cancel] button will take one back to the Provisioning Page.Update / Delete the Referring Physician
In the "Search Result" screen - Screen 24, click on [Last Name] of existing referring physician. Then click [Continue] button. See the following screen.
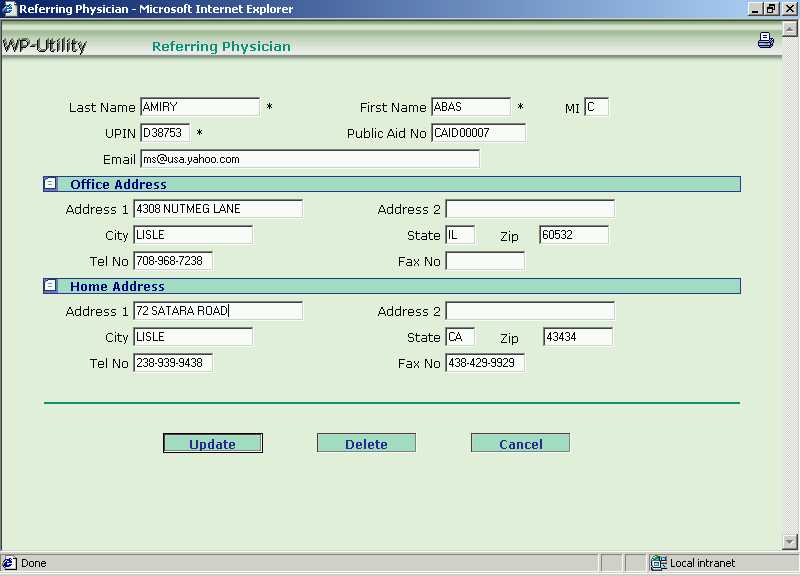
Screen 26 - Update / Delete Referring Physician
Update the Referring Physician's details, and then click the [Update] button. To delete the referring physician, click [Delete] button. [Cancel] button will take one back to the Provisioning Page.
Service Facility is the hospital / place where
service is provided by the physicians. This option allows one to provision the
information of such service providing hospitals.
To provision the service facility information,
click on Utilities -> Provisioning Tables. [Facility Name] option
is shown.
Add New Facility
To add a new facility to the domain, select [New Facility] from the drop-down list box and click the [Go] button. The following screen is displayed.
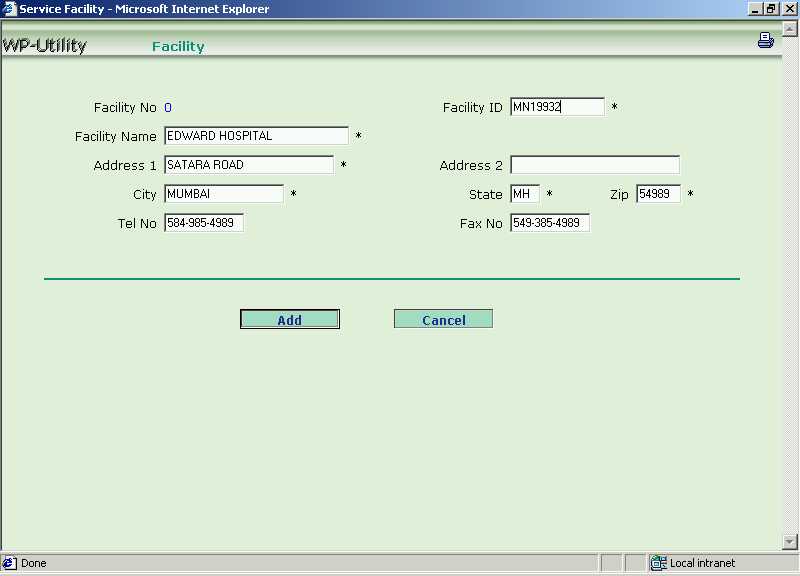
Screen 27 - Add New Facility
In the above screen, enter the Facility Name, its Address and ID. The ID is the facility's Medicare number. Then click the [Add] button. [Cancel] button will take one back to the Provisioning Page.
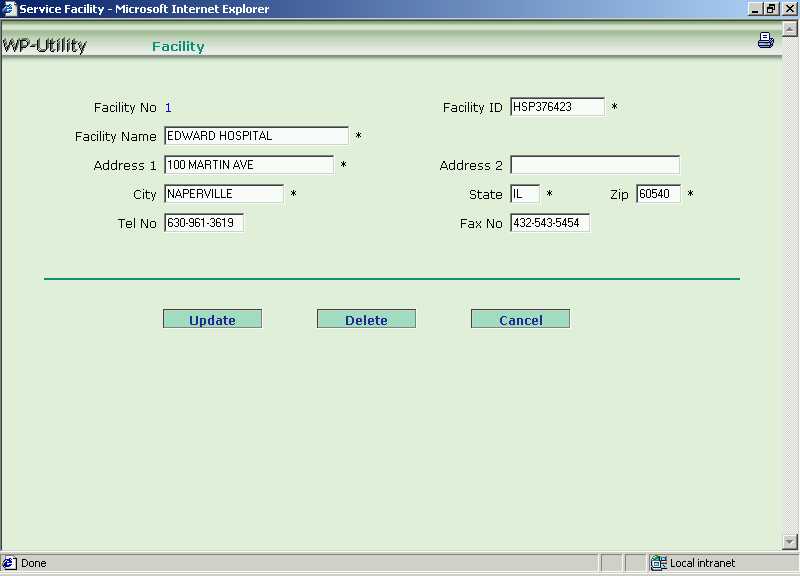
Update / Delete New Facility
To update / delete the details of service facilities, select the [Existing Service Facility] from the drop-down list box and click the [Go] button. The following screen.
Screen 28 - Update / Delete Service Facility
Update the details of the service facility / hospital, and then click the [Update] button. To delete the service facility, click [Delete] button. [Cancel] button will take one back to the Provisioning Page.
Managing Patients and Guarantors
This section explains how the patient and guarantor profiles are created and maintained. Along with the guarantor profiles, the insurance that they subscribe to is also tracked so that claims can be properly routed.
Details of the services provided by the physician to the patient are kept in three folders depending upon the reason for the services. Health related services are kept in the Health folder and there is a corresponding guarantor for these services. Automobile accident related services are kept in the Auto folder and in this case, the patient is the guarantor. Services pertaining to work related accident are kept in the Work folder and in this case too, the patient is the guarantor.
Patient and guarantor information / profile is presented on separate screens. When a new patient is added to the practice, the user is taken from the patient profile screen to the guarantor profile screen.
To provision the patient information / profile,
click on "Patient" option. The "Patient Info Page"
is displayed.
Screen 1 - Patient and Guarantor Search Page
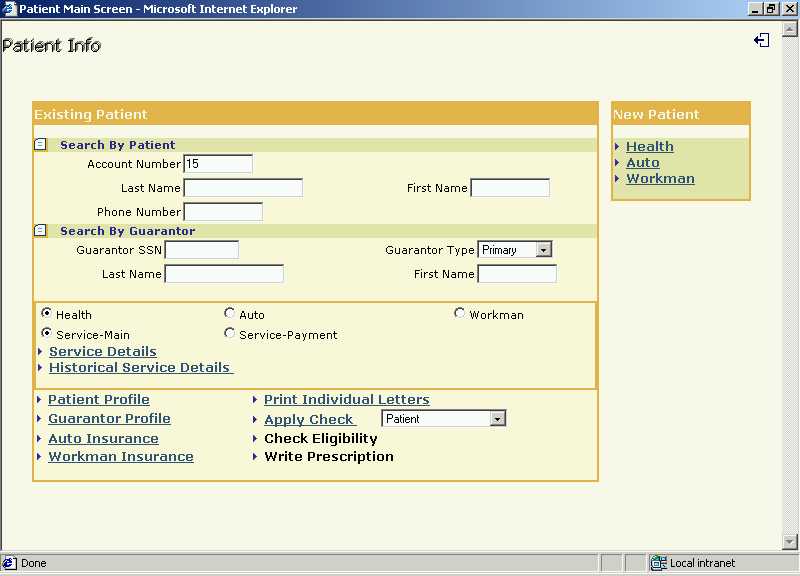
View / Update Existing Patient Profile
In the above screen - Screen 1, give the search criteria to search the patient
from the existing list whose details are to be viewed. The physician can search
the patient on:-
Search by patient criteria is the preferred means of search. In addition, search by the
patient Account Number is the fastest. On giving any of the above selection criterion,
click the [Patient Profile]. The following screen giving the list of
patients according to the given selection criteria is displayed.
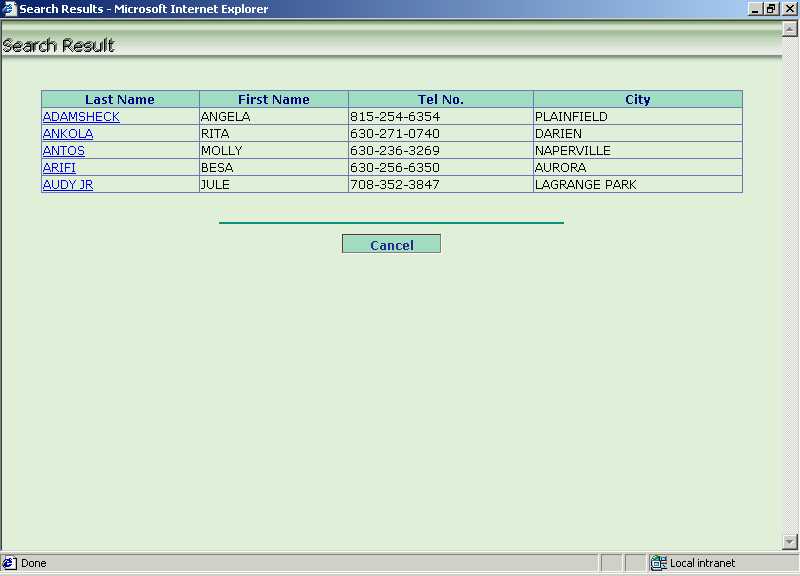
Screen 2 - Patient Profile Search Result

Click the link on [Last Name] to view the patient profile. See the
following screen.
Screen 3 - Patient Profile
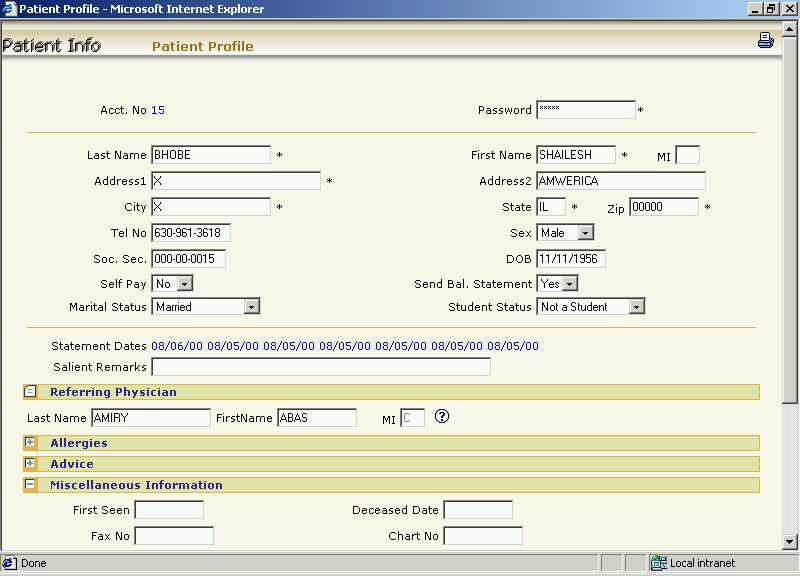
The patient
profile will contain :-
The Send Bal. Statement field governs whether Balance Statements will be sent to this patient's guarantor if there is balance owed. The Self Pay field indicates if the patient is also the guarantor and has no insurance. In this case, the SSN field is mandatory.
If any of the details are to be modified, click on [Update] button to update the changes made. The [Cancel] button will take one back to the Patient and Guarantor Search Page.
Add New Patient Profile
To add information of a new patient, on the Patient and Guarantor Search Page, click on [Health]
/ [Auto] / [Workman] option under the "New Patient"
block.
If a patient is being seen for
health problems, click the [Health] option. If the patient comes due to an
automobile injury, click the [Auto]
option. If the patient comes due to injury at work place, click the [Workman] option.
The following screen is displayed when clicked on the [Health] option .
Screen 4 - Add New Patient
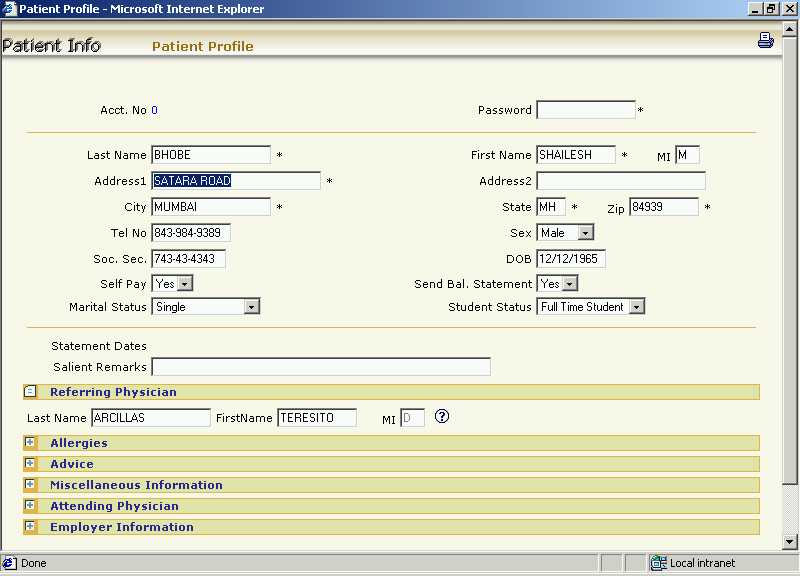
Fill in the patient details as in Screen 3, and click the [Submit] button
to add the details. [Continue] button will take you to the Guarantor
Profile screen. The [Cancel] button will take back to
the Patient and Guarantor Search Page.
Refer to Screen 6 - Guarantor Profile below. You have to add the
information of guarantor for the newly added patient.
On the Guarantor Profile Screen, click the [Add] button to add the
guarantor details. [Cancel] will take one back to the Patient and Guarantor Search Page.
Guarantor Profile for Health Insurance
This option allows one to provision a guarantor's information / profile for a patient. One can also add new guarantors for a patient. WebPractice supports upto two guarantors per patient. Old historical insurance company data associated with a guarantor is also retained for reference purposes.
View / Update Existing Guarantor Profile
On giving any of the selection criterion as in Screen 1, click the [Guarantor
Profile]. The following screen giving the list of patients according to the
given selection criteria is displayed.
Screen 5 - Patient Search Result
Click the link on [Last Name] to view the guarantor information of the
patient selected. The
following screen showing the Guarantor Profile will be displayed.
Screen 6 - Guarantor Profile
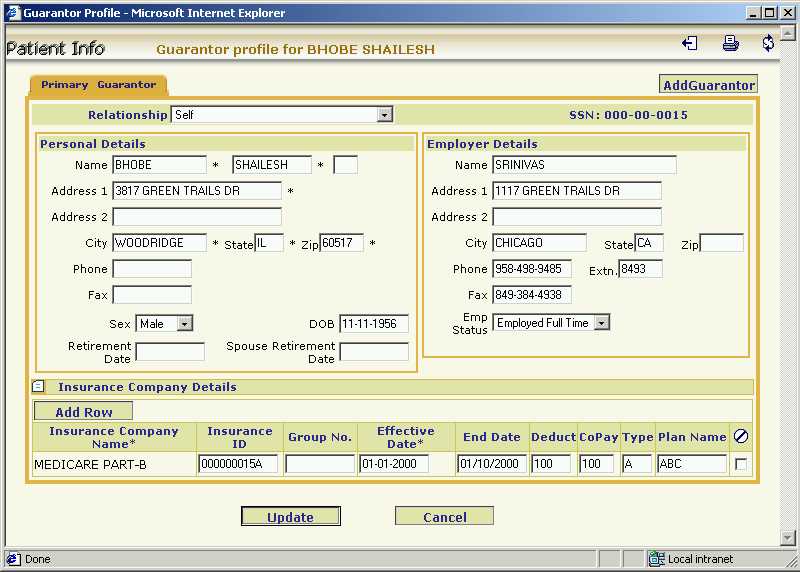
The
guarantor profile will contain :-
If any of the above details are modified, click on [Update] button to update the changes made. The [Cancel] button will take one back to the Patient and Guarantor Search Page.
Add a New Guarantor
To add a new (i.e. secondary) guarantor to a patient, click on [Add Guarantor] button in
the above screen - Screen 6. Add
the secondary guarantor details and click the [Update] button to add a new
guarantor for the patient. The [Cancel] button will take one back to
the Patient and Guarantor Search Page.
* Note :- The Guarantor's Information cannot be deleted.
Adding a New Insurance Company for the
Guarantor
To add a new insurance company for the guarantor, click on [Add Row]
button under the "Insurance Company Details" block in the
Screen 6. Add the
insurance company details and click the [Update] button to add a new
insurance company for the guarantor.
Update / Delete an Insurance Company of the Guarantor
To modify the insurance company information, modify the details and click the [Update]
button. To delete an existing insurance company of the guarantor, click the
check box in the last column indicating [Delete], under the "Insurance
Company Details" block. Then click the [Update] button to update
the insurance company details.
Guarantor Profile for Auto Insurance
This option allows one to provision the insurance
company details of patients in the case of an automobile injury. For automobile insurance,
the patient is the guarantor.
View / Update / Delete Auto
Insurance
On giving any of the selection criterion as in Screen 1, click the [Auto
Insurance]. The following screen giving the list of patients according to the
given selection criteria is displayed.
Screen 7 - Patient Search Result
Click the link on [Last Name] to view the auto insurance information for
that patient. See the following screen.
Screen 8 - Auto Insurance Information
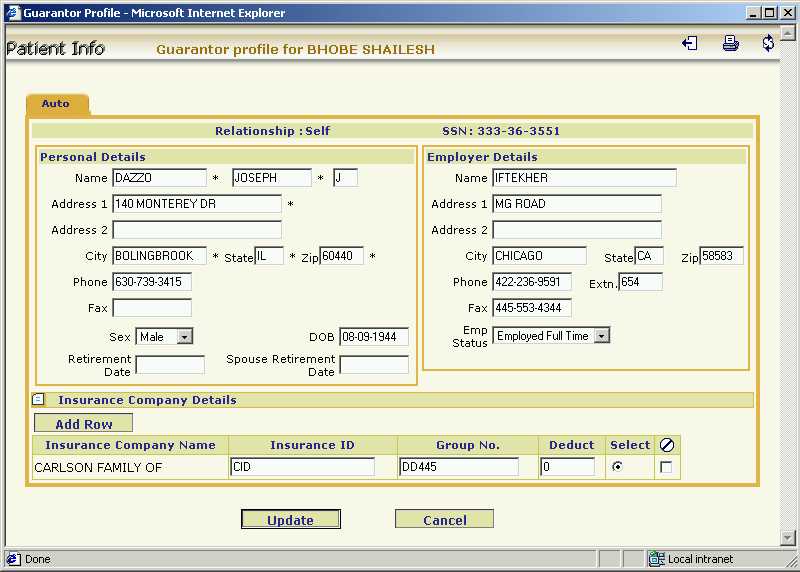
The physician can view the following details:-
If any modifications are done, click on [Update]
to update the changes made. To delete an already existing insurance company of the
patient, click the
check box in the last column indicating [Delete], under the "Insurance
Company Details" block. Then click the [Update] button to update
the insurance company details. The [Cancel] button will take one back to
the Patient and Guarantor Search Page.
Adding a New Insurance Company
To add a new insurance company, click on [Add Row]
button under the "Insurance Company Details" block in the
Screen 8. Add the
insurance company details and click the [Update] button to add a new
insurance company for the patient.
Guarantor Profile for Workmen Compensation Insurance
This option allows one to provision the insurance
company details of patients in the case of injury at their workplace. For workmen
compensation too, the patient is the guarantor.
View / Update / Delete Workman
Insurance
On giving any of the selection criterion as in Screen 1, click the [Workman
Insurance]. The following screen giving the list of patients according to the
given selection criteria is displayed.
Screen 9 - Patient Search Result
Click the link on [Last Name] to view the workman insurance information
for that patient. See the following screen.
Screen 10 - Workman Insurance Information
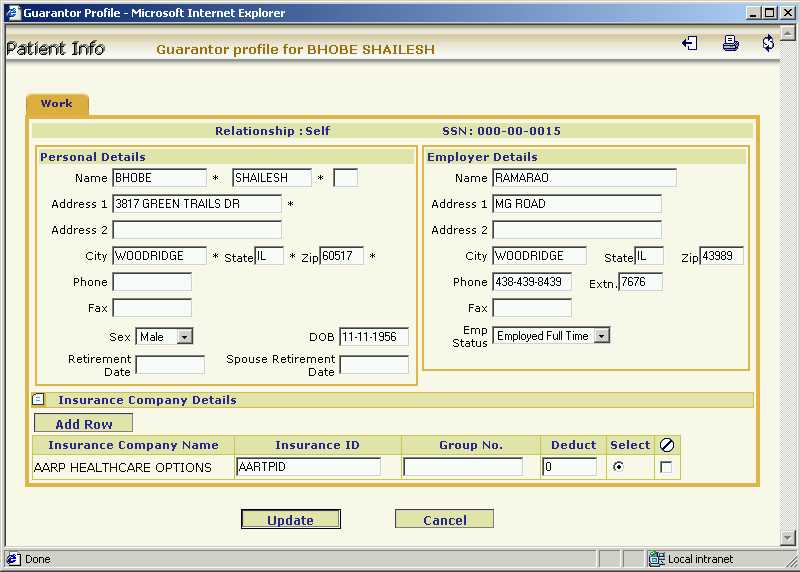
The physician can view the following details:-
If any modifications are done, click on [Update] to update the changes made. To delete an already existing insurance company of the patient, click the check box in the last column indicating [Delete], under the "Insurance Company Details" block. Then click the [Update] button to update the insurance company details. The [Cancel] button will take back to the Patient Info Page.
Add a New Insurance Company
To add a new insurance company, click on [Add Row]
button under the "Insurance Company Details" block in the
Screen 10. Add the
insurance company details and click the [Update] button to add a new
insurance company for the patient.
Managing Service Details
Service
details keep track of services provided by the physician to the patient. The
service information also includes the details of payments made by the patients
and the insurance companies. The information for each service is organized into
four folders for ease of viewing. The first one contains the main service
details and patient payment. When a new service is being added, only this folder
can be accessed and the others left alone. The second folder contains payment
details from the insurance companies and adjustments. This folder will be
accessed when payments are received from the insurance companies. The third folder contains the
dates the insurance companies were billed. There are at most three
dates associated with each submission of claim to the insurance company. The first one shows
the very first time the claim was submitted. The last one shows the most recent
claim submission. The middle one shows the submission date just before the most recent one. Note that
all the entries in this tab are display only. The fourth tab contains miscellaneous items such
as specification of ailment if any or a changing of the referring physician
or extra narrative to be associated with each service detail.
To manage the service details,
click on "Patient" option. The "Patient and Guarantor Search Page"
is displayed.
Screen 1 - Patient and Guarantor Search Page
On the above screen, first select the insurance type from Health / Auto
/ Workman and Service-Main / Service-Payment from the available options, by clicking
the radio button adjacent to the options. Doing so allows one
to directly go to the service details screen under the correct tab.
Also give the search criteria to search the patient
from the existing list whose details are to be viewed. The physician can search
the patient on:
Then
click on [Service Details] to view / enter the service details. A list of
patients will be displayed depending upon the search criteria given.
Screen 2 - Patient Search Result
In the above screen, click on
the link on [Last Name] to view the service details of that patient. See
the screen of "Service-Main Details" - Screen 3.
Depending
upon the selection of the options, the respective tab will be displayed. By
default the one views the "Service-Main" for Health
insurance. See the following display (Refer Screen 3).
Service-Main
This option gives the main details of services provided to the patient. It also shows the patient payment in case the patient makes the payment for the portion that he is responsible for. When adding a new service, only the details in this part (i.e. under this tab) needs to be filled in.
Screen 3 - Service-Main
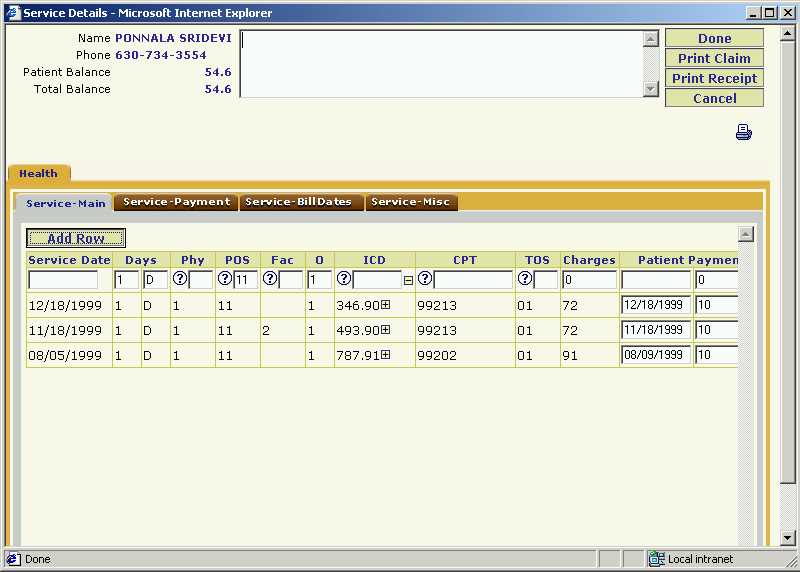
Add New Service Details
In the Screen 3, click on the [Add Row] button to
add new service details. See the
following screen.
The service details include :-
Click on [Done] button to add the service details. The [Cancel] button will take back to the Patient and Guarantor Search Page.
This option gives the details of payment to be done by the insurance companies. See the following screen.
Screen 4 - Service-Payment
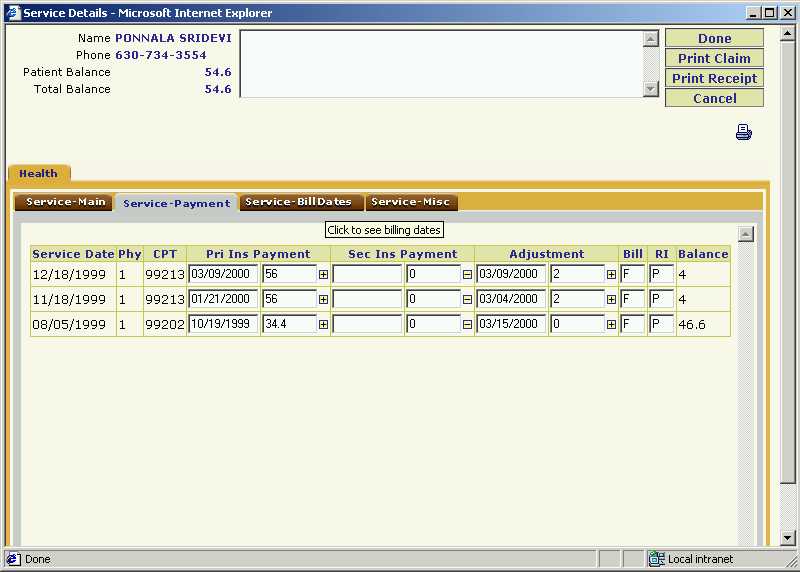
The screen displays the following details :-
Click on [Done] button or the [Cancel] button to go back to the Patient and Guarantor Search Page.
Apply Check
The patient or the primary or the secondary insurance company will pay the amount for various
services provided by the physician by cash, check or credit card.
The amount received is to be adjusted against the various services provided.
To apply check,
click on "Patient" option on the Practice Home Page. The "Patient
and Guarantor Search Page"
is displayed.
On the Screen 1, for the option [Apply Check] first select the paying
party from the drop-down list box adjacent to the option name. The check can be
received from Patient, Primary Insurance Company or Secondary Insurance Company.
Then, click on [Apply Check] option.
A list of patients will be displayed depending upon the search criteria given.
See the following screen displaying the list of patients.
Screen 5 - Patient Search Result
Click on the link on [Last Name] to enter the check details for that
patient. See the following screen.
Screen 6 - Check Details
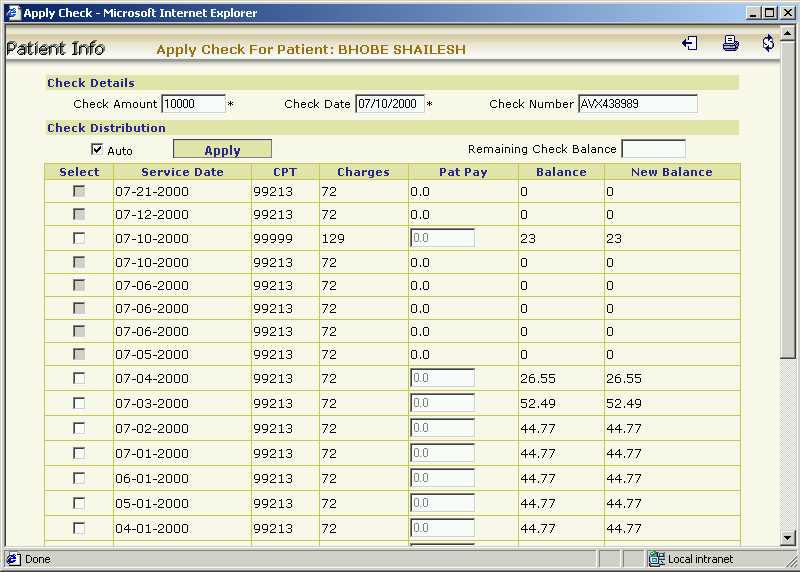
In the above screen, enter the following details :-
To manually distribute the check amount, tick the check boxes adjacent to the services and then enter the amount in the "Patient Payment" column. If the amount is to be distributed automatically, tick the check boxes adjacent to such services, click "Auto" distribution indicator and then click [Apply]. The total amount of check will be distributed according to its balance. The remaining amount of the will be displayed in the "Remaining Check Balance" field. The amount won't be applied, unless the remaining check balance is "0". And in turn, the amount will not be displayed in "Service-Payment" screen of "Service Details" option.
E.g., In the above screen, the "Check Amount" is Rs. 10,000/- If it is to be distributed automatically among the available services, first select the services and then click the "Check Distribution Indicator" - 'Auto'. The it will be distributed according to the balance of the selected services.
If the "Remaining Check Balance" is "0", click on [Submit] button. The amount will thus be displayed in "Service-Payment" screen of "Service Details" option. The [Cancel] button will take back to the Patient and Guarantor Search Page.
This option displays the billing dates of
primary and secondary insurance companies. There are at most three
dates associated with each submission of claim to the insurance company. The first one shows
the very first time the claim was submitted. The last one shows the most recent
claim submission. The middle one shows the submission date just before the most recent one.
Note that all the entries in this tab are display only. See the screen below.
Screen 7 - Service-Bill Dates
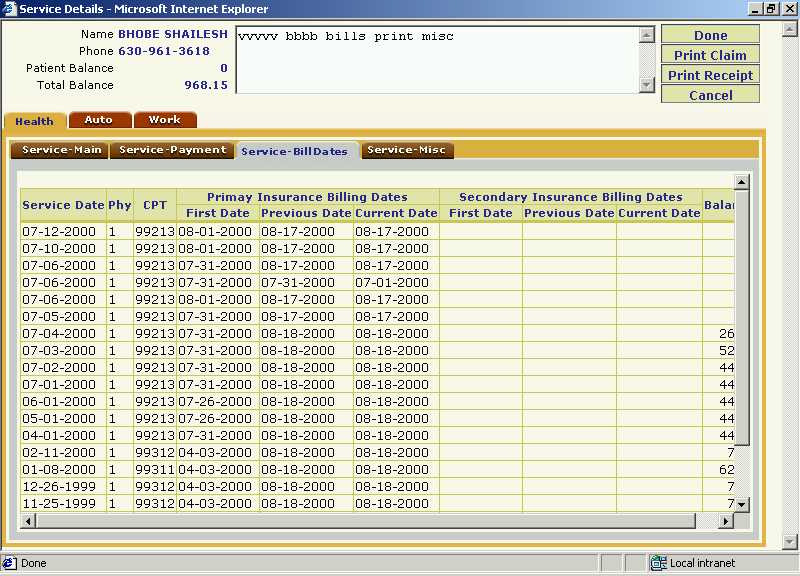
The billing details displayed are :-
Click on [Done] button or the [Cancel] button to go back to the Patient Info Page.
Invoke this tab for changing the Referring Physician or
associating an ailment with the service detail. See the screen below.
Screen 8 - Service-Miscellaneous
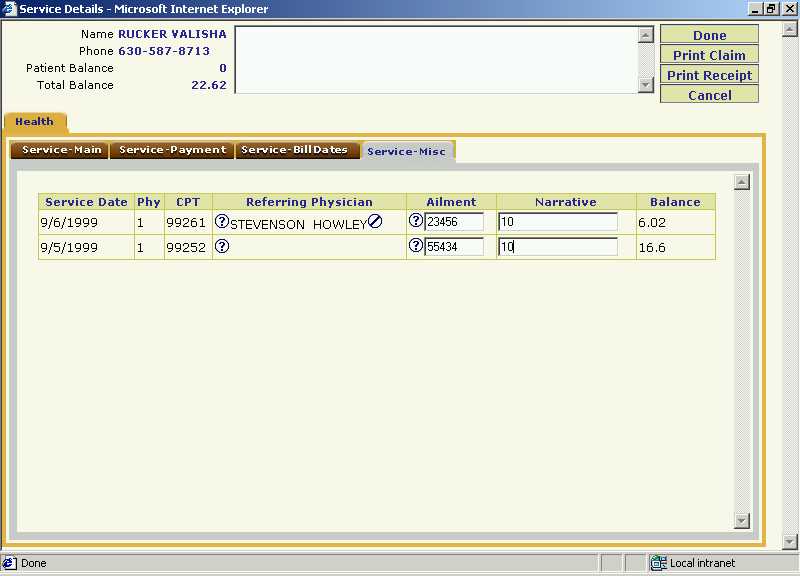
The miscellaneous details that can be viewed or entered are :-
Screen 9 - Add Ailment Details

In the above screen, enter all the details related to the illness of the
patient and then click the [Add] button. [Cancel] will take one
back to the Service Details Page.
Sometimes the patient or on rare occasions the primary and
secondary insurance companies may make the payment in installments. This is known as
Partial Payment. Each partial payment is separately entered and tracked. On the completion
of partial payment entry/entries, the focus shifts to the tab in the service details screen.
What is shown here in the amount column is the sum of all the partial payments. The date
column shows the date on which the last partial payment was made.
If the patient does the payment in installments, the partial payment amount can
be entered through the "Service-Main" option. Expand the column
of "Patient Payment" of Service-Main screen by clicking on the
- or + image. The
following Patient Partial Payment screen is displayed.
Screen 10 - Patient Partial Payment
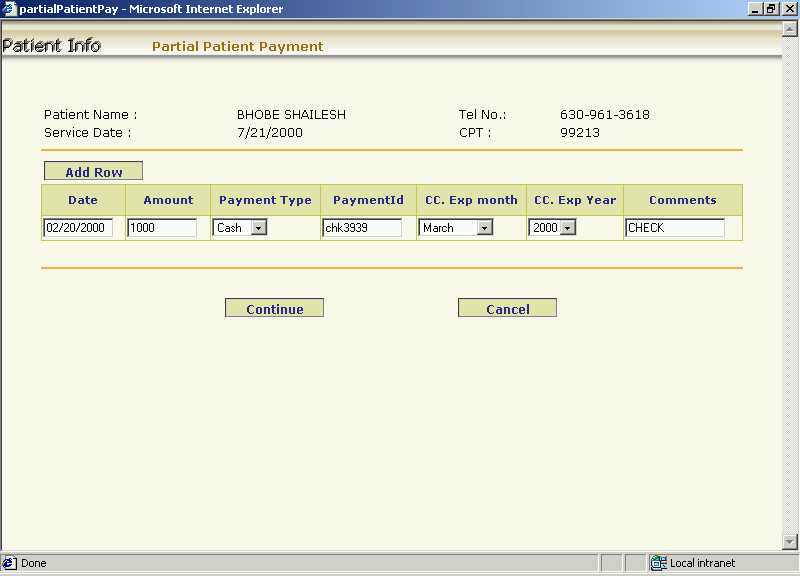
By clicking on the [Add Row] button repeatedly, enter as many entries as there are
partial payments.
The physician may receive payment in installments from insurance company also.
This partial payment can be entered through the "Service-Payment"
option. Expand the column of "Primary Insurance Payment" of Service-Payment
screen by clicking on the - or + image. The following Partial Primary Insurance Payment screen is displayed.
Screen 11 - Partial Primary Insurance Payment
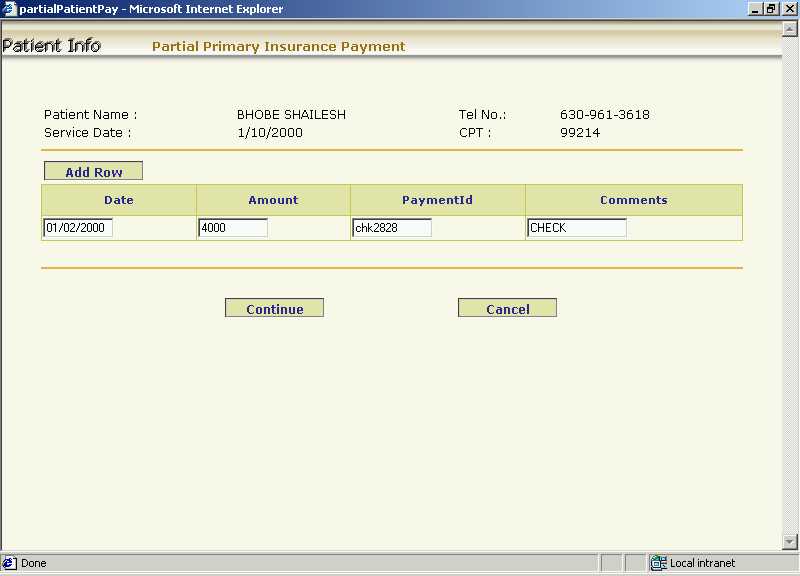
By clicking on the [Add Row], enter the partial payment.
Follow similar procedures to create partial payment entries for the secondary insurance if necessary.
The physician may want to adjust the due amount from the patient or insurance company in some cases. Sometimes, the patient or the insurance company may pay the partial amount of the actual bill amount. The amount left is ignored and is not paid. The physicians in such case, write off the partial amount (if the amount is small) and make the balance zero for that patient. This adjustment amount can be entered through the "Service-Payment" tab. Expand the column of "Adjustment" of Service-Payment screen by clicking on the - or + image. The following Partial Adjustment screen is displayed.
Screen 12 - Partial Adjustment
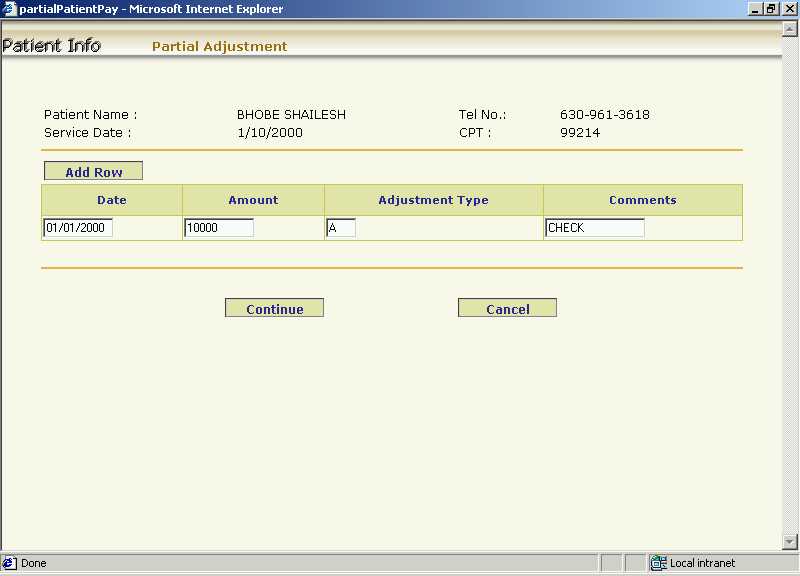
By clicking on the [Add Row], enter the partial adjustment details,
such as, the Date of Adjustment, Amount Adjusted, Adjustment Type and the
Comments specifying the reason for adjustment. One can add any number of
adjustment amounts for the particular patient.
Scheduling Appointments
The WebScheduler feature of WebPractice helps a physician manage patient appointments online. As a result, appointments of any patient can be immediately pulled up for perusal or rescheduling. Physicians can also block off time during which appointments are not available. Since everything is online, if the physician has given permission (by setting a parameter during the provisioning of the office data), patients can also schedule their own appointments online. This results in fewer interrruptions at the physician's office thereby increasing the staff productivity. If the patients are not permitted to schedule online, then they may request an appointment. However, a patient is always permitted to cancel his appointment.
The physician may not allow his patients to
schedule their appointments on-line. In such a case, the
patient can only request an appointment. These requested appointments
show up under "New Patient Alert" on the WebPractice Home Page.
The physician
can then select these requested appointments and either approve them
or deny them.
To view the requested appointments,
click on "Appointment Request Alert" hyperlink. The page showing
the appointment requests from all the patients is displayed.
Screen 1 - Appointment Request Alert Page
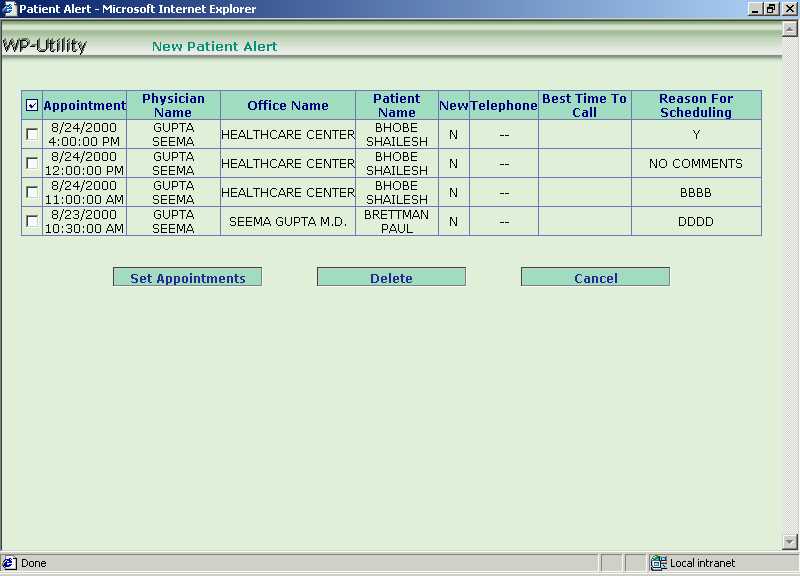
The above screen displays a list of patients who have requested appointments. The list gives the following information :-
From the above screen, one can either approve the appointment or cancel the appointment. To approve the appointment, select check box with a tick mark and click the [Set Appointment] button. These then show up in the scheduler. To deny the appointment, select the check box with a tick mark, and click the [Delete] button. The [Cancel] button will take one back to the WebPractice Home Page.
Within a practice that contains multiple physicians
and multiple offices, appointments are scheduled for a particular physician at a particular
office. Depending upon the login type (i.e. Practice Level vs. Office Level), one either
sees all the physicians belonging to a practice or only those associated with a particular
office.
To open the "Scheduler",
click on physician name with his office under the "Scheduler" option. The "Scheduler
Page" for that physician is displayed. The "Scheduler
Page" shows three tabs - Schedule, View and Block.
Schedule
To schedule an appointment, on "Scheduler
Page", select "Schedule" tab.
Click the radio button adjacent to the week in which the appointment is to be
scheduled. Then click the [Go] button. While scheduling, the physician
cannot schedule any appointments for previous dates.
The following screen is displayed.
Screen 2 - Scheduler along with the Calendar
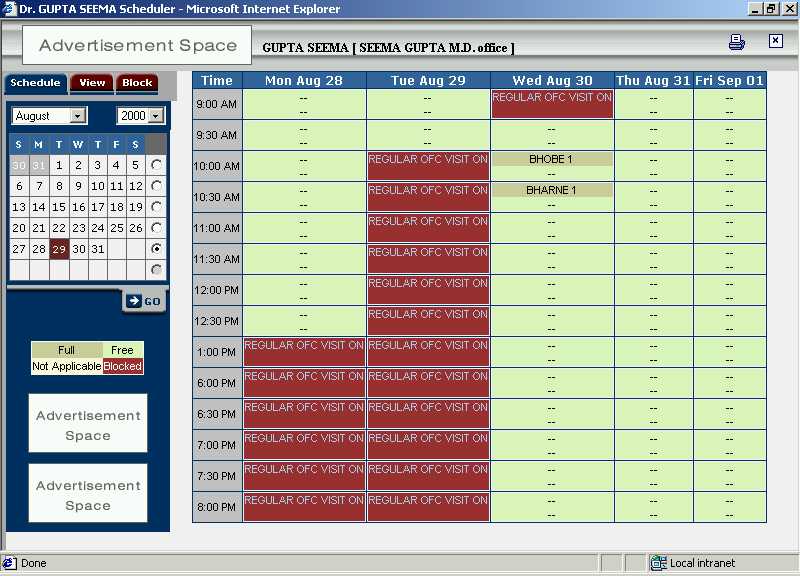
On Screen 2, click the day of the week and the time slot to schedule the
appointment. The Screen 3 will be displayed.
Screen 3 - Patient Appointment Scheduling
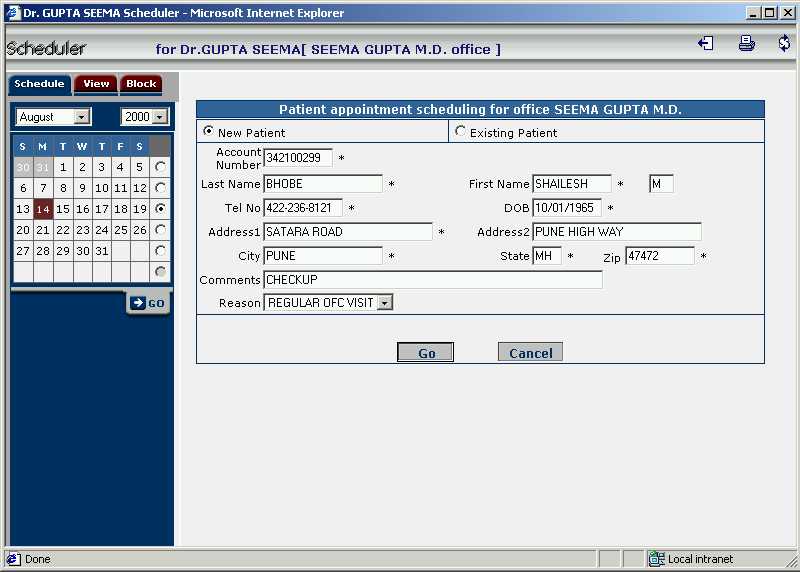
Enter the details for scheduling an appointment
for a new patient or an existing one along with the reason for scheduling and then
click on [Go]
button to set an appointment. The [Cancel] button will take back to
the Scheduler Page without scheduling an appointment.
To cancel an appointment, click on the concerned appointment (i.e. patient last name)
shown in Screen 2 above. The screen showing
the confirmed appointment will be displayed. See the screen below.
Screen 4 - Confirmed Appointment
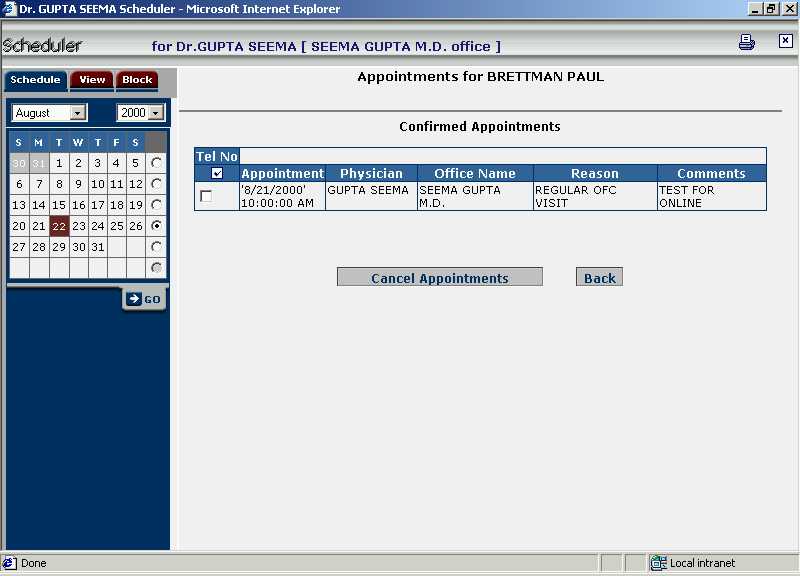
In the above screen, click the check box adjacent to the appointment and then
click on [Cancel Appointments] button. The [Back] button will take one
back to the Scheduler Page.
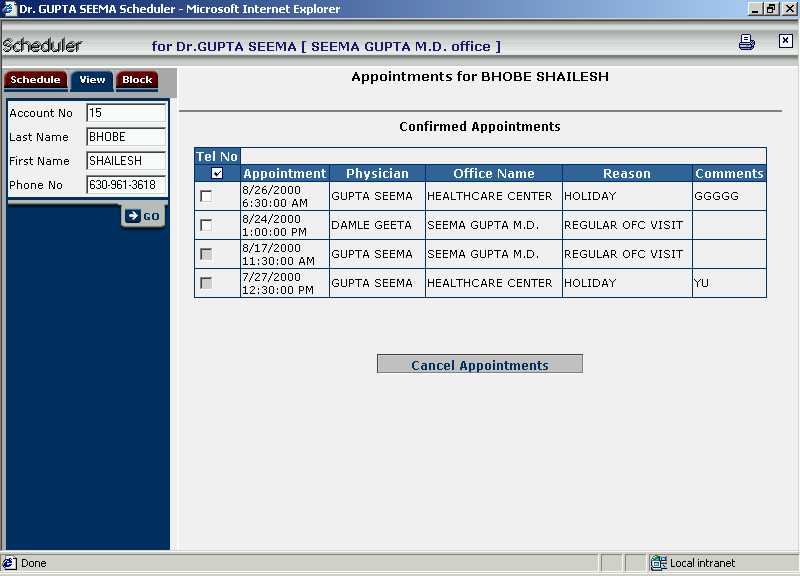
This option enables the physician to view and optionally
cancel all
the previous appointments for a particular patient. Note that all the appointments of the
concerned patient are shown here irrespective of the physician with whom it is scheduled
and irrespective of the office at which it is scheduled. On "Scheduler
Page", select "View"
tab.
Screen 5 - View Tab
Enter the any of the following search criteria to view the appointments for a particular patient
:-
Now click the [Go] button to get a list
of patients for the search criteria given. See the following screen.
Screen 6 - Patients Search Result
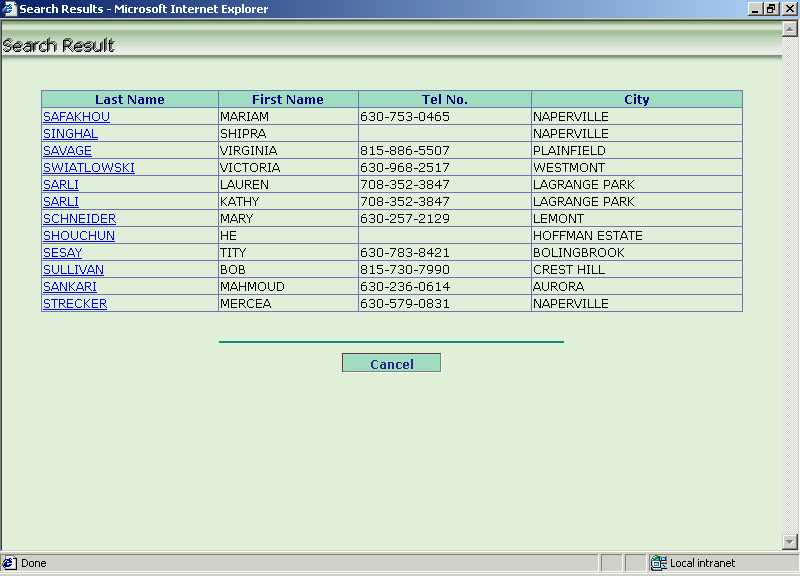
In the above screen, click on the link of [Last Name] to view the details
of the confirmed appointment. See the following screen.
Screen 7 - Confirmed Appointment Screen

If the physician wants to cancel the appointment,
click on the [Cancel Appointments] button.
Using this option, the physician can either block
or unblock a
particular period of a day or multiple days. To block a period of a
day, the physician has to give valid reason. Blocking can only be done if there
are no appointments scheduled during that period.
On "Scheduler
Page", select "Block" tab. The following screen will be
displayed.
Screen 8 - Block Tab
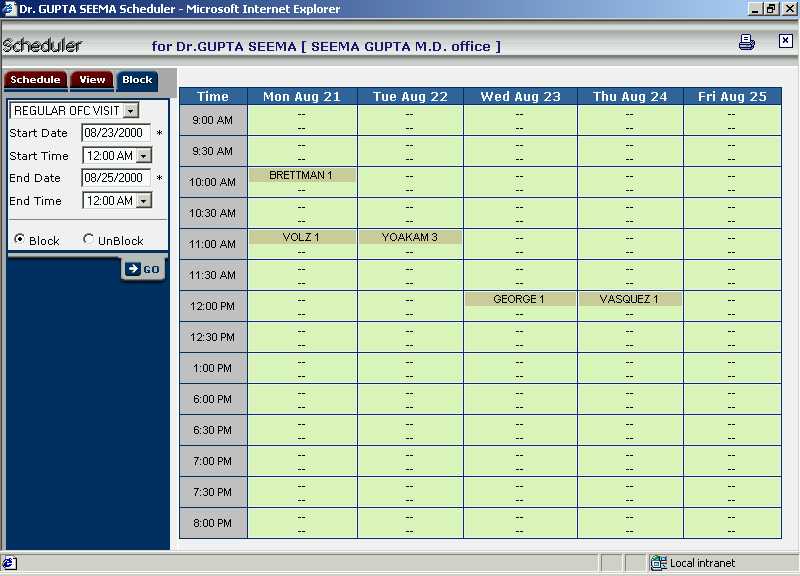
In the above screen, specify the following details to block /
unblock the period :-
Click on [Go] button to block / unblock the period specified.
Individual Statements and Letters to Patients
This capability allows the user to send pre-defined
letters to an individual patient or to a referring physician. The content in these
letters can be tailored by the user.
To view and print the letters for an individual patient,
click on "Patient" option. The "Patient and Guarantor Search Page"
is displayed.
Screen 1 - Patient and Guarantor Search Page
On the above screen specify the search criteria to search the patient
from the existing list to whom a letter is to be sent. One can search
the patient using:
Then
click on [Print Individual Letters] option. A list of
patients will be displayed depending upon the search criteria given.
Screen 2 - Patient Search Result
In the above screen, click on
the link on [Last Name] to view the list of letters and reports that can
be printed for that patient. See
the following screen.
Screen 3 - Letters/Reports List
Now click on any of the letter option to print that specific letter for that
patient.
Specify the criteria which needs to be minimally satisfied
in order for a letter to be printed. Note that the Balance Payment Interval constraint
that is set during the provisioning of the Practice information does not apply here since
the mode of printing is not a batch mode. However, other constraints like whether the
patient can receive Balance Statement and whether the guarantor's insurance company allows
Balance Statement to be sent are observed.
Screen 4 - Search Criteria for Balance Statement
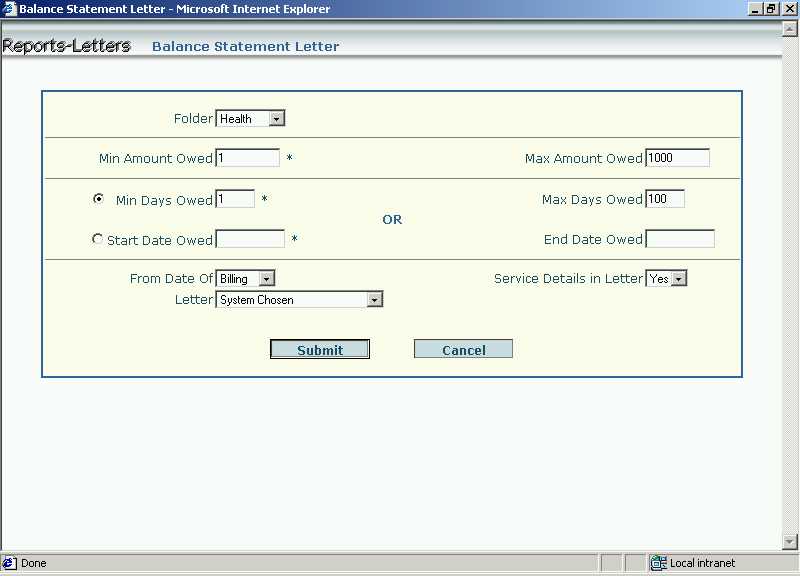
In the above screen, enter the following selection criteria to print the Balance
Statement:
Click on [Submit] button to generate the
letter.
[Cancel] button will take one back to the Reports Page.
When you view the letter, there are two buttons - [Print] and [Cancel].
Click the [Print] button to print the letter and send it to the patient.
[Cancel] button will take one back to the Reports Page.
Specify the criteria in order to request a patient to
come in for an appointment.
Screen 5 - Search Criteria for Checkup Reminder
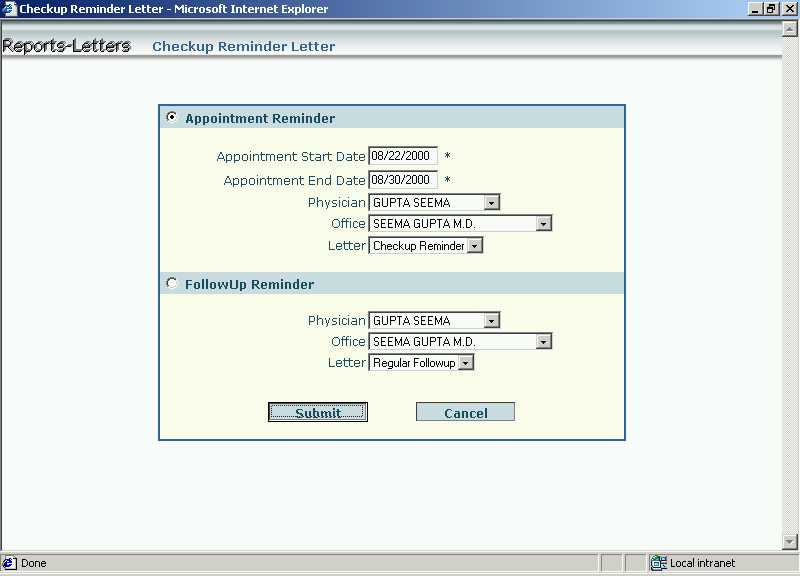
In the above screen, enter the selection criteria to print the either the
Appointment Reminder or Follow up Reminder to a patient. If an Appointment
Reminder is to be sent, enter the following :-
If the patient does not have any appointments scheduled, then a physician can remind the patient to schedule an appointment for a regular checkup / follow-up visit using this letter. If a Follow up Reminder is to be sent, enter the following :-
Click on [Submit] button to view the
letter.
[Cancel] button will take back to the Reports Page.
When you view the letter, there are two buttons - [Print] and [Cancel].
Click the [Print] button to print the letter and send it to the patient.
[Cancel] button will take one back to the Reports Page.
In order to print the Encounter Form for patients who walk-in or whose appointment was scheduled a short while ago, this form is made use of.
The Encounter Form is printed on a pre-printed form. Hence, only select the patient on the Patient and Guarantor Search Page and then select this form to be printed.
Select this option to print a letter requesting the
patient to mail-in the signed insurance form.
Screen 7 - Search Criteria for Insurance Form
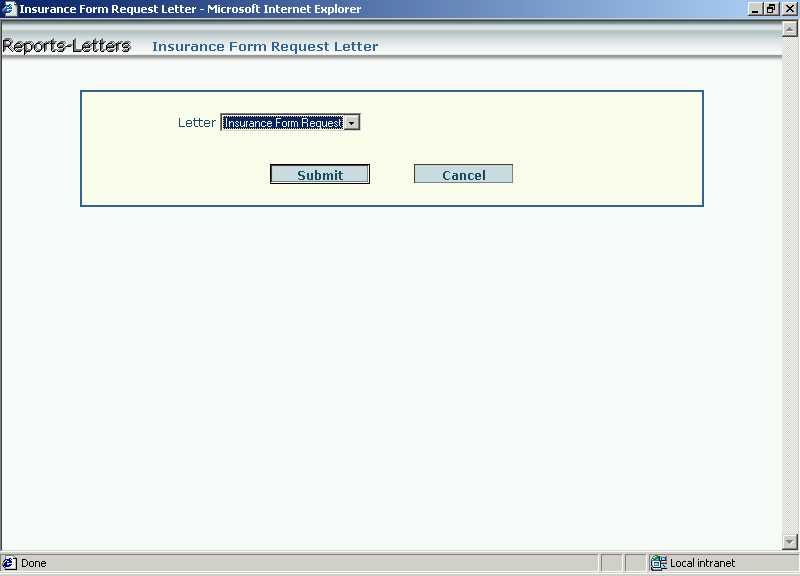
In the above screen, select the Letter from
the drop-down list box and click on [Submit] button to view the letter.
[Cancel] button will take one back to the Reports Page.
When you view the letter, you can see two buttons - [Print] and [Cancel].
Click the [Print] button to print the letter and send it to the patient.
[Cancel] button will take back to the Reports Page.
Select this option to generate a Disability Certificate
or Back-To-Work letter to be given to the patient.
Screen 8 - Search Criteria for Back to Work Certificate
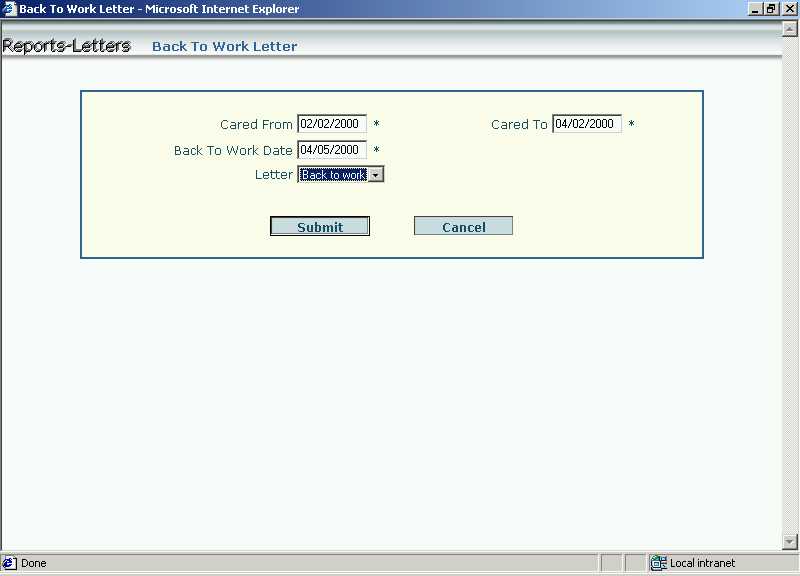
In the above screen, enter the following selection criteria:-
Click on [Submit] button to view the
letter.
[Cancel] button will take back to the Reports Page.
When you view the letter, there are two buttons - [Print] and [Cancel].
Click the [Print] button to print the letter and send it to the patient.
[Cancel] button will take one back to the Reports Page.
Compliment Referring Physician
Select this option to compliment or thank the Referring
Physician of the patient for referral.
Screen 8 - Search Criteria for Compliment Referring Physician
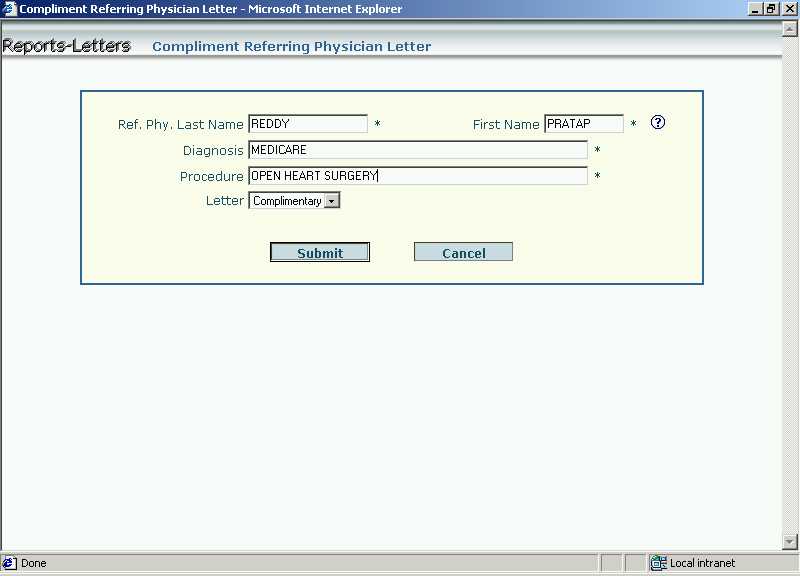
In the above screen, enter the following selection criteria :-
Click on [Submit] button to view the
letter.
[Cancel] button will take back to the Reports Page.
When you view the letter, there are two buttons - [Print] and [Cancel].
Click the [Print] button to print the letter and send it to the patient.
[Cancel] button will take one back to the Reports Page.
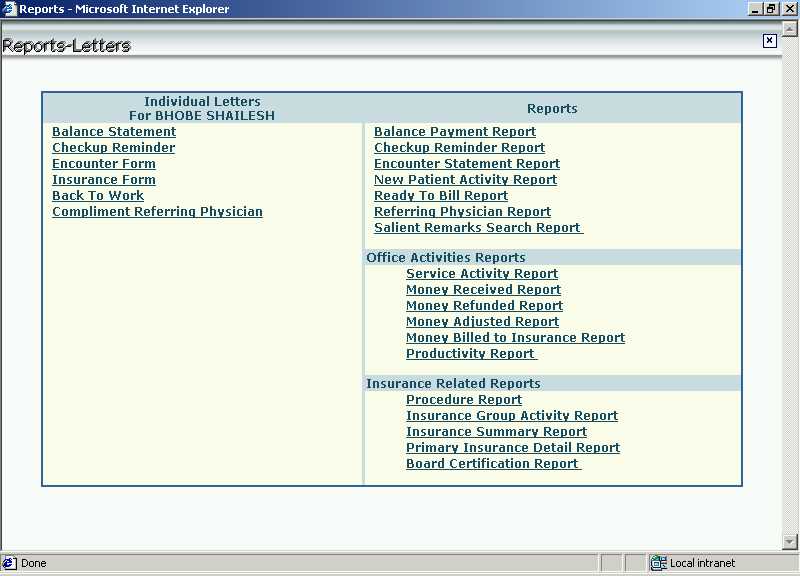
Reports
The report facility allows the physician
to get important information in a summarized manner, subject to user defined
constraints, on the screen. The physician can either just view this report on
the screen or print it to keep records.
After the physician logs in,
the Practice Home Page is displayed. To view and print the reports,
click on "Reports" option. The Reports Page"
is displayed.
Screen 1 - List of Reports
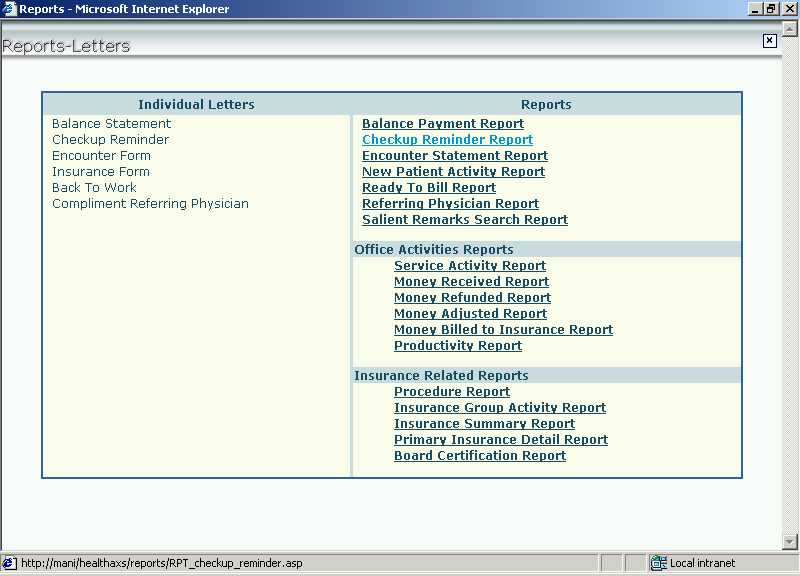
On the above screen click on any report from the list to view it or print it.
The purpose of this report is to identify the
patients who have not made their balance payments. It gives the names and the
balance amount owed by all the patients who owe more than the specified amount
for (at least) the specified days.
Screen 2 - Selection Criteria for Balance Payment Report
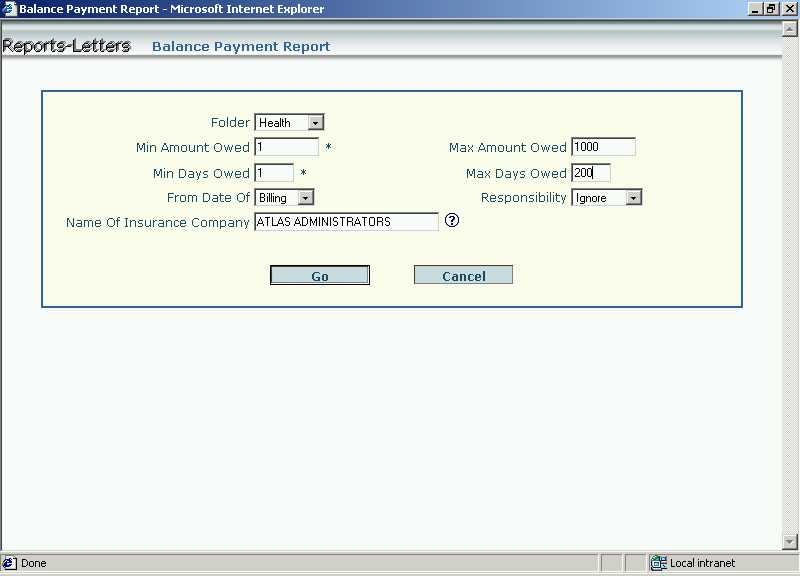
In the above screen, enter the following selection criteria to generate the
report :-
Click on [Go] button to execute the report.
[Cancel] button will take back to the Reports Page.
Screen 3 - Balance Payment Report
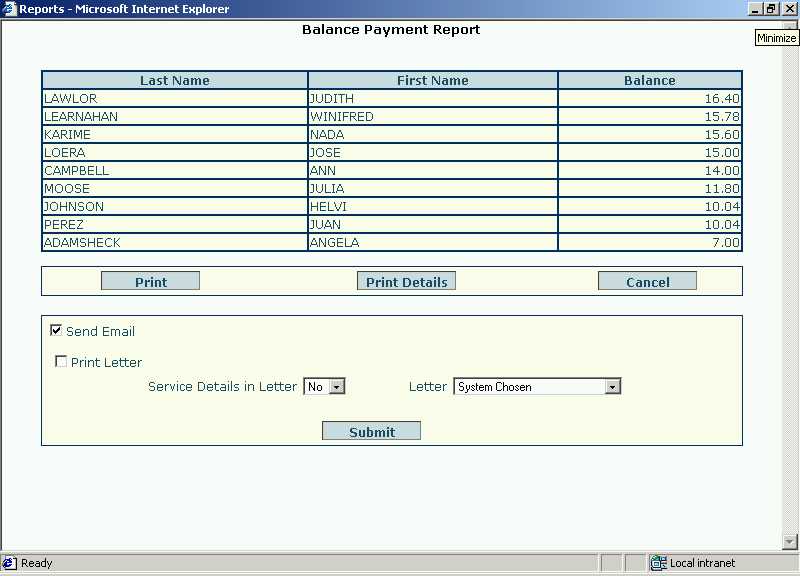
The report displays,
Click on [Print] button to print the
report, or you can click on [Print Details] to print the service details
of that patient on a separate page. [Cancel] button will take one back to
the Reports Page.
In the lower section, select the appropriate check boxes for,
Click the [Submit] button to either send the email, print the letter, or print service details in the letter.
The Checkup Reminder Report enables the
physician to get the names, telephone numbers and reminder dates for all his
patients who have taken an appointment with him for checkup between the
specified Start and End Dates.
Screen 4 - Selection Criteria for Checkup Reminder Report

In the above screen, enter the following selection criteria to generate the
report :-
Click on [Go] button to execute the report.
[Cancel] button will take back to the Reports Page.
Screen 5 - Checkup Reminder Report
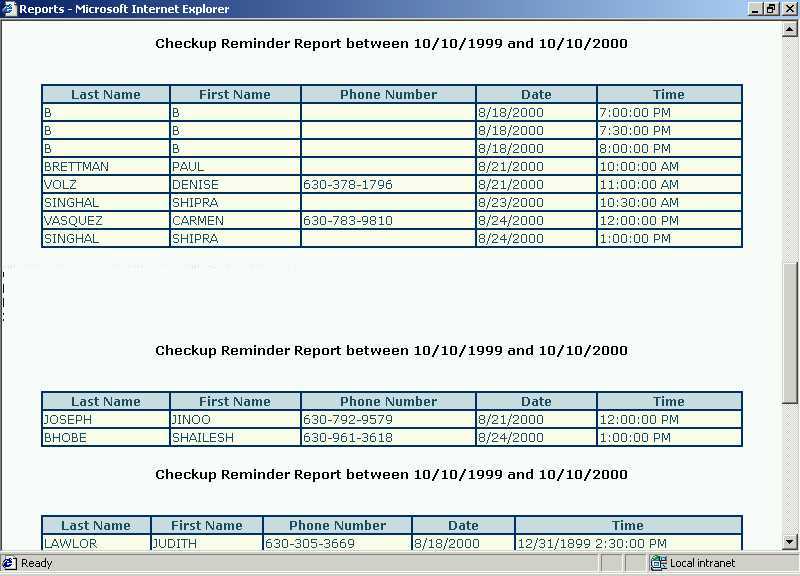
The report displays,
Click on [Print] button to print the
report. [Cancel] button will take one back to the Reports Page.
In the lower section, select the appropriate check boxes for,
Click the [Submit] button to either send the email, or print the letter.
The purpose of this report is to know in brief,
between the specified dates, the patients that will be seen by the physician
along with their balances.
Screen 6 - Selection Criteria for Encounter Statement Report
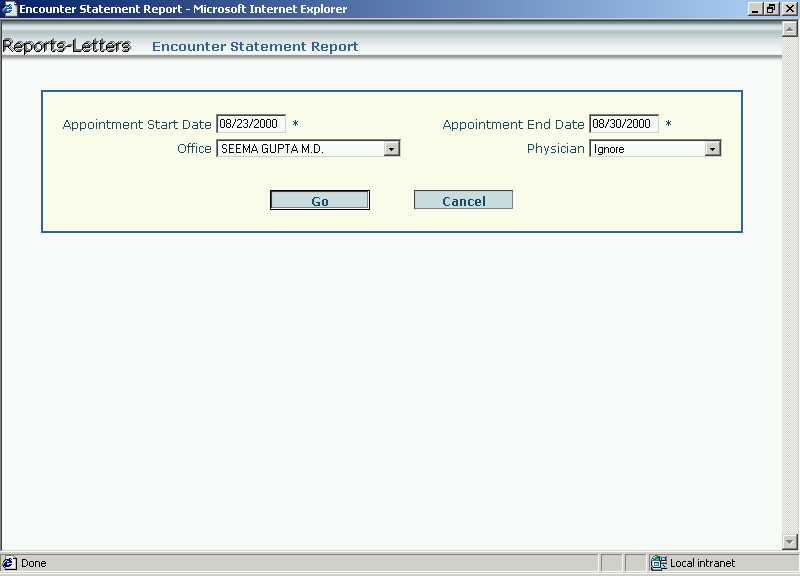
In the above screen, enter the following selection criteria to generate the
report :-
Click on [Go] button to execute the report.
[Cancel] button will take back to the Reports Page.
Screen 7 - Encounter Statement Report
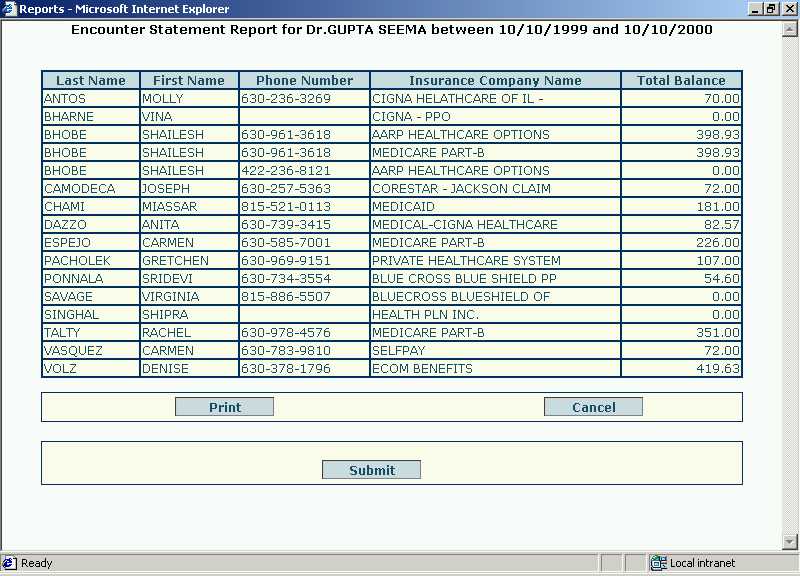
The report displays,
Click on [Print] button to print the report. [Cancel] button will take one back to the Reports Page.
The purpose of this report is to provide the
physician, data on how fast his/her practice is growing, as evident from the
number of new patients being seen by the physician during the specified
period. It provides the names of all the patients along with their associated
total charges and balance payment between the specified dates the patient first
seen by the physician.
Screen 8 - Selection Criteria for New Patient Activity Report

In the above screen, enter the following selection criteria to generate the
report :-
Click on [Go] button to view the report.
[Cancel] button will take back to the Reports Page.
Screen 9 - New Patient Activity Report
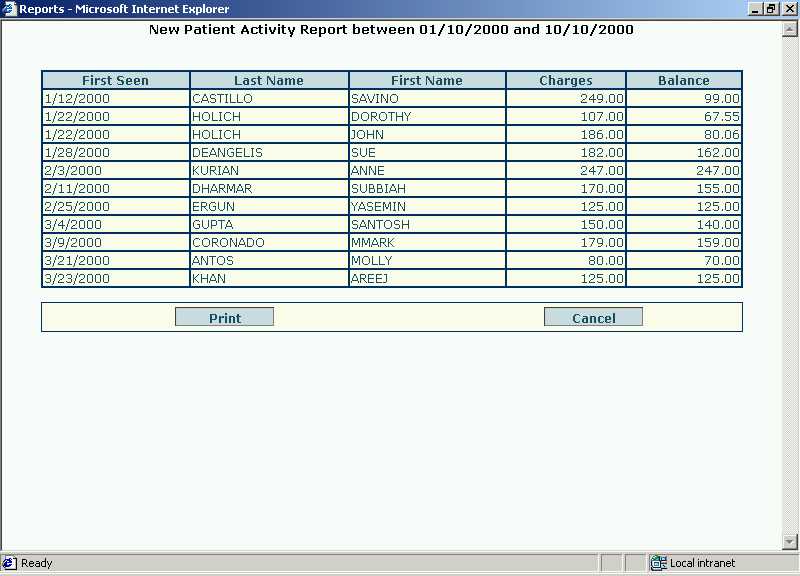
The report displays,
Click on [Print] button to print the report. [Cancel] button will take one back to the Reports Page.
The purpose of this report is to display the
names of the patients who are marked for billing in [Service Details]
option. In [Service Details] option, the "Bill"
Indicator is marked as "P" or "S" indicating
the payment to be received from Primary Insurance Company or Secondary Insurance
Company. The patients with such indicator is said to be marked for billing.
Thus, this report displays the names of these patients. The report displays the
names of patients and the name of the insurance company to whom the bill is to
be sent.
Screen 10 - Selection Criteria for Ready to Bill Report
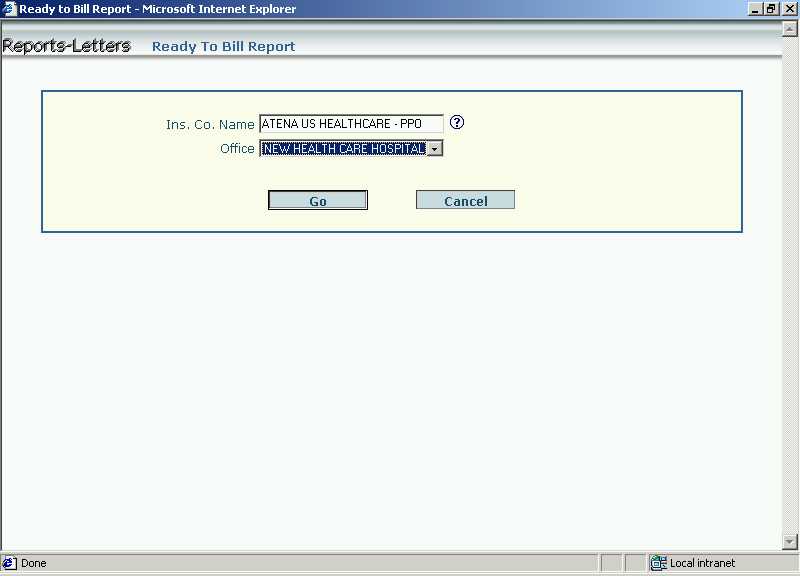
In the above screen, enter the following selection criteria to generate the
report :-
Click on [Go] button to execute the report.
[Cancel] button will take back to the Reports Page.
Screen 11 - Ready to Bill Report
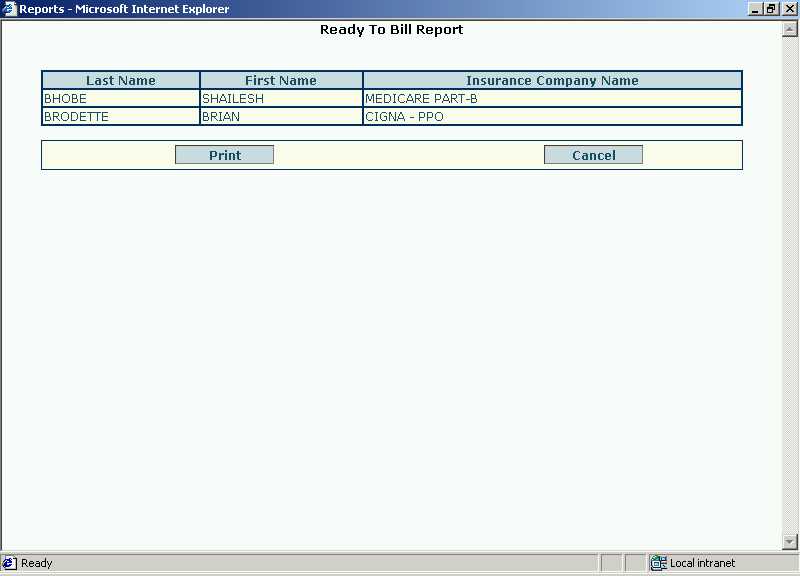
The report displays,
Click on [Print] button to print the report. [Cancel] button will take one back to the Reports Page.
This reports enables the physician to get the names of all
his patients
referred by the specified physician between the specified start and end dates.
Screen 12 - Selection Criteria for Referring Physician Report
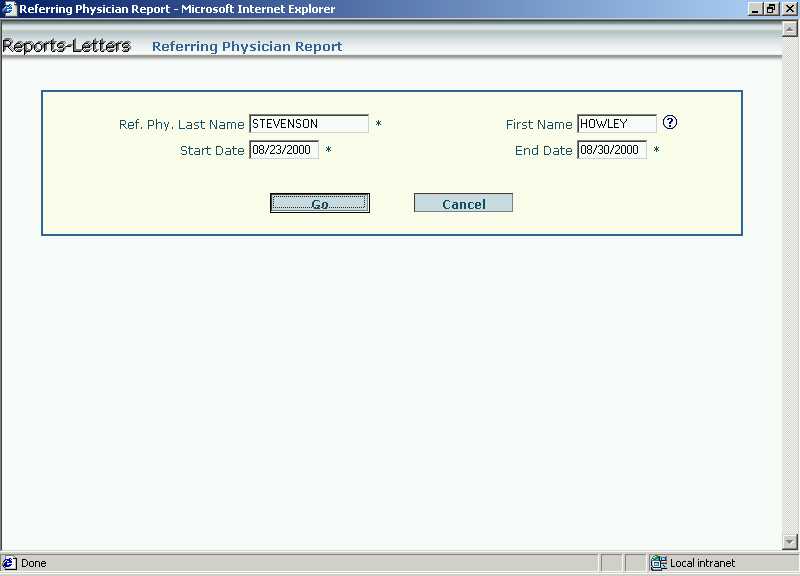
In the above screen, enter the following selection criteria to generate the
report :-
Click on [Go] button to execute the report.
[Cancel] button will take back to the Reports Page.
Screen 13 - Referring Physician Report
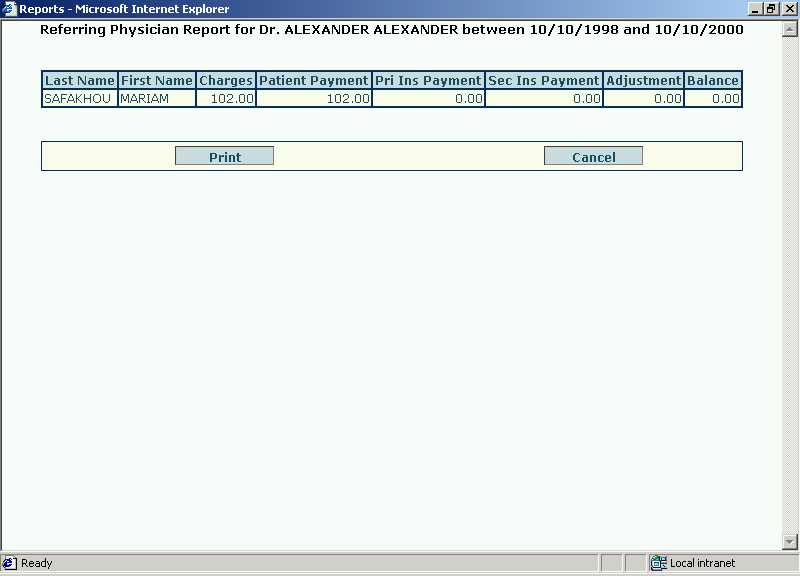
The report displays,
Click on [Print] button to print the report. [Cancel] button will take one back to the Reports Page.
The physician enters some remarks about his
patient in the [Patient Profile] option. The remarks are pertaining to
the diagnosis done of the patient. This reports enables the physician to get the
names of patients and final diagnosis for all your patients with the specified
Diagnosis.
Screen 14 - Selection Criteria for Salient Remarks Search Report
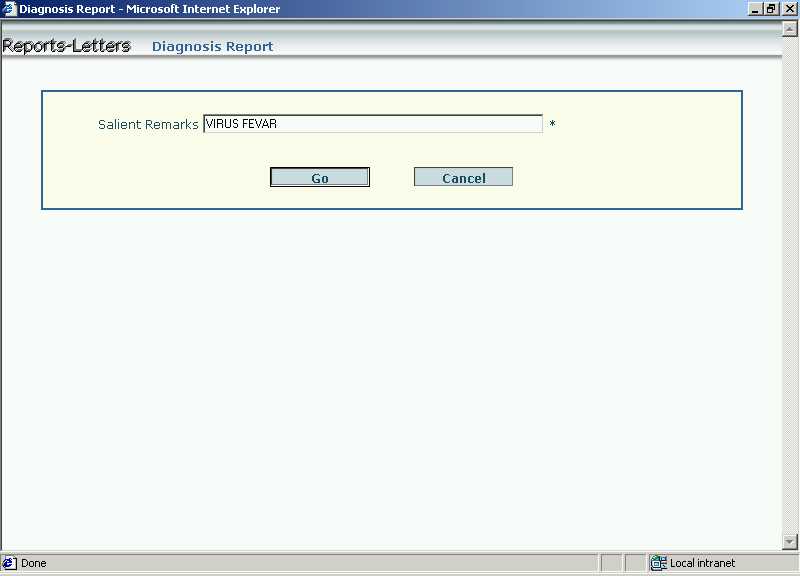
In the above screen, enter the following selection criteria to generate the
report :-
Click on [Go] button to execute the report.
[Cancel] button will take back to the Reports Page.
Screen 15 - Salient Remarks Search Report
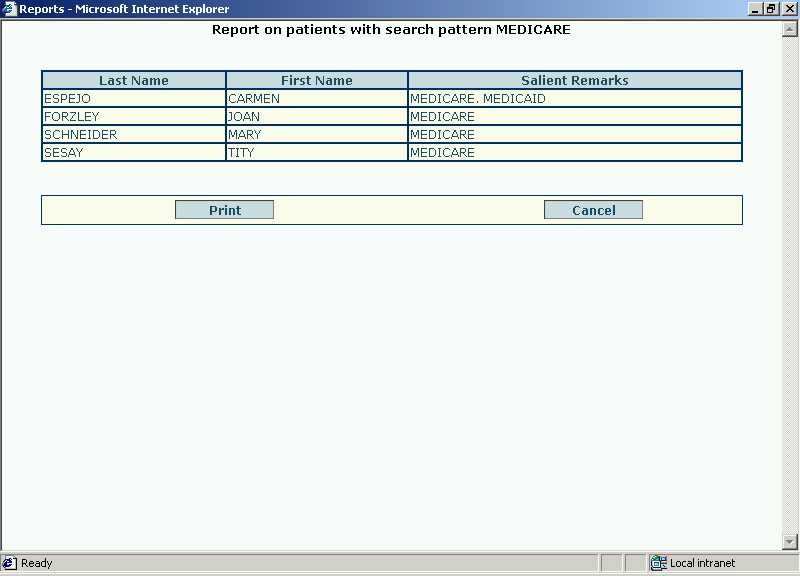
The report displays,
Click on [Print] button to print the report. [Cancel] button will take one back to the Reports Page.
Service Activity Report
This reports enables the physician to get the details of service provided to
all his patients between the specified start and end dates. The report gives
the financial details like service charges, payments done by the patient,
primary and secondary insurance company, adjustment, if any and the balance to
be received.
Screen 16 - Selection Criteria for Service Activity Report
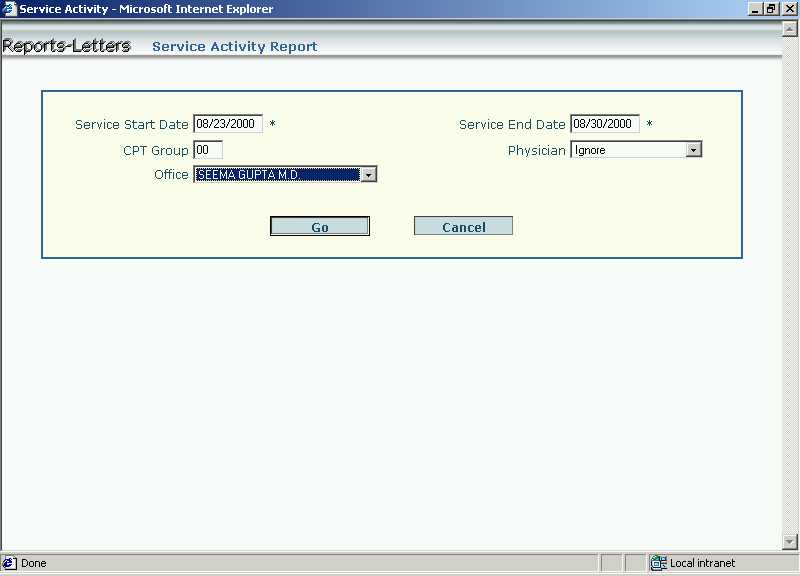
In the above screen, enter the following selection criteria to generate the
report :-
Click on [Go] button to view the report.
[Cancel] button will take back to the Reports Page.
Screen 17 - Service Activity Report
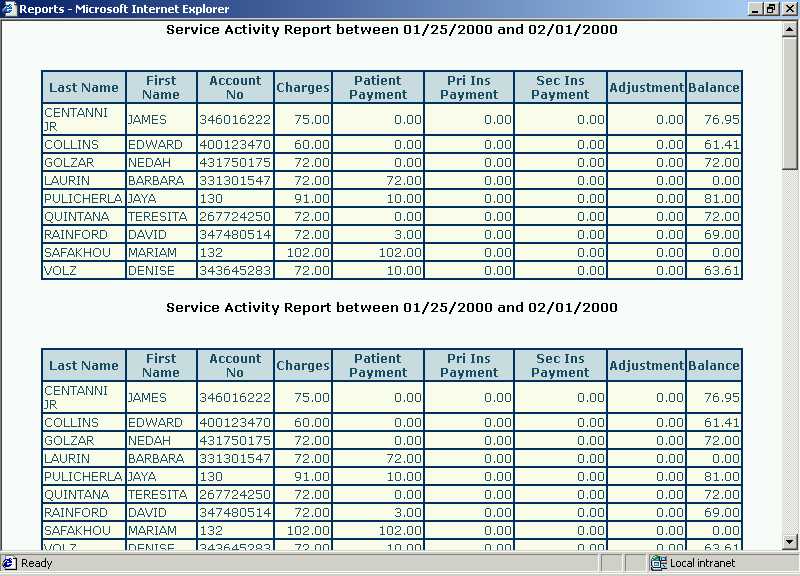
On the above report screen, click on [Print] button to print the
report. [Cancel] button will take one back to the Reports Page.
Money Received Report
The purpose of this report is to get the details of payment received from the patients
or the primary / secondary insurance company between the specified start and end dates. The report gives
the details like patient name, payments done by the patient,
primary insurance company and secondary insurance company.
Screen 18 - Selection Criteria for Money Received Report
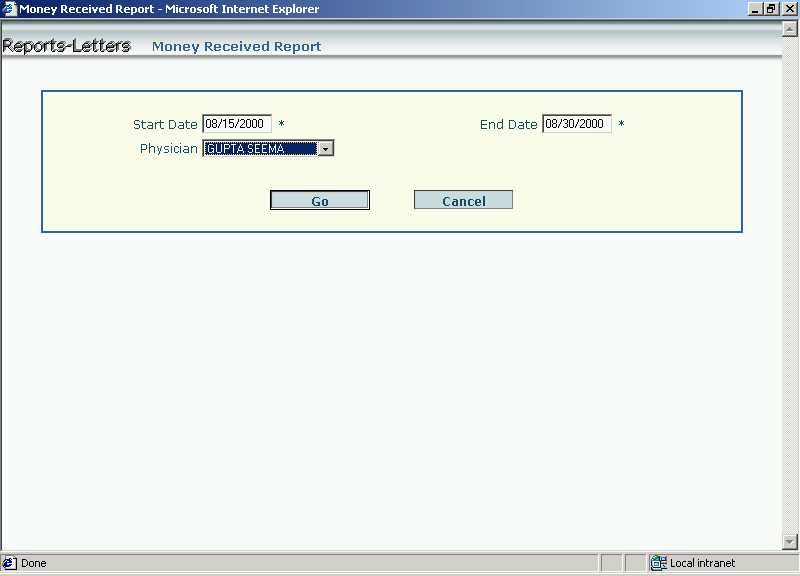
In the above screen, enter the following selection criteria to generate the
report :-
Click on [Go] button to execute the report.
[Cancel] button will take back to the Reports Page.
Screen 19 - Money Received Report
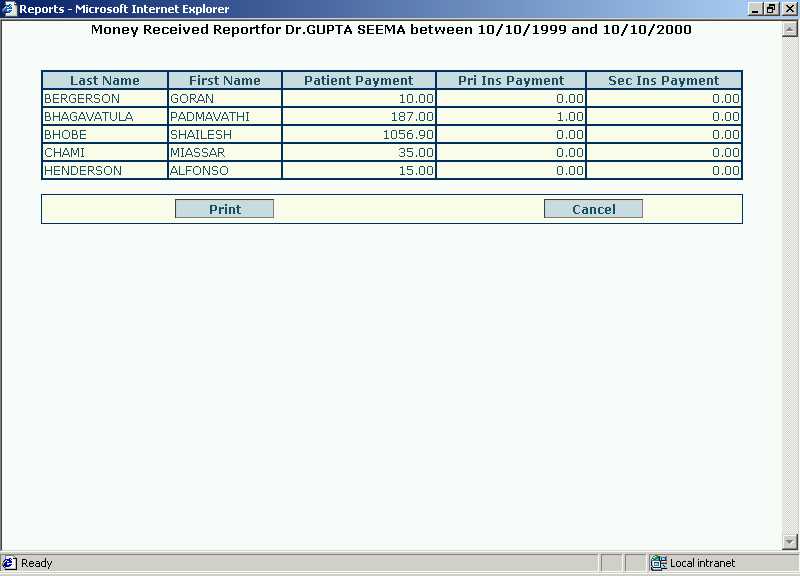
The report displays,
Click on [Print] button to print the report. [Cancel] button will take one back to the Reports Page.
Money Refunded Report
Sometimes, the physician receives more money against the actual bill amount. In
such a case, he has to return the extra money back to the patient or the primary
or secondary insurance company. This report displays the name of the patient and
the amount to be refunded to the patient or the primary or secondary insurance
company.
Screen 20 - Selection Criteria for Money Refunded Report
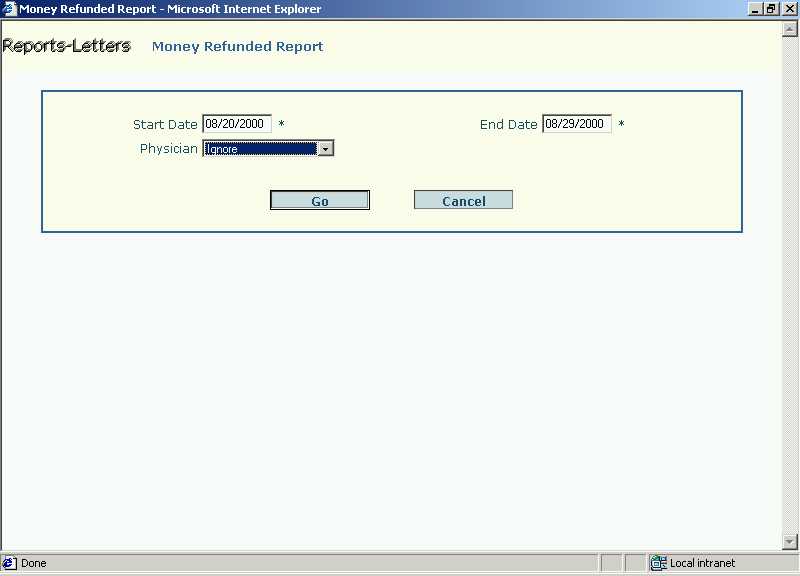
In the above screen, enter the following selection criteria to generate the
report :-
Click on [Go] button to execute the report.
[Cancel] button will take back to the Reports Page.
Screen 21 - Money Refunded Report
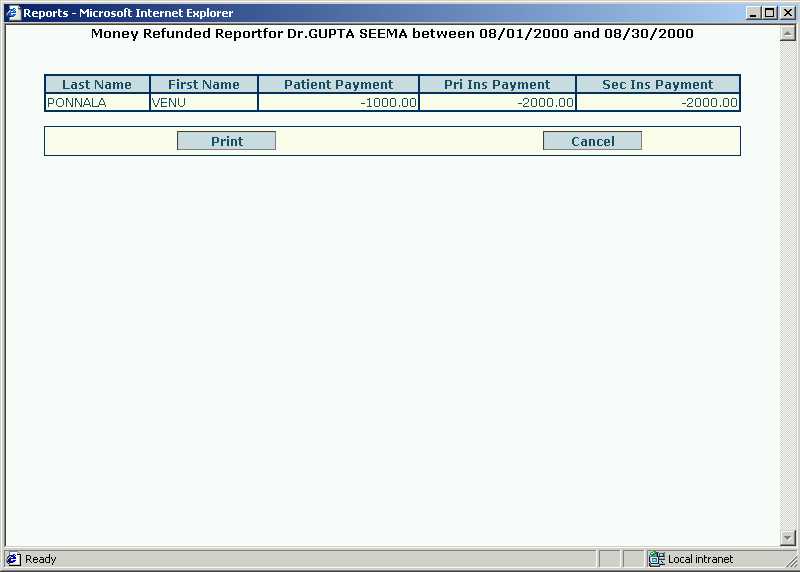
The report displays,
Click on [Print] button to print the report. [Cancel] button will take one back to the Reports Page.
Money Adjusted Report
The purpose of this report is to display the names of the patients against
whom the adjustment of money is done. Sometimes, the patient or the primary or
secondary insurance companies may pay the partial amount of the actual bill
amount. The amount left is ignored and is not paid. The physicians in such case,
write off the partial amount (if the amount is small) and make the balance zero
for that patient. This report displays the names of such patients along with the
adjustment amount.
Screen 22 - Selection Criteria for Money Adjusted Report
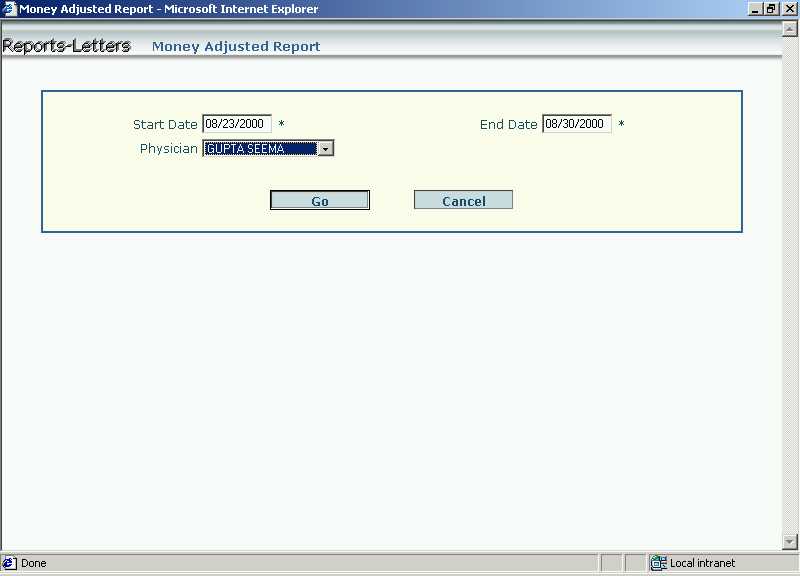
In the above screen, enter the following selection criteria to generate the
report :-
Click on [Go] button to execute the report.
[Cancel] button will take back to the Reports Page.
Screen 23 - Money Adjusted Report
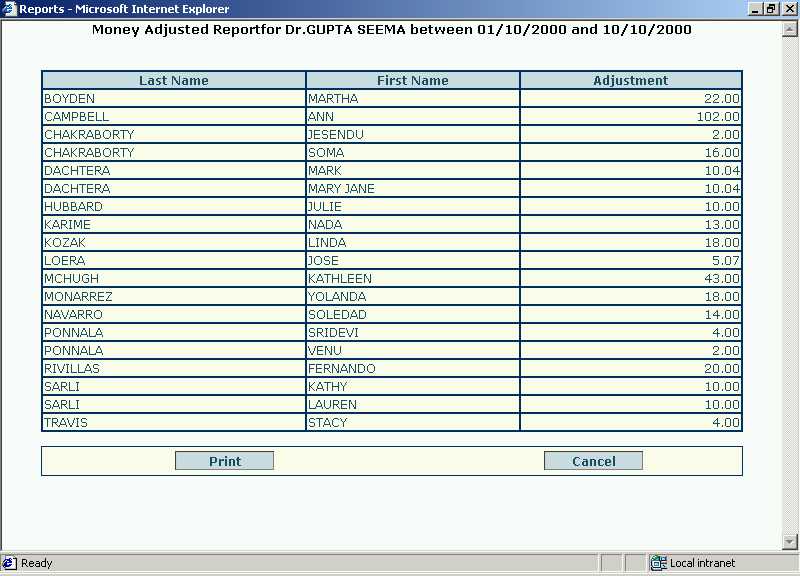
The report displays,
Click on [Print] button to print the report. [Cancel] button will take one back to the Reports Page.
Money Billed to Insurance Report
The purpose of this report is to let the physician know the amount billed
either to all the primary insurance companies or secondary insurance companies
between the specified dates. The report gives
the details like patient name, and the service bill amount to be received from
the patient.
Screen 24 - Selection Criteria for Money Billed to Insurance Report
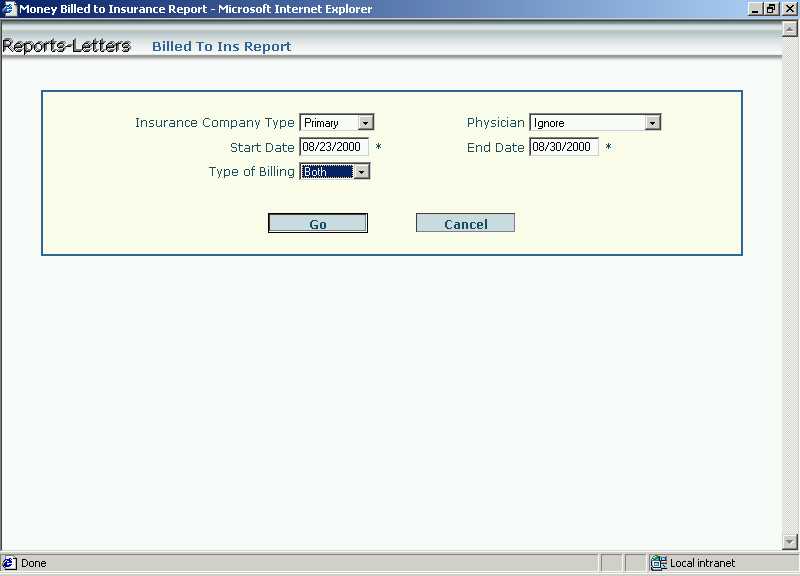
In the above screen, enter the following selection criteria to generate the
report :-
Click on [Go] button to view the report.
[Cancel] button will take back to the Reports Page.
Screen 25 - Money Billed to Insurance Report
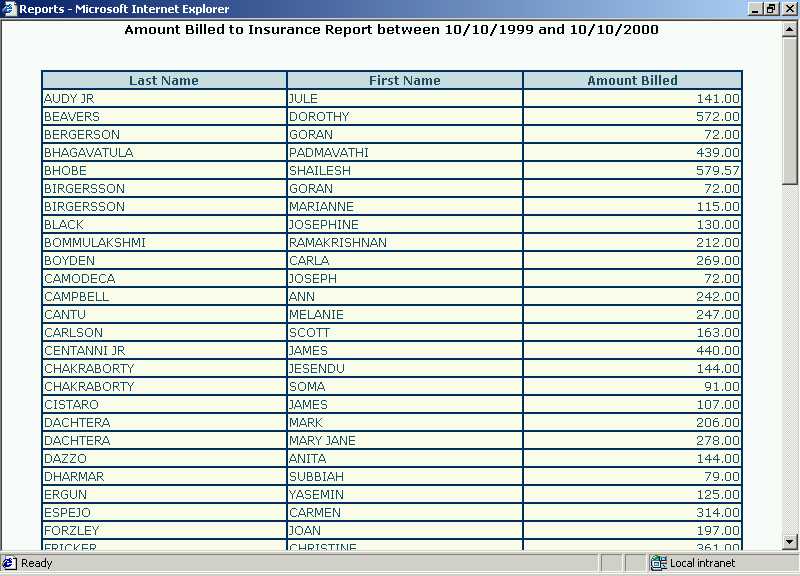
The report displays,
Click on [Print] button to print the report. [Cancel] button will take one back to the Reports Page.
Productivity Report
This report gives the details of work done by the office staff / secretary of
the physician within a specific period. It displays the service details
entries done in the [Service Details] option by the secretary of the
physician.
Screen 26 - Selection Criteria for Productivity Report
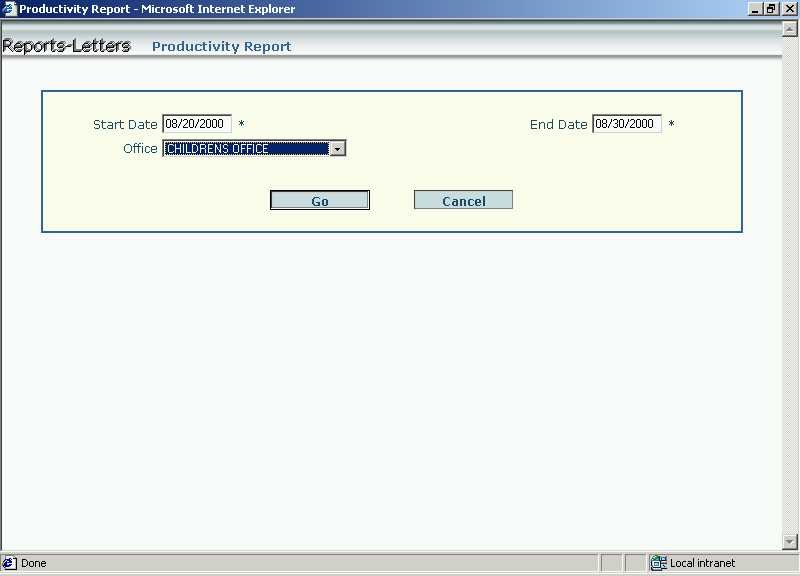
In the above screen, enter the following selection criteria to generate the
report :-
Click on [Go] button to execute the report.
[Cancel] button will take back to the Reports Page.
Screen 27 - Productivity Report
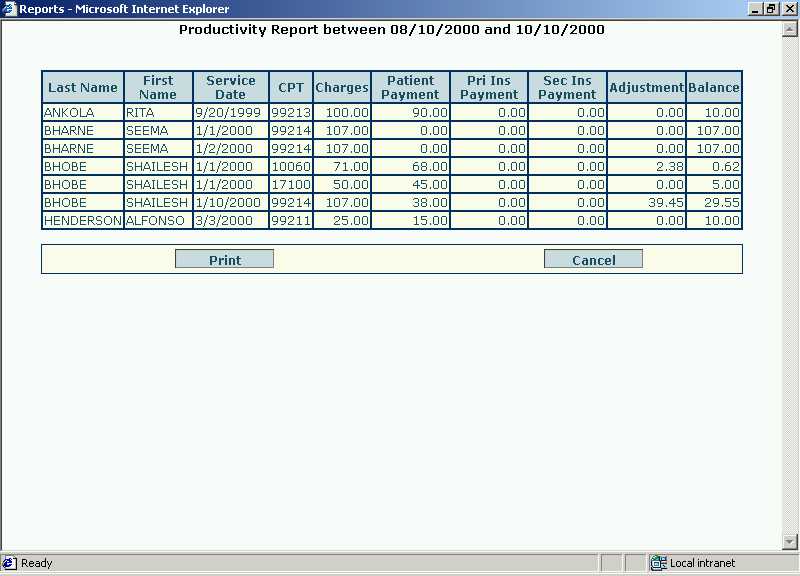
The report displays the service details of the patients.
Click on [Print] button to print the report. [Cancel] button will take one back to the Reports Page.
Insurance Related Reports
Procedure Report
The purpose of the Procedure Report is to provide information to the physician
on the revenue generated by a CPT (Procedure) code between the specified
periods. This can be useful in deciding if any equipment associated with the
concerned CPT code should be bought or leased. Another advantage of this
report is that, the physician now has data on the average payment provided by
the insurance companies for the concerned CPT. Also, by specifying the
optional Insurance Company name, the physician can also get this data for each
of the Insurance Company he/she is dealing with.
Screen 28 - Selection Criteria for Procedure Report
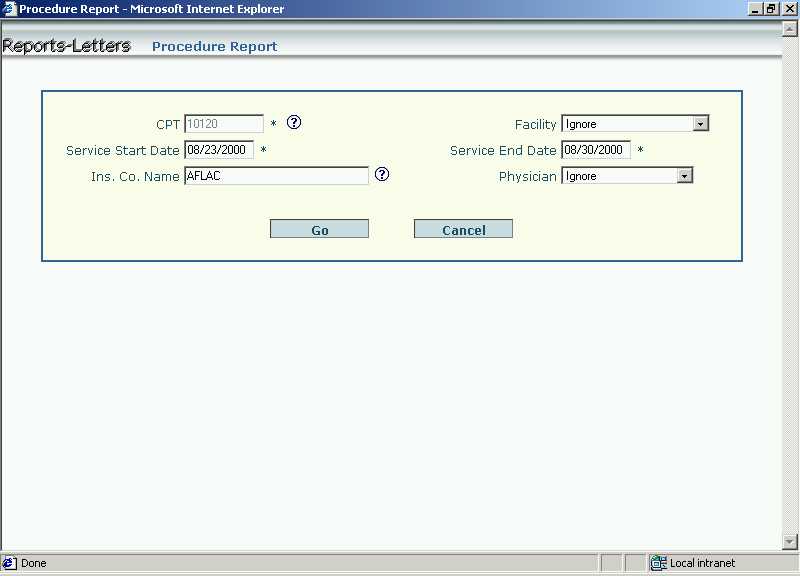
In the above screen, enter the following selection criteria to generate the
report :-
Click on [Go] button to view the report.
[Cancel] button will take back to the Reports Page.
Screen 29 - Procedure Report
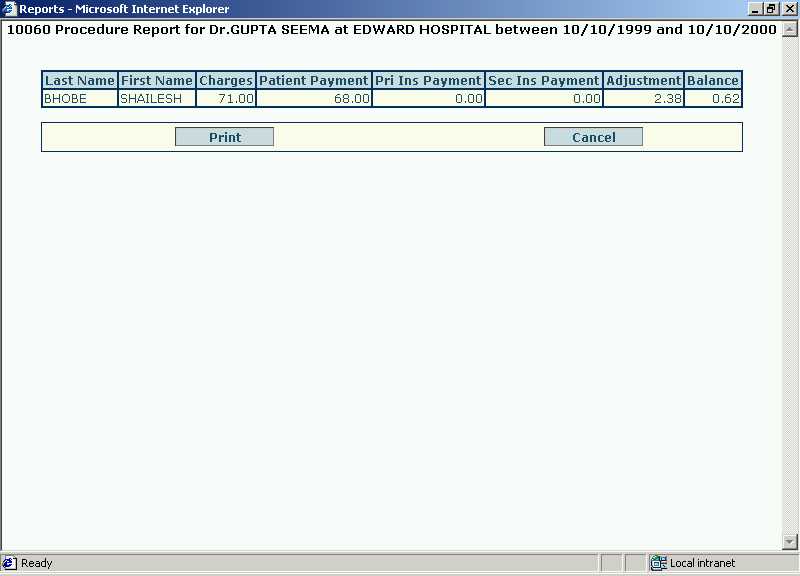
On the report once you view the details, click
on [Print] button to print the report. [Cancel] button will take
one back to the Reports Page.
Insurance Group Activity Report
The Insurance Group Activity report enables the physician to know the
financial activity (charges, payments and balances) between the specified dates
of services by different groups of insurance companies.
For example, the user may split all the insurance companies into 10 groups,
e.g., Medicare, Publicaid, PPOs, HMOs, Commercial etc. This report would then
tell the physician how the financial activity is spread across these ten
insurance groups between the specified dates of service.
Thus in this report, service date is made use of and it displays - Insurance
Group Number and Name, Charges, Amount Paid by the Insurance Companies (both
primary and secondary if applicable) and the Patient and the Balance Owed by the
Patient.
Screen 30 - Selection Criteria for Insurance Group Activity Report

In the above screen, enter the following selection criteria to generate the
report :-
Click on [Go] button to execute the report.
[Cancel] button will take back to the Reports Page.
Screen 31 - Insurance Group Activity Report
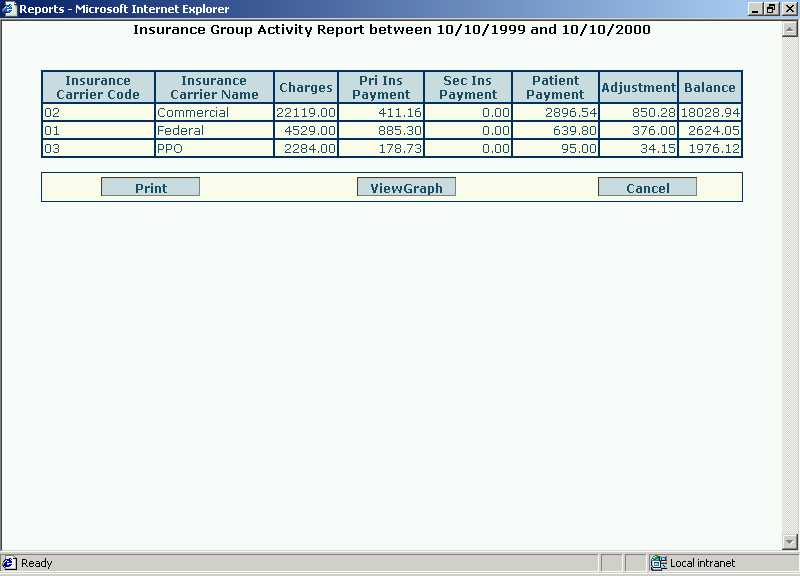
On the report once you view the details, click
on [Print] button to print the report. [Cancel] button will take
one back to the Reports Page. Click on [View Graph] to view the
graphical representation of the report. It shows the charges to be paid by the
patient, insurance companies and the adjustment against it for different
Insurance Carriers, like Commercial, Federal, etc.
On the graph you can see two buttons. Click
on [Print] button to print the graph. [Cancel] button will take
one back to the Reports Page.
The purpose of this report is to get the Patient Name, Charges, Amount Paid by the Insurance Companies and the Patient and the Balance Owed by the patient for the specified Insurance Company. This report displays the primary insurance company details for all the patients.
Screen 32 - Selection Criteria for Insurance Summary Report
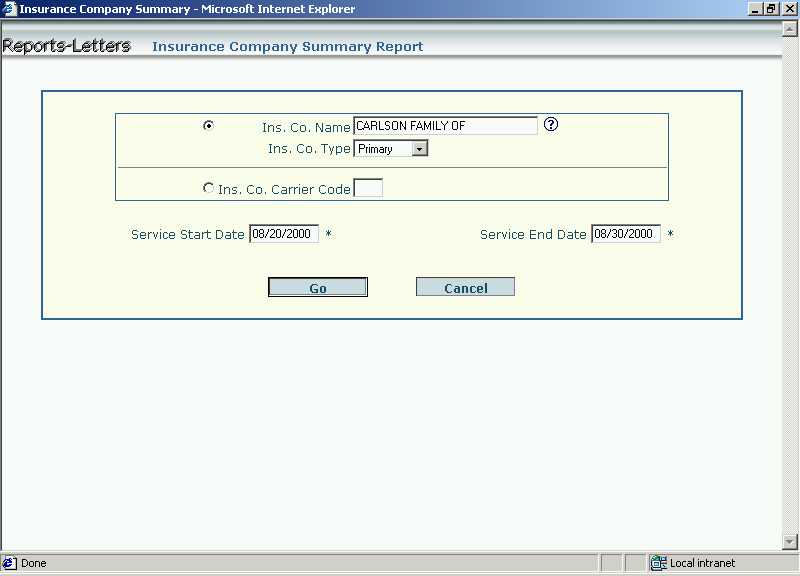
In the above screen, enter the following selection criteria to generate the
report :-
Click on [Go] button to execute the report.
[Cancel] button will take back to the Reports Page.
Screen 33 - Insurance Summary Report
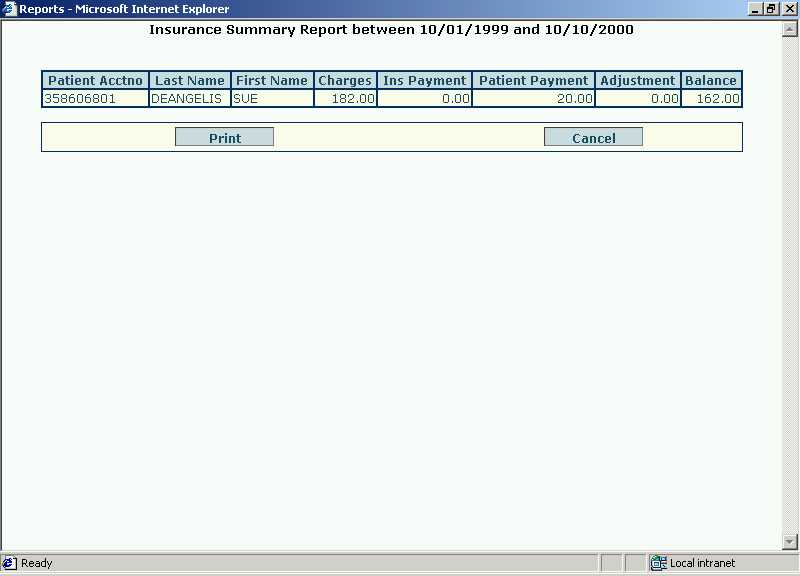
On the report once you view the details, click
on [Print] button to print the report. [Cancel] button will take
one back to the Reports Page.
Primary Insurance Detail Report
The Primary Insurance Details report is exactly like the Insurance Summary report except that in Primary Insurance Details report, the individual service details for each patient are separately displayed while they are shown together in the Insurance Summary report.
Screen 34 - Selection Criteria for Primary Insurance Detail Report
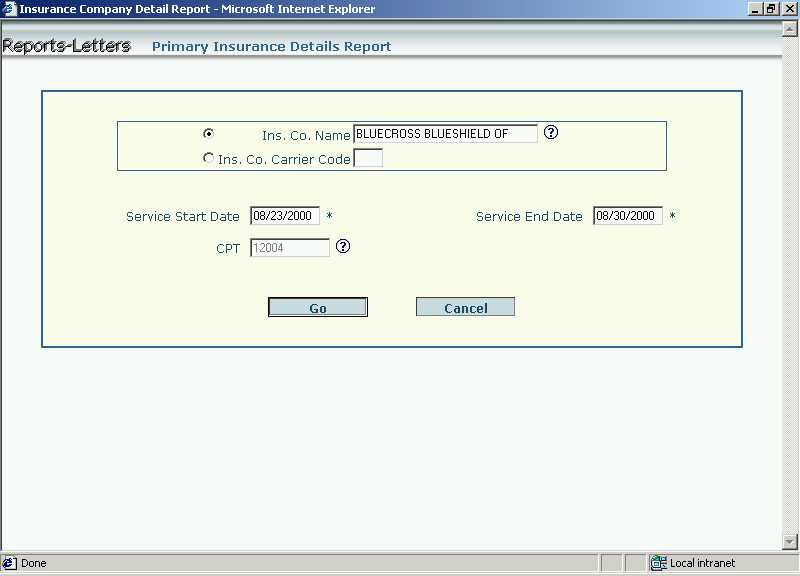
In the above screen, enter the following selection criteria to generate the
report :-
Click on [Go] button to execute the report.
[Cancel] button will take back to the Reports Page.
Screen 35 - Primary Insurance Detail Report
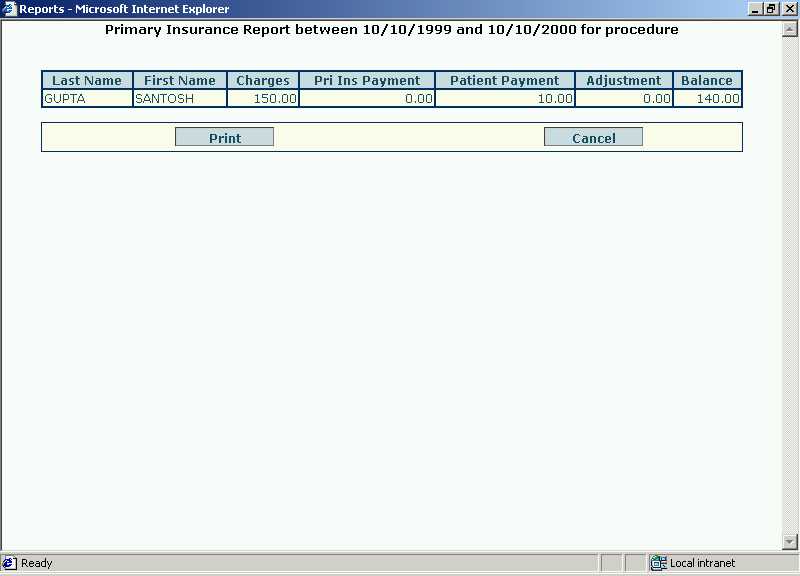
On the report once you view the details, click
on [Print] button to print the report. [Cancel] button will take
one back to the Reports Page.
The purpose of the Board Certification
Report is to display the names of the patients, their age, the referring
physician and the date of service on which the specified procedure was
performed. The report is also bounded by the specified dates of service.
Screen 36 - Selection Criteria for Board Certification Report
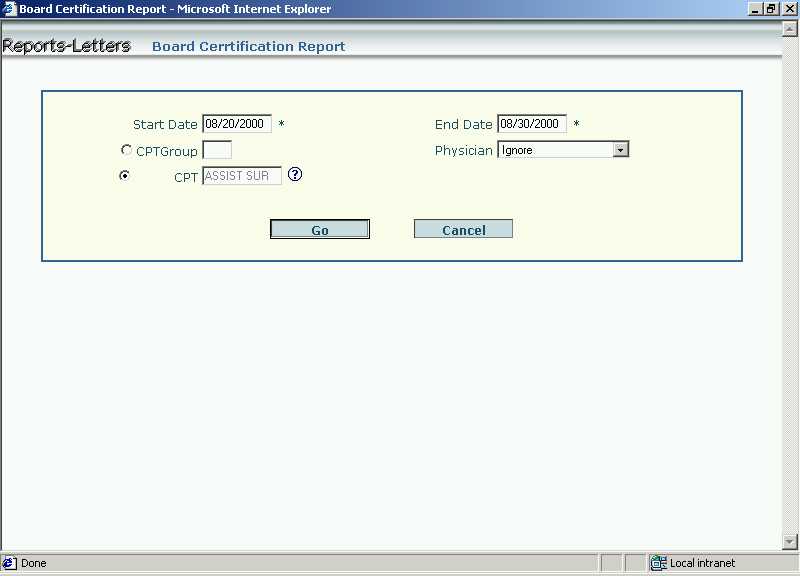
In the above screen, enter the following selection criteria to generate the
report :-
Click on [Go] button to execute the report.
[Cancel] button will take back to the Reports Page.
Screen 37 - Board Certification Report
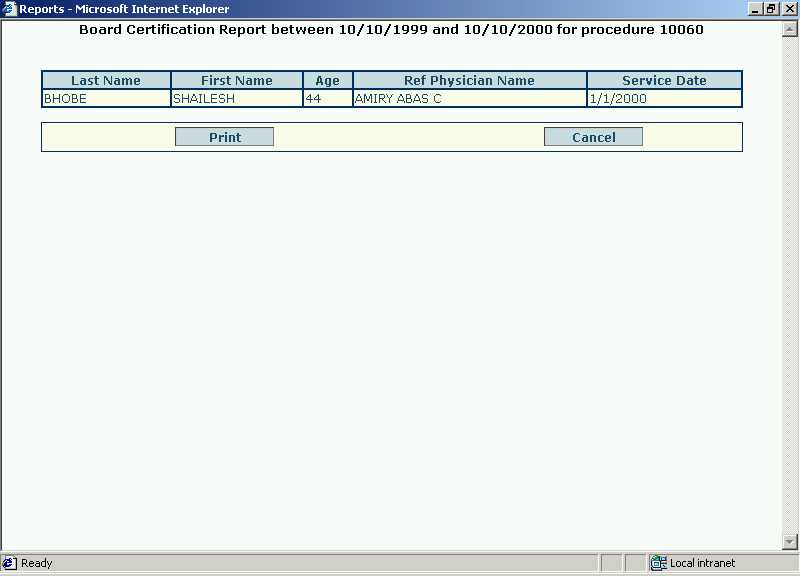
On the report once you view the details, click on [Print] button to print the report. [Cancel] button will take one back to the Reports Page.
Paper Claims
The billing capability allows the user to prepare and print the patient's claims on HCFA-1500 and Medicaid Insurance forms. Most insurance companies accept paper claims on the HCFA-1500 forms. In some states, Publicaid/Medicaid may require you to submit paper claims on their forms. Please check with your insurance companies regarding this matter. Note that during the provisioning of the insurance company information, the type of form to be used was indicated.
There are two modes in which claims can be printed - batch mode and individual mode. The latter is discussed in this chapter. The former allows one to print the claims for an individual patient and this functionality is accessed from the service details screen.
"Bill Insurance" option enables the
physician to print the patient's claims on the above two forms.
To print the claims on paper in batch mode, click on
"+ sign adjacent to Bill Insurance" option.
Screen 1 - Practice Home Page - Paper Claims
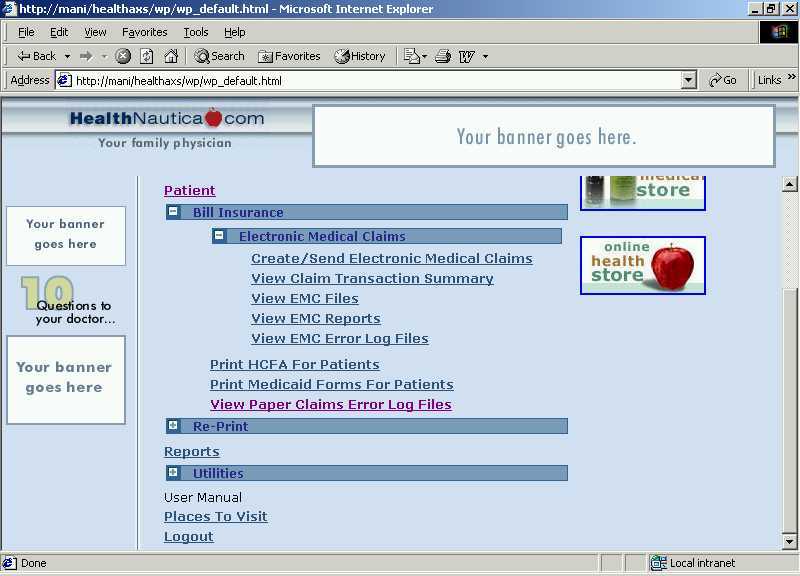
One can print a patient's claims on either HCFA Form or Medicaid Form. To print the claim on HCFA Form, click on "Print HCFA Forms" option. If the printing is to be done on the Medicaid Form, click on "Print Medicaid Forms" option.
View Paper Claims Error Log Files
If there are any errors while preparing and printing the claims on the HCFA or Medicaid Insurance Forms, then those errors are logged and saved in a ".err" file. This option enables to view such saved error log files.
Screen 2 -View Paper Claims Error Log Files
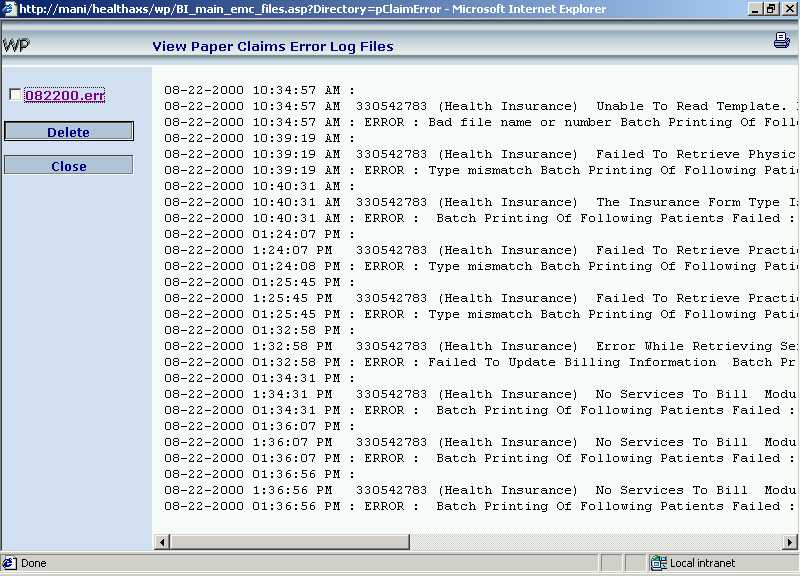
In the above screen, click on the file name to see the details of the file. You
can delete the old error log files which are not required by clicking the check
box adjacent to the file name and then clicking the [Delete] button. [Close]
button will take back to the WebPractice Home Page.
This option enables one to reprint the claims on the HCFA insurance form for a specified bill date. This is done for the following reasons:
Screen 3 -Search Criteria for Reprint HCFA
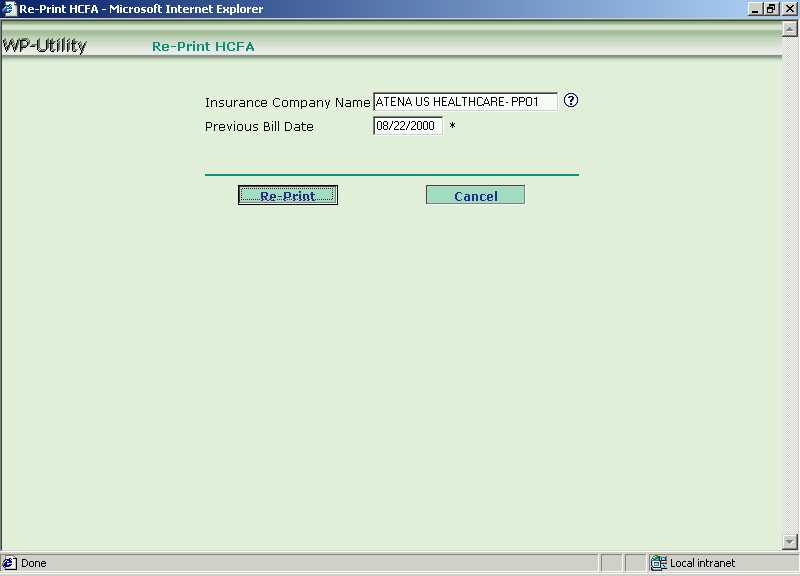
In the above screen,
The [Re-print] button will reprint the data on the insurance form. [Cancel] button will take back to the WebPractice Home Page.
Reprint Medicaid Insurance Forms
This option enables one to reprint the claims on the Medicaid insurance form for a specified bill date. This is done for the following reasons:
To reprint the claim on the Medicaid form, click on "+ sign adjacent to Re-print" option. And select the "Medicaid Form" option.
Screen 4 -Search Criteria for Reprint Medicaid Form
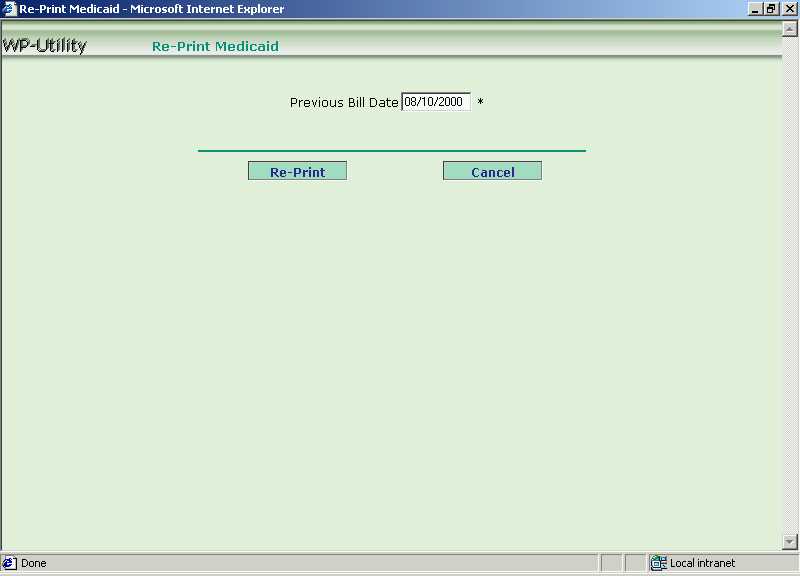
In the above screen,
The [Re-print] button will reprint the data on the insurance form. [Cancel] button will take back to the WebPractice Home Page.
Electronic Claims
Submitting Electronic Claims means transmitting the medical claims electronically to the clearing house with whom you have a signed agreement.
Handling claims electronically eliminates many of the delays involved in filing paper claims, such as the time the post office takes to deliver the forms; and the time it takes the data entry staff at the insurance company to re-enter information into their computers.
To go to the Electronic Claims option,
click on "+ sign adjacent to Bill Insurance" option. Then click
on "+ sign adjacent to Electronic Medical Claims" option.
Screen 1 - Practice Home Page - Electronic Claims
Create / Send Electronic Claims
This option enables one to create and submit the claims to the clearing house electronically. The claims which are ready to be submitted are put in one file.
Note that during the provisioning of the insurance company information, one has to set the Electronically Billable option to Yes only for those insurance companies whose claims are accepted eletronically by the clearing house.
View Claims Transaction Summary
Once the claim file is created, an entry is created in the
log file summarizing the results.This summary of claims, which are put in one file,
can be viewed using this option. Click on the option to see the following
display.
Screen 2 - View Claims Transaction Summary
![]()
The transaction summary displays the following details :-
[Cancel] button will take back to the Practice Home Page.
The EMC (Electronic Medical Claims)
file contains all the claims that were marked for Electronic Transmission
in a suitable format. The file is named as - today’s date followed by a number
from 1 to 99. This allows for multiple files (up to 99) on any given single day.
The file suffix is std . Leave the file with the txt suffix alone.
Screen 3 -View EMC Files
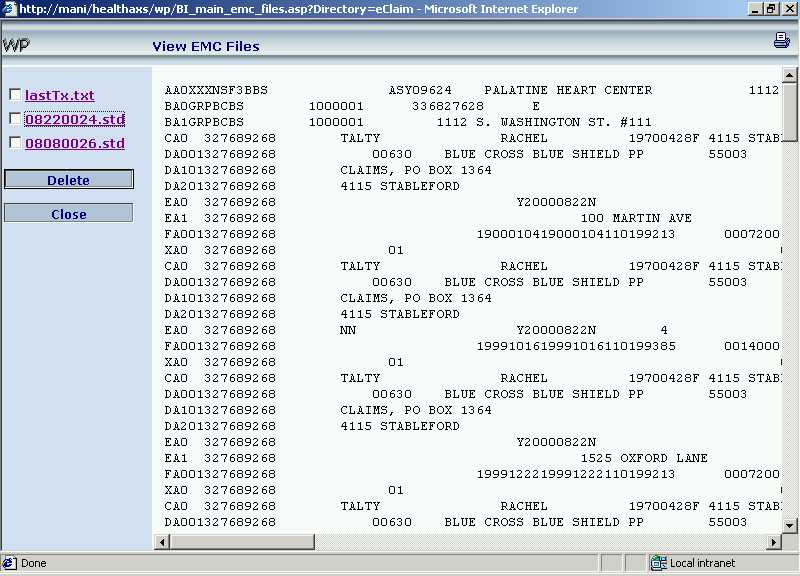
In the above screen, click on the file name to see the details of the file. Please
delete the old files which are not required by clicking the check box
adjacent to the file name and then clicking the [Delete] button. [Close]
button will take back to the WebPractice Home Page.
The EMC (Electronic Medical Claims)
reports are downloaded from the clearing house. The reports give the
disposition on the claims submitted to the clearing house. Please look at this file to
confirm that all the claims were received by the clearing house without any errors.
In case there are any errors, these will have to be fixed and the corresponding claim/s
resubmitted.
Screen 4 -View EMC Reports
In the above screen, click on the file name to see the details of the file. Please
delete the old reports which are not required by clicking the check box
adjacent to the file name and then clicking the [Delete] button. [Close]
button will take back to the Practice Home Page.
If there are any errors while transmitting the claims electronically, then those errors are logged and saved in a ".err" file whose format is yymmddxx.err. This option enables to view such saved error log files.
Screen 5 -View EMC Error Log files
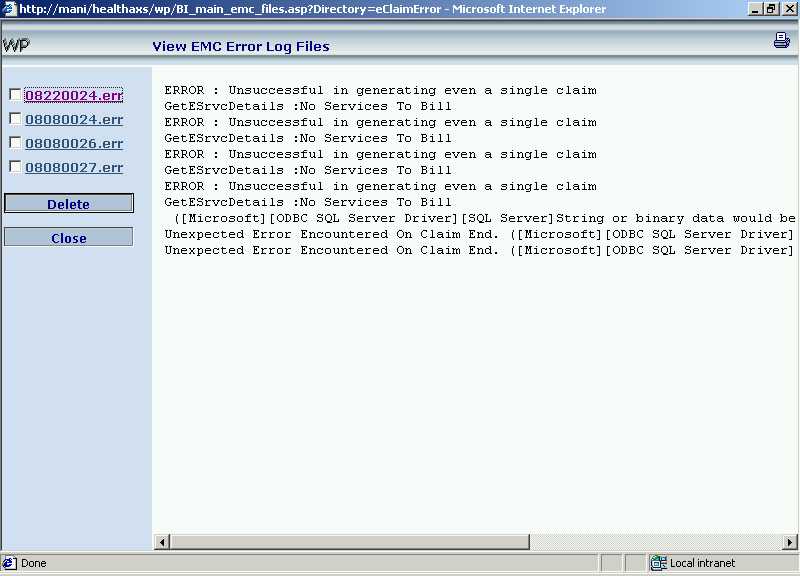
In the above screen, click on the file name to see the details of the file. Please
delete the old error log files which are not required by clicking the check
box adjacent to the file name and then clicking the [Delete] button. [Close]
button will take back to the Practice Home Page.
Miscellaneous Utilities
The WebPractice provides many miscellaneous utilities to a physician. These are:
Print Insurance Company Name Labels
The insurance company name labels need to be
printed for mailing claims to the insurance companies. To print the insurance company name
labels,
click on "+ sign adjacent to Utilities". Click on the [Print Insurance Company
Name Labels] option. The following screen will be displayed.
Screen 1 - Search Criteria for printing the insurance company labels
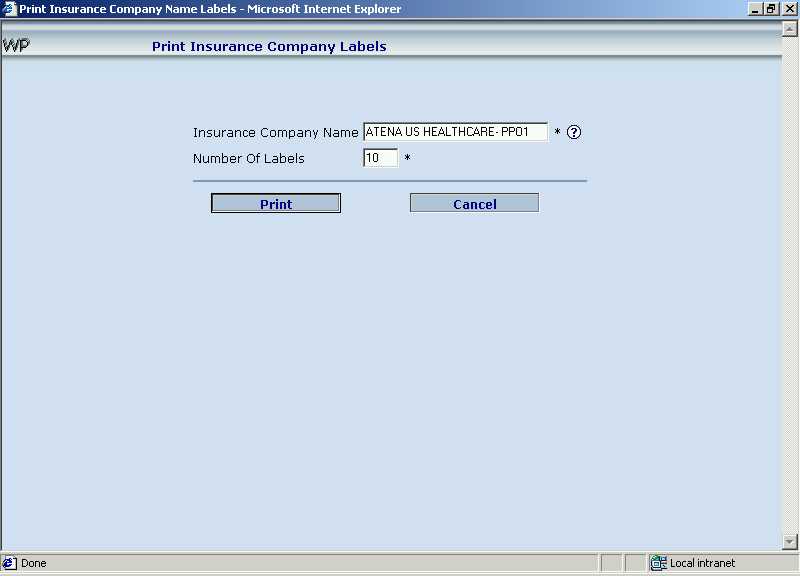
In the above screen,
Click on [Print] button to print the labels. [Cancel] button will take back to the WebPractice Home Page.
Mark Service Details Historical
Service details that are deemed old can be marked historical
so that they don't show up when viewing the service details.
To mark the service details of a patient historical,
click on "+ sign adjacent to Utilities". Click on the [Mark
Service Details Historical] option. The following screen will be displayed.
Screen 2 - Mark Service Details Historical

In the above screen,
Click on [Submit] button to mark the service details historical. [Cancel] button will take back to the Practice Home page.
In order to reduce clutter and improve response time, one
should periodically delete old appointments.
To delete the old appointments,
click on "+ sign adjacent to Utilities". Click on the [Delete
Old Appointments] option. The following screen will be displayed.
Screen 3 - Delete Old Appointments
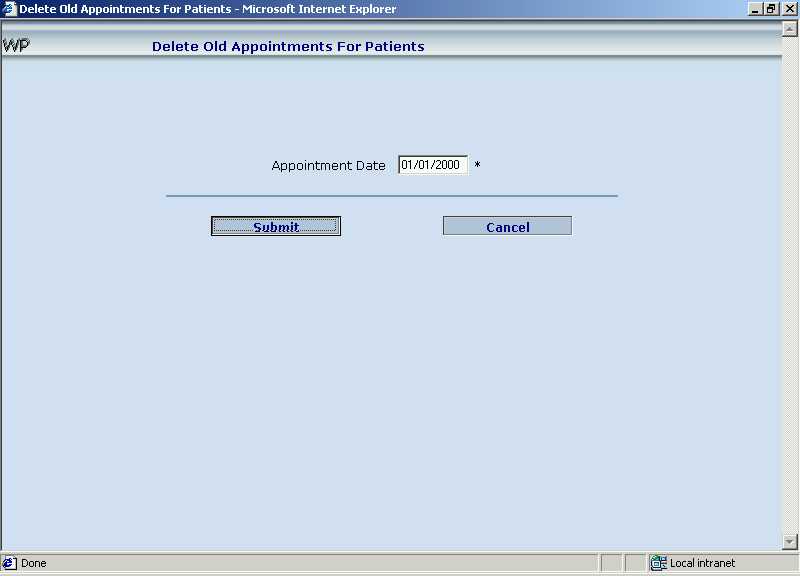
In the above screen,
Click on [Submit] button which will delete the appointments prior to the entered date. [Cancel] button will take back to the Practice Home page.
You can send any suggestions or comments about the site to HealthNautica.com through this option.
To send suggestions,
click on "Suggestions" option on the Practice Home Page. The following screen will be displayed.
Screen 4 - Send Suggestions
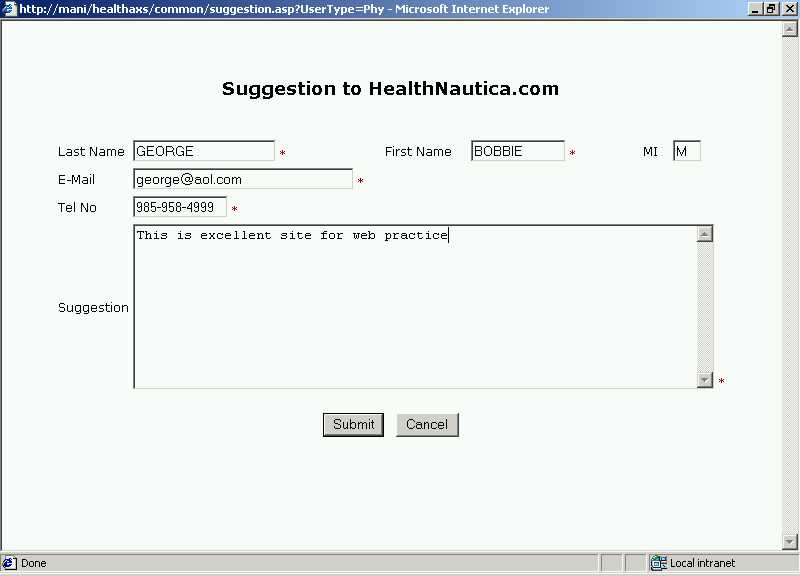
In the above screen, enter,
Click the [Submit] button to send the suggestions to HealthNautica.com. [Cancel] will take one back to the Practice Home Page.
Feedback
Please contact HealthNautica.com regarding any suggestions for enhancements, improvements, feedback, errors etc., by sending an email to "support@HealthNautica.com". Or alternatively, on the WebPractice home page, click on the Suggestions hyperlink or on the HealthNautica.com home page, click on the Contact Us hyperlink.
If you would like to write or speak to us, our address is:
HealthNautica.com Inc.
3817 Green Trails Drive
Woodridge, IL 60517
Tel. No. (630) 961-3618
Fax. No. (630) 961-5469