Scheduling Appointments
The WebScheduler feature of WebPractice helps a
physician manage patient appointments online. As a result, appointments of any
patient can be immediately pulled up for perusal or rescheduling. Physicians can also
block off time during which appointments are not available. Since everything is online,
if the physician has given permission (by setting a parameter during the provisioning
of the office data), patients can also schedule their own appointments online. This
results in fewer interrruptions at the physician's office thereby increasing the
staff productivity. If the patients are not permitted to schedule online, then they
may request an appointment. However, a patient is always permitted to cancel his
appointment.
Schedule Alert
The physician may not allow his patients to
schedule their appointments on-line. In such a case, the
patient can only request an appointment. These requested appointments
show up under "New Patient Alert" on the WebPractice Home Page.
The physician
can then select these requested appointments and either approve them
or deny them.
To view the requested appointments,
click on "Appointment Request Alert" hyperlink. The page showing
the appointment requests from all the patients is displayed.
Screen 1 - Appointment Request Alert Page
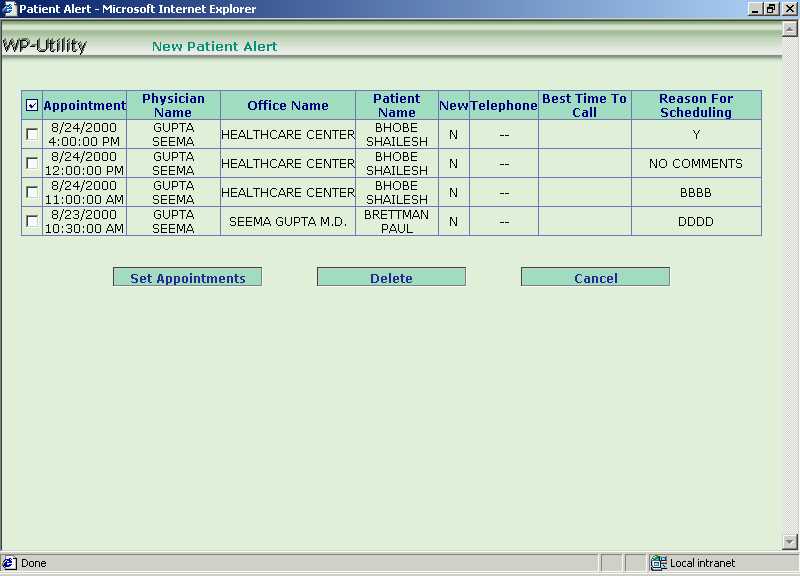
The above screen displays a list of patients who have requested appointments. The list gives the following information :-
- Select check box,
- Appointment Date and Time,
- Physician Name whose appointment is taken,
- Office Name,
- Patient Name,
- New Patient / Existing Patient Indicator,
- Telephone number of the patient,
- Best Time to Call, and
- Reason for Scheduling the appointment.
From the above screen, one can either
approve the appointment or cancel the appointment. To approve the appointment,
select check box with a tick mark and click the [Set Appointment]
button. These then show up in the scheduler. To deny the appointment, select the check box with a tick mark, and
click the [Delete] button. The [Cancel] button will take one
back to the WebPractice Home Page.
Scheduler
Within a practice that contains multiple physicians
and multiple offices, appointments are scheduled for a particular physician at a particular
office. Depending upon the login type (i.e. Practice Level vs. Office Level), one either
sees all the physicians belonging to a practice or only those associated with a particular
office.
To open the "Scheduler",
click on physician name with his office under the "Scheduler" option. The "Scheduler
Page" for that physician is displayed. The "Scheduler
Page" shows three tabs - Schedule, View and Block.
Schedule
To schedule an appointment, on "Scheduler
Page", select "Schedule" tab.
Click the radio button adjacent to the week in which the appointment is to be
scheduled. Then click the [Go] button. While scheduling, the physician
cannot schedule any appointments for previous dates.
The following screen is displayed.
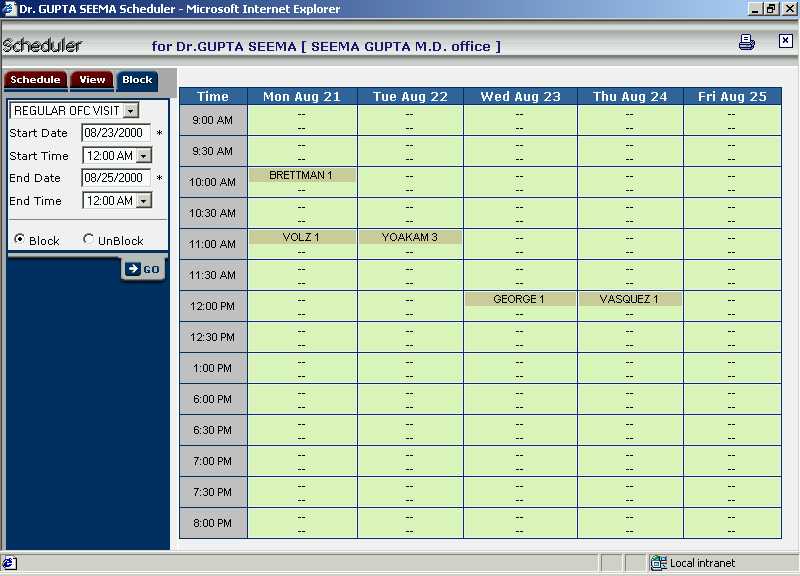
Screen 2 - Scheduler along with the Calendar
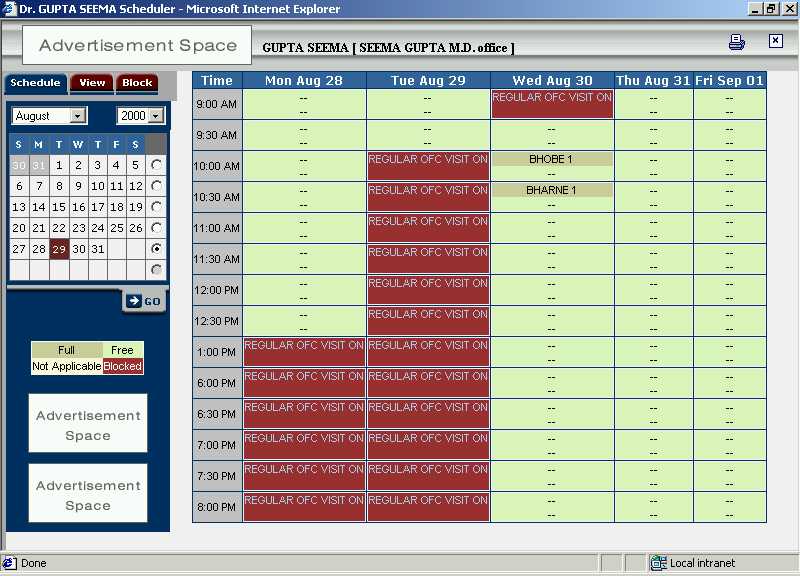
On Screen 2, click the day of the week and the time slot to schedule the
appointment. The Screen 3 will be displayed.
Screen 3 - Patient Appointment Scheduling
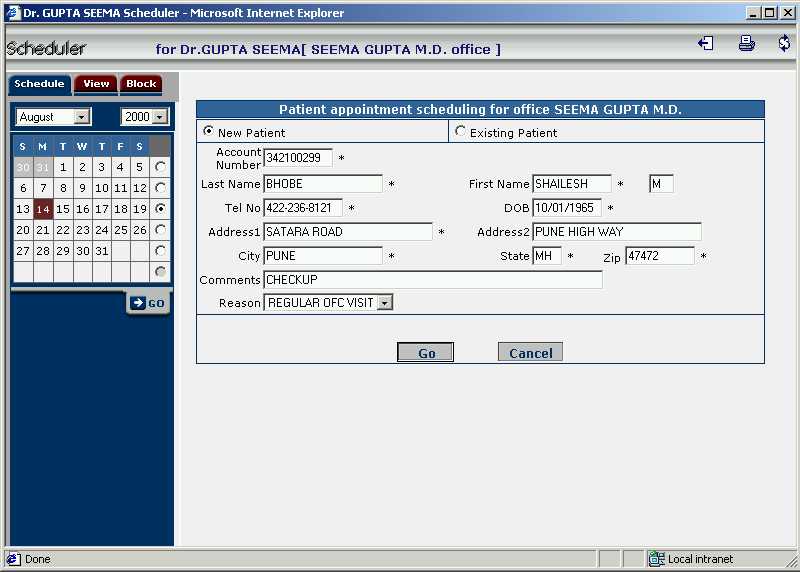
Enter the details for scheduling an appointment
for a new patient or an existing one along with the reason for scheduling and then
click on [Go]
button to set an appointment. The [Cancel] button will take back to
the Scheduler Page without scheduling an appointment.
To cancel an appointment, click on the concerned appointment (i.e. patient last name)
shown in Screen 2 above. The screen showing
the confirmed appointment will be displayed. See the screen below.
Screen 4 - Confirmed Appointment
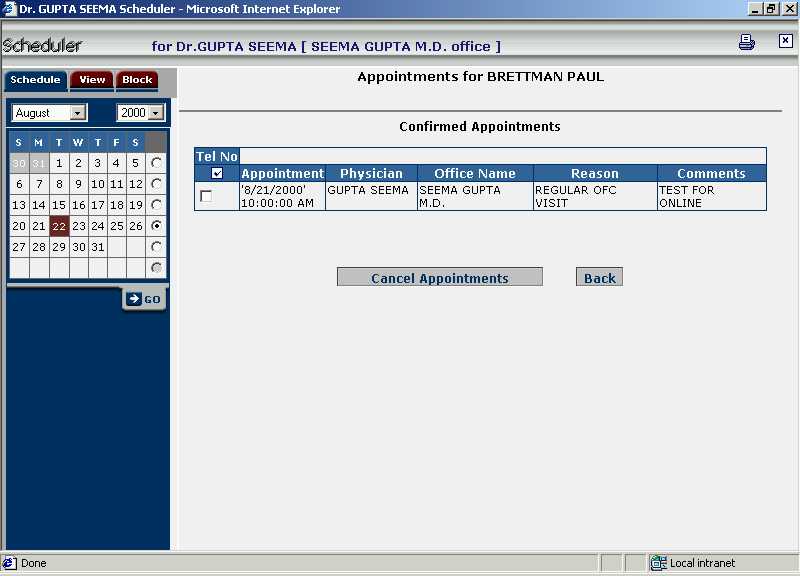
In the above screen, click the check box adjacent to the appointment and then
click on [Cancel Appointments] button. The [Back] button will take one
back to the Scheduler Page.
View
This option enables the physician to view and optionally
cancel all
the previous appointments for a particular patient. Note that all the appointments of the
concerned patient are shown here irrespective of the physician with whom it is scheduled
and irrespective of the office at which it is scheduled. On "Scheduler
Page", select "View"
tab.
Screen 5 - View Tab
Enter the any of the following search criteria to view the appointments for a particular patient
:-
- Account Number
- Last Name and First Name
- Phone Number
Now click the [Go] button to get a list
of patients for the search criteria given. See the following screen.
Screen 6 - Patients Search Result
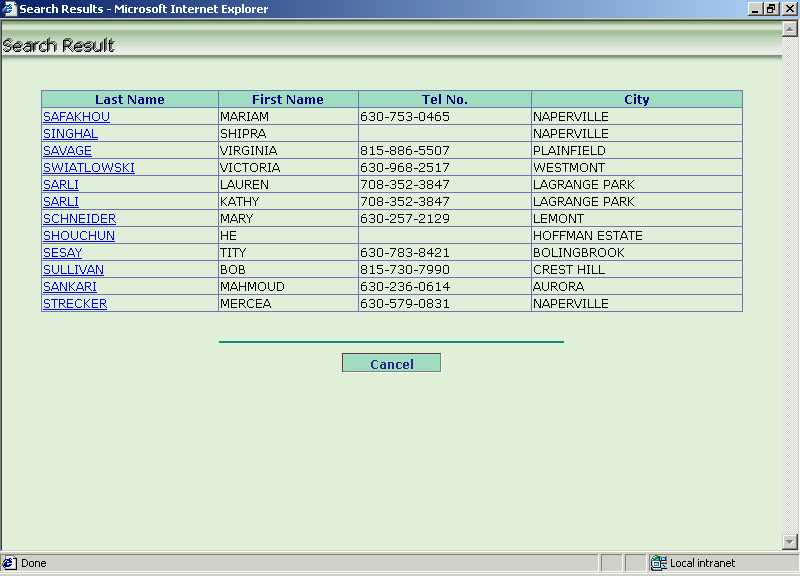
In the above screen, click on the link of [Last Name] to view the details
of the confirmed appointment. See the following screen.
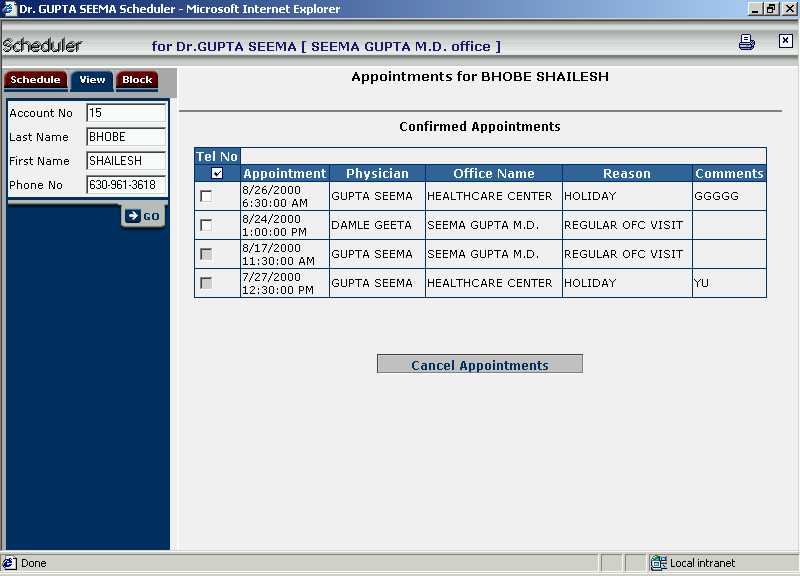
Screen 7 - Confirmed Appointment Screen

If the physician wants to cancel the appointment,
click on the [Cancel Appointments] button.
Block
Using this option, the physician can either block
or unblock a
particular period of a day or multiple days. To block a period of a
day, the physician has to give valid reason. Blocking can only be done if there
are no appointments scheduled during that period.
On "Scheduler
Page", select "Block" tab. The following screen will be
displayed.
Screen 8 - Block Tab
In the above screen, specify the following details to block /
unblock the period :-
- Reason for blocking the period. If a period
is being unblocked, it plays no role.
- Start Date,
- Start Time,
- End Date,
- End Time,
- Block / Unblock.
Click on [Go]
button to block / unblock the period specified.